Urban Family Homesteader
  • DIY Projects
  • Recipes
  • Going Solar
  • Backyard Chickens
  • Blog

Urban family homesteader

two alfredo sauce recipes from scratch

2/29/2020

0 Comments

 
Warning: Once you make alfredo sauce from scratch, it's pretty much impossible to go back to jarred alfredo sauce ever again. This is what alfredo sauce is supposed to taste like. #LifeChanging

I've got two versions that I make, depending on what I've got in the fridge. The first version "Alfredo Cream Sauce" is faster and very rich.

ALFREDO CREAM SAUCE INGREDIENTS
  • 1/4 cup (1/2 a stick) of butter
  • 2 cups heavy whipping cream
  • 1 1/2 cup  Parmesan cheese

ALFREDO CREAM SAUCE DIRECTIONS
  1. Melt the butter and whisk in most of the cream over medium heat for a few minutes until it thickens a bit.
  2. Reduce heat to medium-low, add the remaining cream and the parmesan cheese. Whisk and serve on your favorite dish!

VERSION 2  VERSION 2  VERSION 2  VERSION 2  VERSION 2  VERSION 

GARLIC ALFREDO SAUCE INGREDIENTS
  • 1/4 cup butter
  • 1/4 cup  minced onions
  • 2  tablespoons  minced garlic
  • 1/4 cup all-purpose flour
  • 4  cups half-and-half OR 2 cups of whole milk + 2 cups of heavy cream
  • 1 teaspoon ground nutmeg
  • 2 teaspoons salt
  • 1 teaspoon ground black pepper
  • 2 cups parmesan cheese, shredded

GARLIC ALFREDO SAUCE DIRECTIONS
  1. Melt the butter and add the onions & garlic until translucent, ~4 min (med-high heat).
  2. Stir in the flour to coat for a minute or two.
  3. Whisk in the half-and-half OR milk & cream, constantly stirring so it doesn't scorch until thickened 6-8 min.
  4. Remove from heat and whisk in the nutmeg, salt & pepper and parmesan cheese.
  5. Serve with your favorite dish!
0 Comments

Homemade chicken bone broth

2/28/2020

1 Comment

 
I like to make a roast chicken (it's so cheap and easy!!) and make a big batch of chicken bone broth (aka chicken stock) from the leftover skin & bones. Those times when I'm short on time and I pick up a rotisserie chicken instead, I still make sure to use the leftover skin & bones to make my bone broth. It extends your dollar so much further. Waste not, want not and all that. 

Basically every ingredient listed below is optional besides the chicken itself and the water obviously. There's really no going wrong. 

INGREDIENTS
  • 1 whole chicken (with the meat removed).
  • Vegetables roughly chopped: whatever you have on hand-- onions, carrots, celery, etc.
  • Garlic! Garlic is a must - I love garlic so I usually put in a good 2-3 tablespoons.
  • A lemon if you have one - just cut it in half and throw it in.
  • 2 teaspoons of salt and a bunch of fresh ground black pepper.
  • Fresh herbs- whatever you have in the fridge. My usual go-to's include: sage, rosemary, thyme, dill, bay leaves, oregano, etc. If you don't have fresh herbs - just put in a tablespoon of dried herbs of your choice. 
  • Water - fill your crock pot full.

DIRECTIONS
  • ​Put all the ingredients in your crock pot and than fill it with water to the very top.
  • Set the temperature to low and cook for 12 hours. 
  • When done put a large mesh strainer over a really large mixing bowl and pour the entire thing in. Discard the bones/herbs.
  • A layer of fat will solidify on top after cooling. I like to use my gravy fat separator to remove the fat, but you can easily just scoop it off with a large spoon or simply mix it back in for a richer flavor (but obviously a bit more... fat). 
  • Store them in wide-mouth mason jars (leave the lids cracked until frozen through so the glass doesn't crack) or BPA-free plastic storage containers. 
  • Freeze within 3-4 days.
1 Comment

nestle toll house original chocolate chip cookie recipe

2/28/2020

2 Comments

 
INGREDIENTS:  
  • 1 cup all-purpose flour
  • 1 1/4 cups whole wheat flour
  • 1 teaspoon baking soda
  • 1 teaspoon salt
  • 1 cup (2 sticks) butter, softened
  • 3/4 cup granulated sugar
  • 3/4 cup packed brown sugar
  • 2 teaspoon vanilla extract (make your own vanilla blog HERE)
  • 2 large eggs
  • 1 1/2 cups (3/4 of a bag) of milk chocolate chips

DIRECTIONS
  • Pre-heat oven to 375.
  • Whisk the dry ingredients together in a medium bowl and set aside: both flours, baking soda, and salt.
  • Beat the butter, sugar, and vanilla (I use the whisk attachment on the Kitchenaid mixer; but you can use a hanndheld electric mixer or stir by hand). 
  • Mix the eggs into the butter mixture, one at a time.
  • Add the dry ingredients.
  • Add the chocolate chips. You can pour in the whole bag if you want... it's just my personal preference to go a little light on them and do about 1/2 to 3/4 the bag. 
  • Bake 10 minutes until just starting to brown on the edges.
Picture
2 Comments

Pop-Over yorkshire pudding

2/20/2020

2 Comments

 
The Brits call pop-overs "Yorkshire Pudding," which I think is a bit odd, since it doesn't look/taste anything like pudding... So I'm going to go with calling these pop-overs. They're my favorite "bread" side dish at meals and totally up your game so guests will think you're fancy. They'd never guess how easy they are to make!
​INGREDIENTS
  • 2 cups all-purpose flour
  • 1 teaspoon salt
  • 4 large eggs
  • 3 cups milk (divided 1 1/2 cups in two bowls)
  • A few tablespoons of butter, bacon fat, or pan drippings- melted
  • Optional: Grated Parmesan cheese, Italian herb or garlic salt (topping)

DIRECTIONS:
  1. Whisk flour, eggs, 1 1/2 cups milk, salt and pepper in a medium bowl. Set aside.
  2. Let stand for 30 minutes.
  3. Preheat oven to 400 degrees. 
  4. Whisk remaining 1 1/2 cups milk into batter (it'll be the consistency of heavy cream).
  5. Pour 1 teaspoon of butter, bacon grease or pan drippings into each cupcake tin. 
  6. Place cupcake tin(s) in oven for 2 minutes - don't skip this step (it helps the pop overs rise up the hot sides and conveniently melts your butter/lard)!
  7. Fill each cupcake tin with batter about 1/3-1/2 way. 
  8. Optional: Sprinkle the tops with choice of salt and maybe some parmesan or herbs.
  9. Bake ~30 minutes until puffy and golden brown.
2 Comments

Marinara sauce for spaghetti, pizza, and the like

2/20/2020

1 Comment

 
I make a big batch of marinara sauce and can use it in 1-3 recipes that week (lasagna, spaghetti, pizza, etc).

INGREDIENTS
  • ~1 Tablespoon of olive oil
  • Green, red, or yellow pepper- chopped optional (only if you've got 'em on hand)
  • 6 cloves of garlic, minced
  • 1 onion, chopped
  • 2 Large cans of organic peeled tomatoes (or 2 lbs of fresh tomatoes)
  • 2 cups of water
  • ~1/4 cup organic maple syrup (more or less to taste)
  • Optional: 1 lb of Italian pork sausage or ground beef
  • Salt & pepper
  • A large bunch of basil

DIRECTIONS:
  1. In a large stockpot, add ~1 tablespoon of olive oil and saute the onion, garlic, and peppers (if using) in some olive oil for 4-6 minutes, med-high heat.
  2. Add the tomatoes and water and bring to a low boil; simmer for 45-60 minutes until it's at your desired consistency. ​
  3. Add the maple syrup in the last ~10 minutes.
  4. If you're making it a meat sauce, cook the ground meat separately in a little olive oil until no longer pink for ~8 minutes and add to the sauce at the end. 
  5. You should have ~6 cups of the world's very very best marinara sauce.
1 Comment

Mini-pizzas in cupcake tin

2/20/2020

0 Comments

 
This is a family-favorite dish that the kids love to help with the making of. I usually buy pizza dough from trader joe's and make this an easy dinner night. 

INGREDIENTS
  • Olive oil spray, for muffin pan
  • Flour, for rolling
  • 1/2 pound pizza dough, in ~12 pieces
  • Pizza Sauce - I make my own (see recipe here)
  • Garlic salt
  • Shredded mozzarella  (I usually also add different cheeses I have in my fridge at the time--cheddar, blue cheese, parmesan, etc.)
  • Choice of toppings, pepperoni, pineapple & ham, veggies, etc.


DIRECTIONS
  1. Preheat oven to 450 degrees.
  2. Spray your muffin tin cups with olive oil spray.
  3. On a lightly floured work surface, roll out the dough so it's ~1" thick and cut it out into a round shape.
  4. Fill each cup with 1 round, gently pressing dough into bottom and sides of cup.
  5. Season with garlic salt
  6. Spoon each dough cup with 1 tablespoon of pizza sauce
  7. Sprinkle on cheese (about 1-2 Tablespoons) and desired toppings
  8. Bake until dough is cooked through, ~12 minutes.
  9. Let cool 2 minutes before removing from cups & serve.
0 Comments

Horseradish steak sauce

2/20/2020

1 Comment


My husband isn't a big fan of horseradish, so I leave it out of his half of this dish. I on the other hand adore it and this is my favorite sauce to pair with any red meat dish. It's incredibly simple -- enjoy!!

INGREDIENTS
  • 8 Tablespoons of butter, melted
  • 1 Tablespoon of minced onion or shallot (whatever you've got in the pantry)
  • 3 chives, finely chopped
  • 3 garlic cloves, minced
  • 3 Tablespoons of horseradish, peeled and grated
  • Pinch cayenne pepper
  • Salt & Pepper to taste

RECIPE
  • Stir all ingredients together
  • Immersion blend them for a smoother consistency (or put in blender) - optional
  • Serve it with your choice of beef dish; half cooled
1 Comment

hummus so good, you'll never buy store bought again

2/12/2020

0 Comments

 
INGREDIENTS
  • 1 (15-ounce) can chickpeas, or 2 cups drained, cooked chickpeas
  • 1/4 cup to 1/2 cup of liquid from chickpeas can
  • 3 tablespoons extra-virgin olive oil
  • 3 tablespoons tahini
  • 1 1/2 tablespoons lemon juice (from 1/2 lemon)
  • 1 garlic clove, minced
  • 1 1/2 teaspoon salt
  • 1/2 teaspoon black pepper
  • Optional additions: 3/4 cup of chopped olives, 1/4 cup of chopped preserved lemons, or 1/2 cup of toasted walnuts, almonds, or pine nuts.
​
INSTRUCTIONS
  1. Drain & rinse the chickpeas into a strainer, keeping the liquid from the can in a bowl, set aside.
  2. ​If time allows, pinch the skins from each of the chickpeas to make the hummus smoother.
  3. Combine the chickpeas, olive oil, tahini, lemon juice, garlic, salt, and pepper in a food processor or blender and blend until smooth, at least 5 minutes. 
  4. ​Add 1/4 cup to 1/2 cup of the liquid you set aside from the chickpeas can--to taste. I like mine really creamy, so I do about 1/2 cup myself.
  5. That's it! Serve with naan bread, tortillas, pita chips or my fave- raw vegetables like cucumbers, bell peppers, sweet peppers, carrots, etc.

0 Comments

Leasing solar panels vs. buying

2/6/2020

1 Comment

 
We leased our solar panels through solar city (now owned by Tesla). They guaranteed that the panels would generate a minimum of 10,901 kWh per year. If it does not produce that amount, Tesla refunded the difference. Our system saved us an average of $25 a month and we  received a reimbursement check of $75 at the end of the year.

Here's a snapshot of our panel's performance the last 5 months we were in the house (we recently sold the house and moved). 
Picture
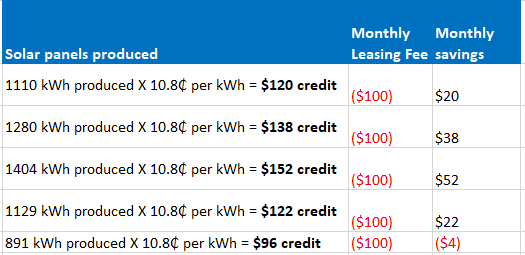
So- the savings didn't turn out to be the 30-40% that the salesperson promised, it was more like 6%. So make the decision to lease your solar panels knowing that your money savings aren't going to be huge. Obviously, your savings could be higher or lower, depending on the number of panels, your usage, or the direction of the panels relative to the sun, etc. 

We were a bit disappointed in the low cost savings of course, but our primary motivation was to lower our carbon footprint by replacing utility power with clean electricity from solar panels! 

Now, there's one more "CON" to leasing solar panels that we didn't take seriously enough when signing the contract. It was a 20 year contract at a variable kWh rate. It made selling our home much trickier. Tesla doesn't service solar builds in our new city, so we couldn't take the panels with us. To get out of the contract, whoever bought our house had to assume the remaining 17 years on our solar panel lease:
  • This limited the pool of potential buyers quite a lot in our opinion. On the West Coast, it could be a positive selling point, but in Texas people saw it as a liability.
  • When we did get an offer on our home, the whole deal almost fell apart because of it and we had to pay an extra $4,000 to lock in the cost per kWh at it's current rate (the 20 year contract has a variable kWh rate).  

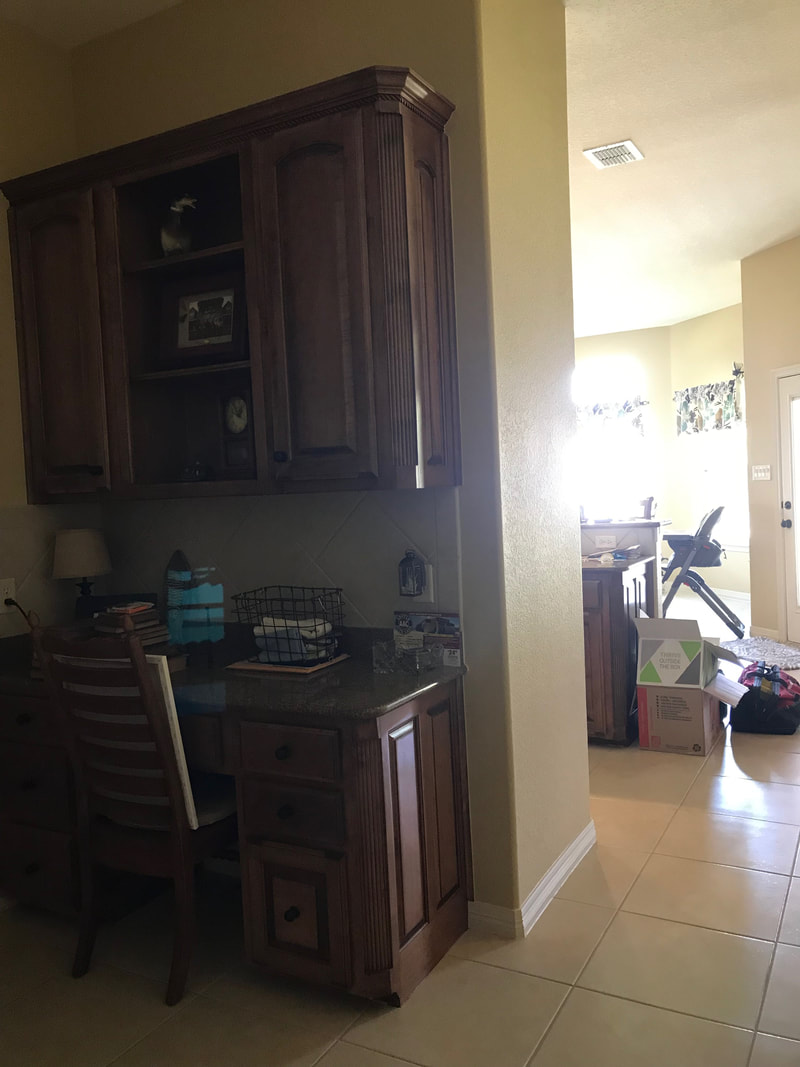
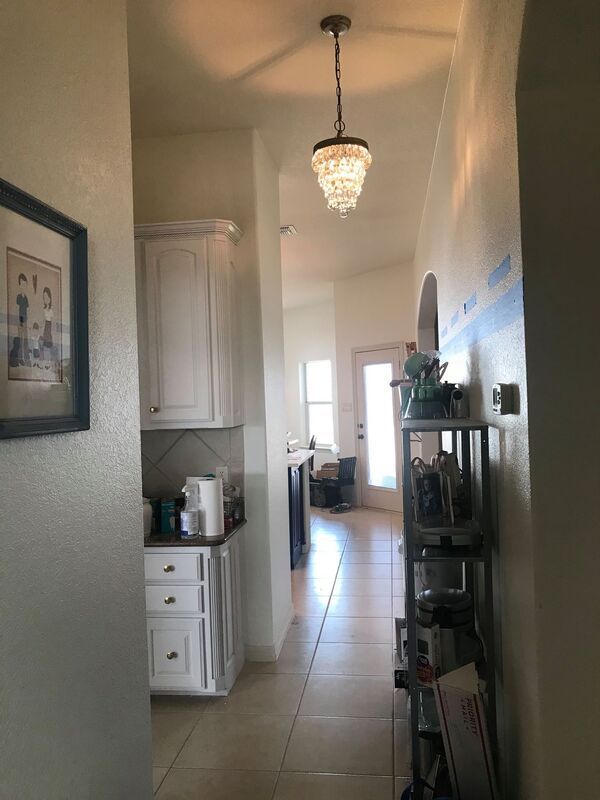
In summary, buying your solar panels is the only way I'd go solar again. You get to pocket all the savings from the kWh your panels generate and you can take them down/bring them with you wherever you go, or if you leave them behind- they're an asset and viewed as a bonus to potential buyers. 
1 Comment

entryway update

2/3/2020

1 Comment

 
When you enter our new house from the garage, you're faced the laundry room to your left, cabinets and countertop in front, and to your right a large white blank wall. It was very utilitarian and uninspiring. I'm right-brained and my visual surroundings tend to have a strong influence on my mood/emotions- so this really bothered me and just wasn't going to work. 

First, as part of the kitchen renovation, I had the contractors paint these cabinets in Benjamin Moore Chantilly Lace OC-65, the same white as the kitchen cabinets. I like to keep the shades of colors in my house to only a few. I also changed out the light with a Pottery Barn Clarissa chandelier in small (to match the same, but larger chandeliers in the kitchen). 
Picture
Picture
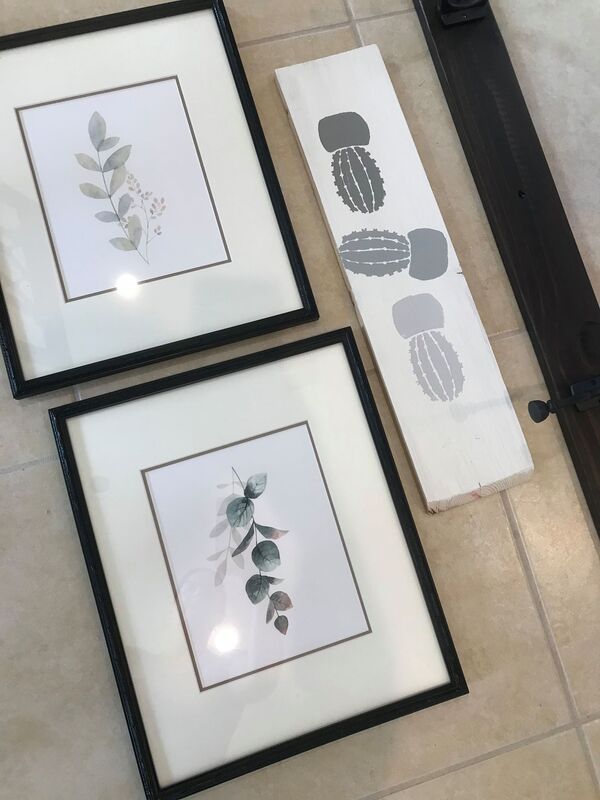
I took several steps to update this big blank wall. I laid out where I'd like to put some artwork and a coat hook board that runs the length of the wall.  
Picture
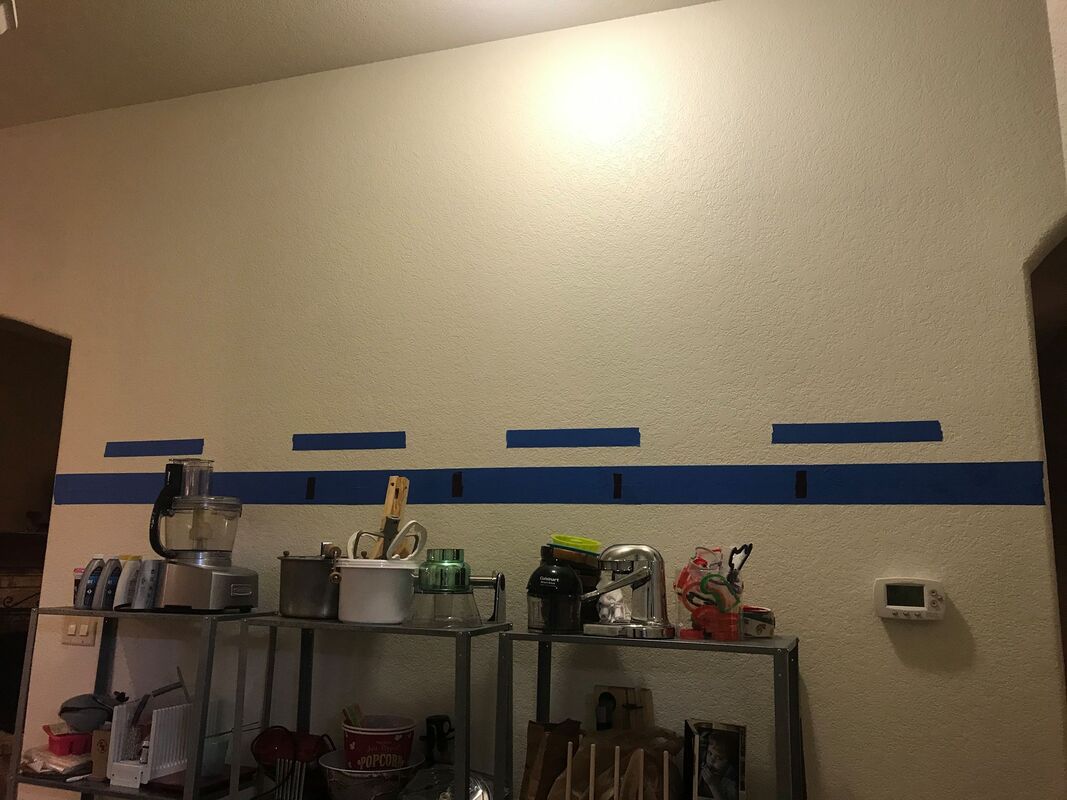
I bought a large length of 2x4" and Restoration hardware Duluth hooks to match the hardware in the Kitchen, but in oil rubbed bronze. Then I took four picture frames that we already had, but they were white. So spray painted them, bought new mattes from Hobby Lobby and some botanical prints from Amazon. 
Picture
Picture
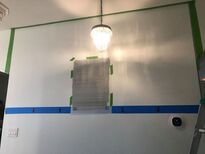
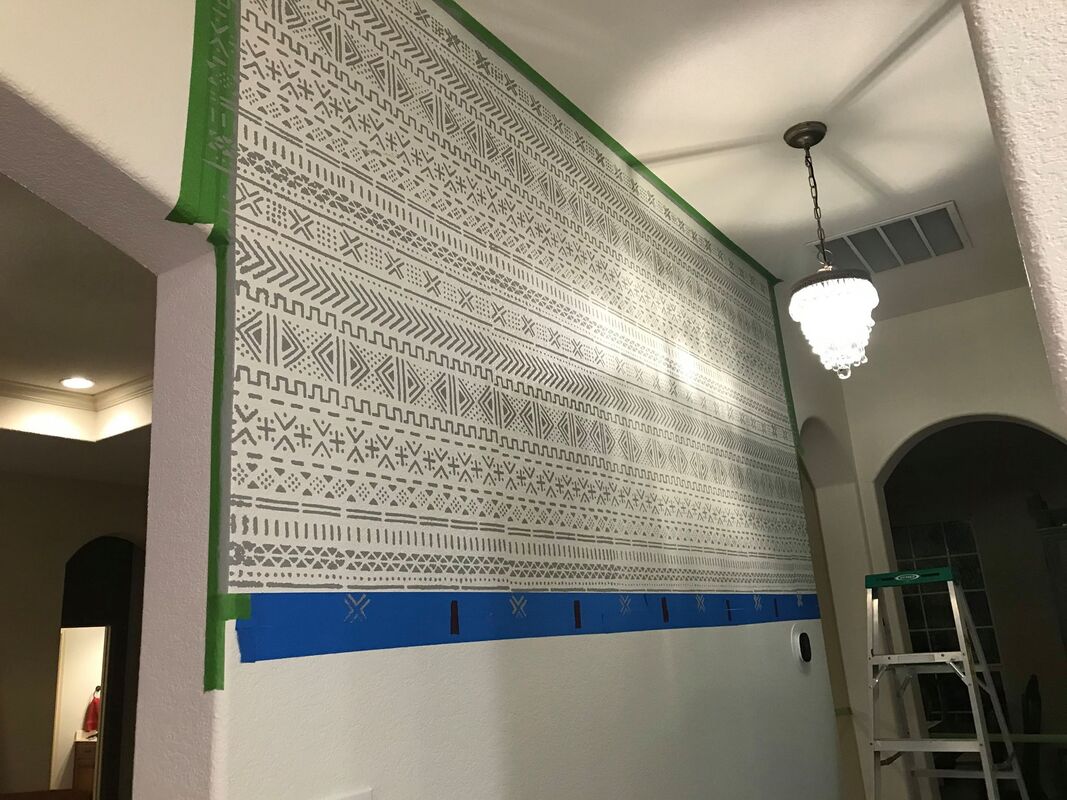
Then I picked out a stencil that I wanted to put on the top half of the wall. I chose an African Mudcloth wall stencil from CuttingEdge Stencil--the same place I bought the stencil pattern for my fireplace & patio floor tile stencil project and also for my laundry room accent wall project (in my last house). I bought a gray paint to match the gray in the kitchen counters to coordinate the spaces and got to work stenciling!
Picture
Picture
Picture
Then I screwed the wood coat rack to the wall (using a stud locator, be sure to drill into studs) and hung the pictures. Then I styled it by adding a cute hanging basket of faux lavender, a Persian rug that I've had forever (I bought it in Bahrain when I was in the Navy), hung some family pictures, and added a bench that I had laying around. It used to be at our kitchen table for years until we switched it out for new chairs (see the reupholster blog about those HERE). And voila- my one-day project was completed and my entryway looks a million times better!
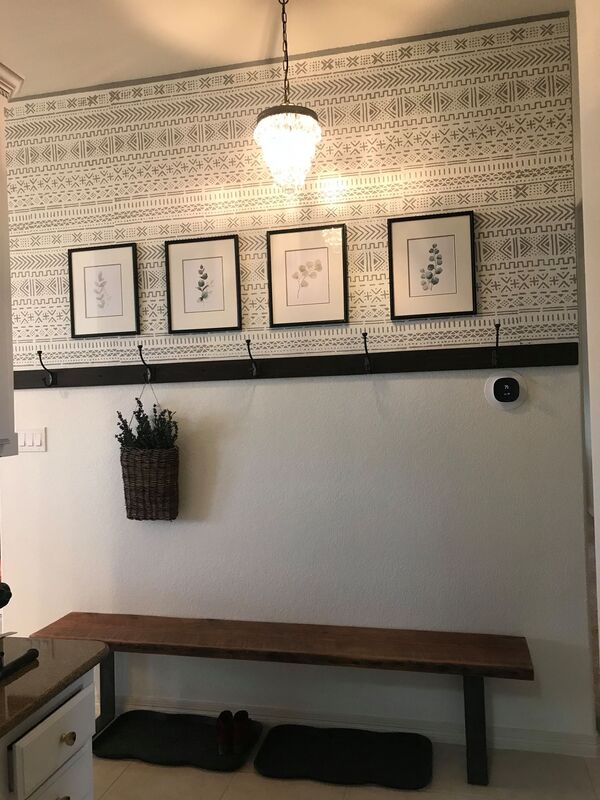
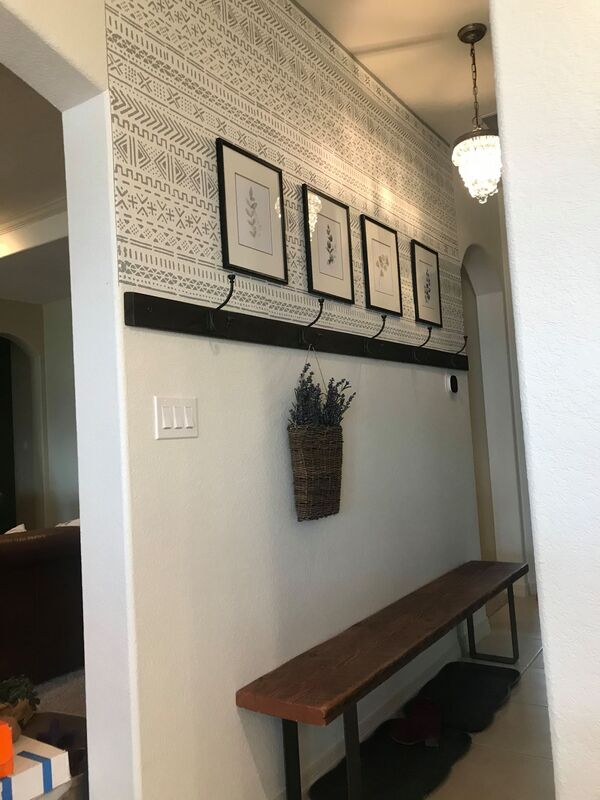
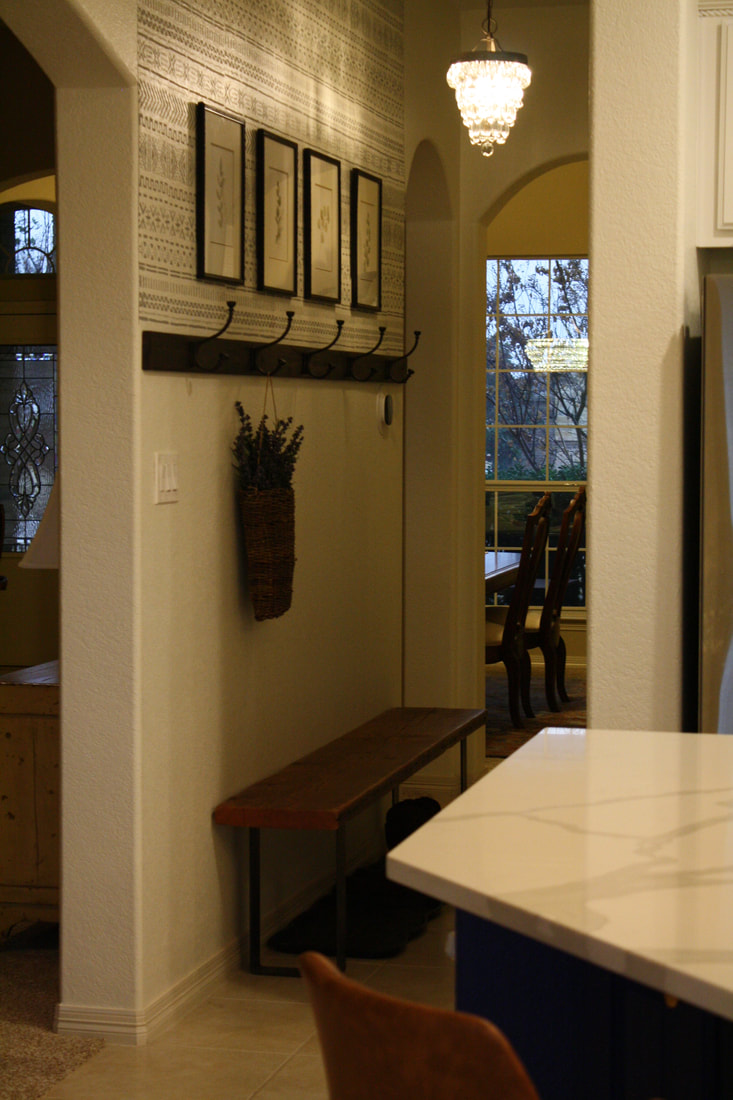
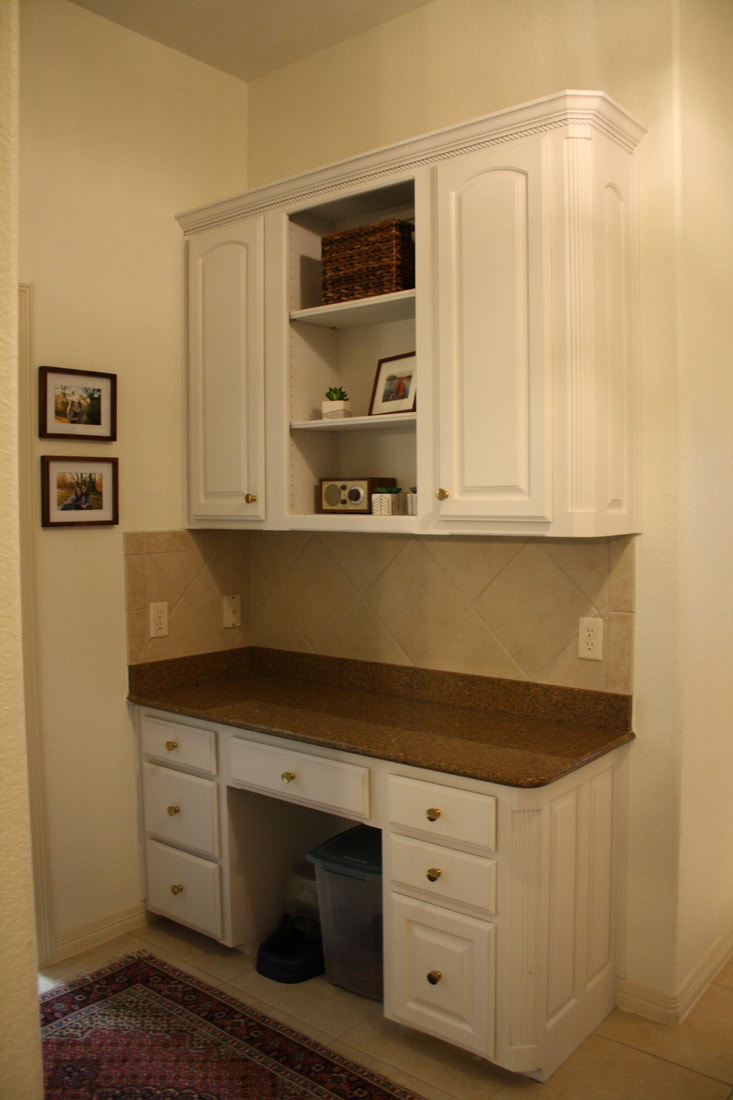
Picture
Picture
Picture
Picture
1 Comment
<<Previous

    Homesteaders

    Cooking & home projects galore! My secret inner-designer revealed.

    Categories

    All
    Backyard Chickens
    Blog
    Christmas
    DIY Projects
    Going Solar
    Halloween
    Holidays
    Ikea Hack
    Recipes
    Thanksgiving

    Archives

    August 2020
    May 2020
    April 2020
    March 2020
    February 2020
    January 2020
    December 2019
    November 2019
    October 2019
    September 2019
    August 2019
    July 2019
    June 2019
    May 2019
    April 2019
    March 2019
    February 2019
    January 2019
    December 2018
    November 2018
    October 2018
    September 2018
    August 2018
    July 2018
    June 2018
    May 2018
    April 2018
    March 2018
    February 2018
    December 2017
    November 2017
    October 2017
    September 2017
    August 2017
    July 2017
    April 2017
    December 2016
    October 2016
    September 2016
    August 2016

Powered by Create your own unique website with customizable templates.
  • DIY Projects
  • Recipes
  • Going Solar
  • Backyard Chickens
  • Blog