|
In 1862, Louis Pasteur discovered that he could destroy bacteria and the microbes responsible for souring alcohol and milk by boiling and then cooling the liquid, This process became known as pasteurization. Fast forward a few years to the second industrial revolution in the U.S. (1870-1914). New farming machinery had enabled large scale farming operations which distanced the connection farmers had with their land and animals (remember Grapes of Wrath?). It was the beginning of poor cows being forced to live in over-crowded, inhumane, and unsanitary commercial-scale dairy "farms." There was also no regulated oversight or sanitary standards for the dairy process from milking, packaging, or transportation. This led to unhealthy cows, unsanitary handling of dairy products, and inevitably to outbreaks of milk-borne diseases such as scarlet fever, typhoid fever, and diptheria. This is when Raw Milk, which humans had been drinking for thousands of years, got a bum-rap. Our well-meaning federal government stepped in to protect the people from "dangerous" raw milk and began regulating the supply of dairy products and requiring that milk be pasteurized. As best they knew at the time, pasteurization was the perfect solution. As Louis Pasteur had discovered, the process killed off all the bad bacteria that was making people sick. Their jobs were done- drop the mic! But then again... What do they say about good intentions...? What they didn't know was that when milk is heated past 150 degrees the nutritional value is negatively impacted. It damages the milk's vitamins, minerals and healthy enzymes (probiotics) that are good for our guts and helps our bodies digest the milk. This is what leads to lactose intolerance and inflammatory bowel disease! Here's a great infographic that illustrates the negative affects of pasteurization on Milk perfectly.* 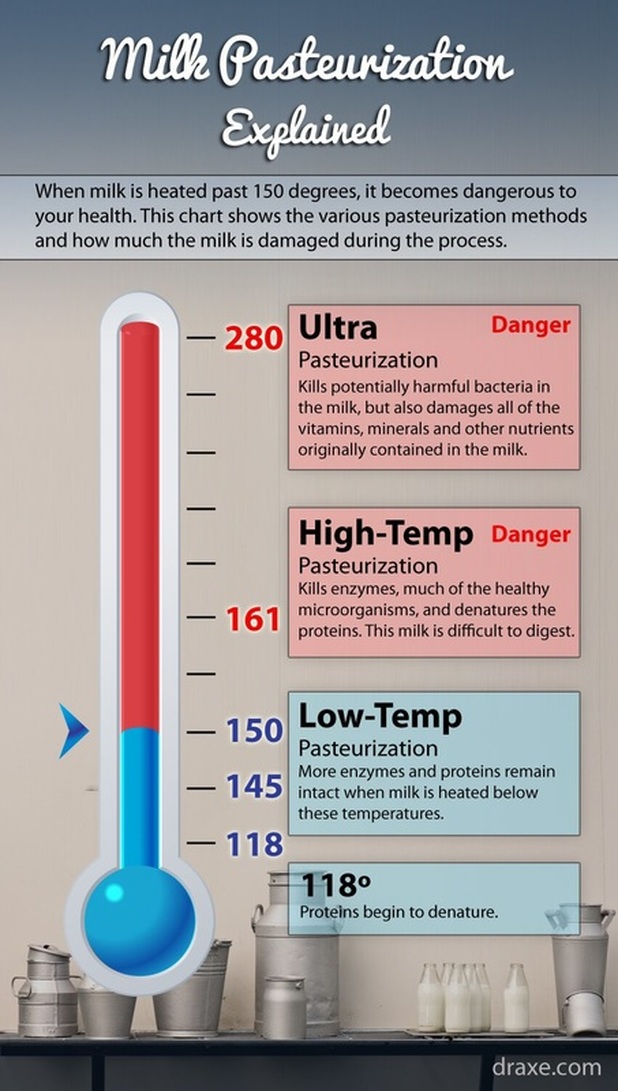 What you want to do is buy Organic Raw Milk or Organic Low-Temp Pasteurized Milk. Raw milk has all the enzymes and nutrients still intact that support digestion and absorption. Depending on your state laws (see map below) you should be able to get Organic Raw Milk from a local dairy farm. In my area we have Lucky Layla Farms. Or you can at least find Organic Low-Temp Pasteurized Milk at you local Whole Foods. I'll end with this note about organic milk - it comes from cows that have access to the outdoors and are fed 100% organic feed. This ensures residue from pesticides, fungicides, or herbicides don't transfer into their milk. Also, they are not given antibiotics, added growth hormones., or GMO's (genetically modified organisms). You don't want any of that getting into your family's bodies. I know it costs a lot, but I value the health of my family above anything else and am willing to cut corners in other places to continue our organic shopping practices. So you want milk that is both Organic AND Raw/Low-Temp Pasteurized. Just one or the other defeats the purpose of intentional healthy living.  Pasteurization, Homogenization and Raw Milk Resources
Blog Sources:
0 Comments
I signed up to host my daughter's first class social last week and had to come up with an idea for something for 10 kids to do... I was chatting with some co-workers about it, looking for ideas, and one particularly clever woman suggested Halloween sugar cookie decorating. What a perfect idea! Even though, normally I'm not the biggest fan of feeding kids sugary treats - but the cooking/decorating part was so fun it over-ruled my angst about that. I tell myself that the organic/whole grain version makes it slightly nutritious at least. The kids had a fantastic time! Here's my recipe (adapted from my fave woman Martha Stewart!): Sugar Cookie Recipe:
Lemon Icing Recipe:
Directions: Preheat oven to 325 degrees. Mix the dry ingredients together. In a separate bowl mix the wet ingredients and then combine both bowls. Sprinkle flour on the counter, roll the dough out. Using Halloween cookie cutters let the kids cut out the cookies. Bake for 12-16 min (until edges are brown). Let cool completely before icing. For the icing you just whisk the confectioners sugar with the milk until it's smooth. Add any spooky colors like orange and black (I use all-natural, vegan, non-GMO food coloring). Spread over cookies with a small spoon and add any of the sprinkles/decorations if you chose to. Icing will harden in ~20 min. 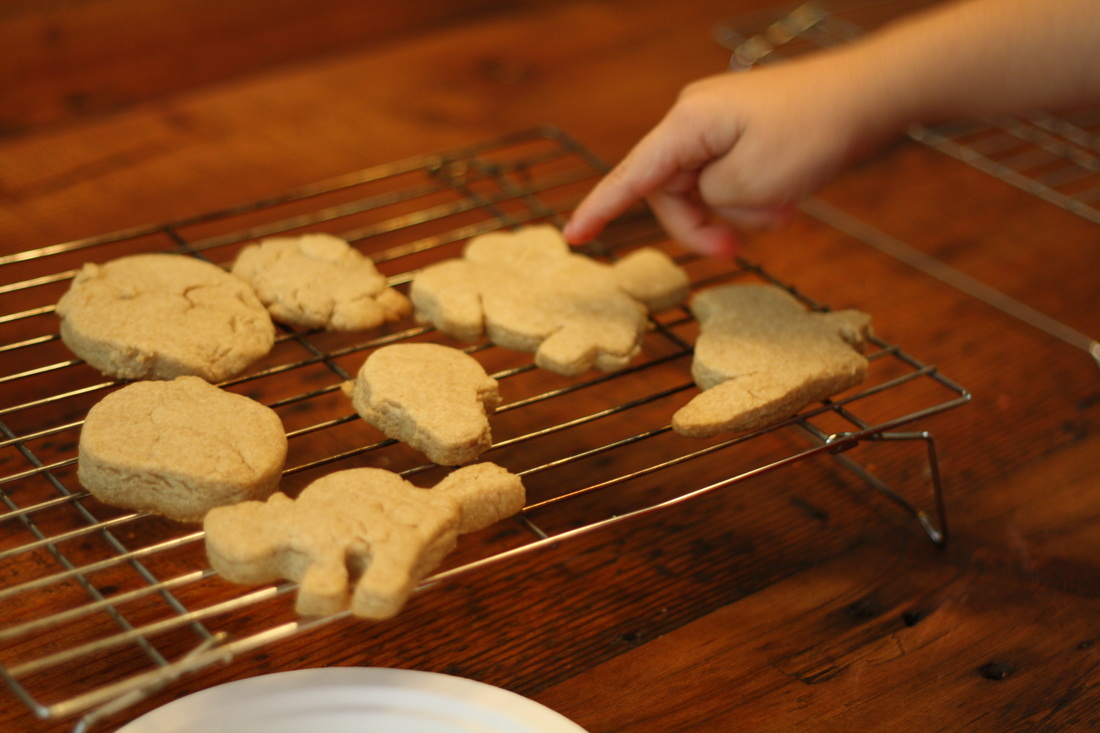 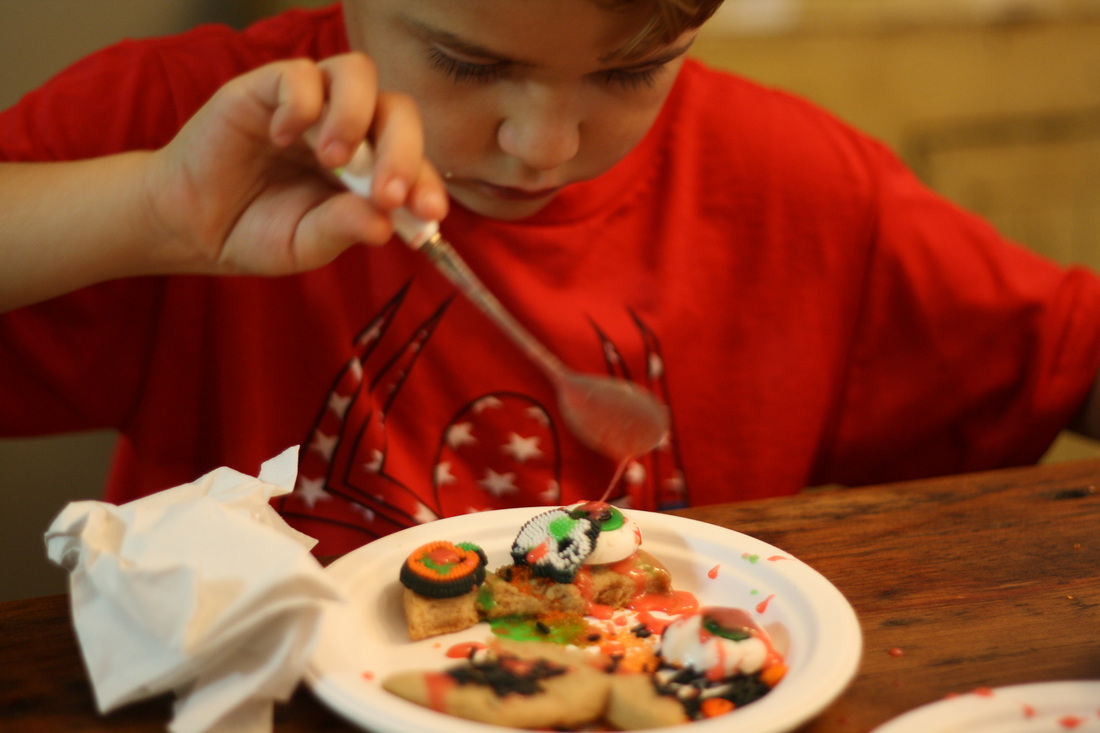 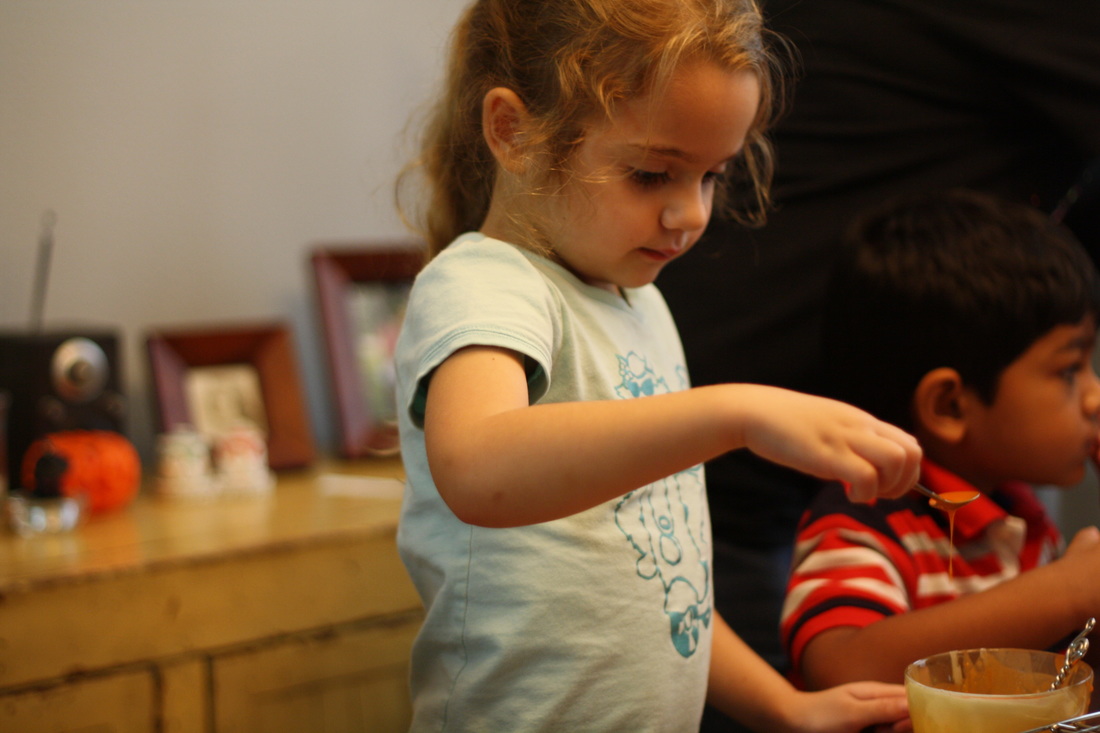 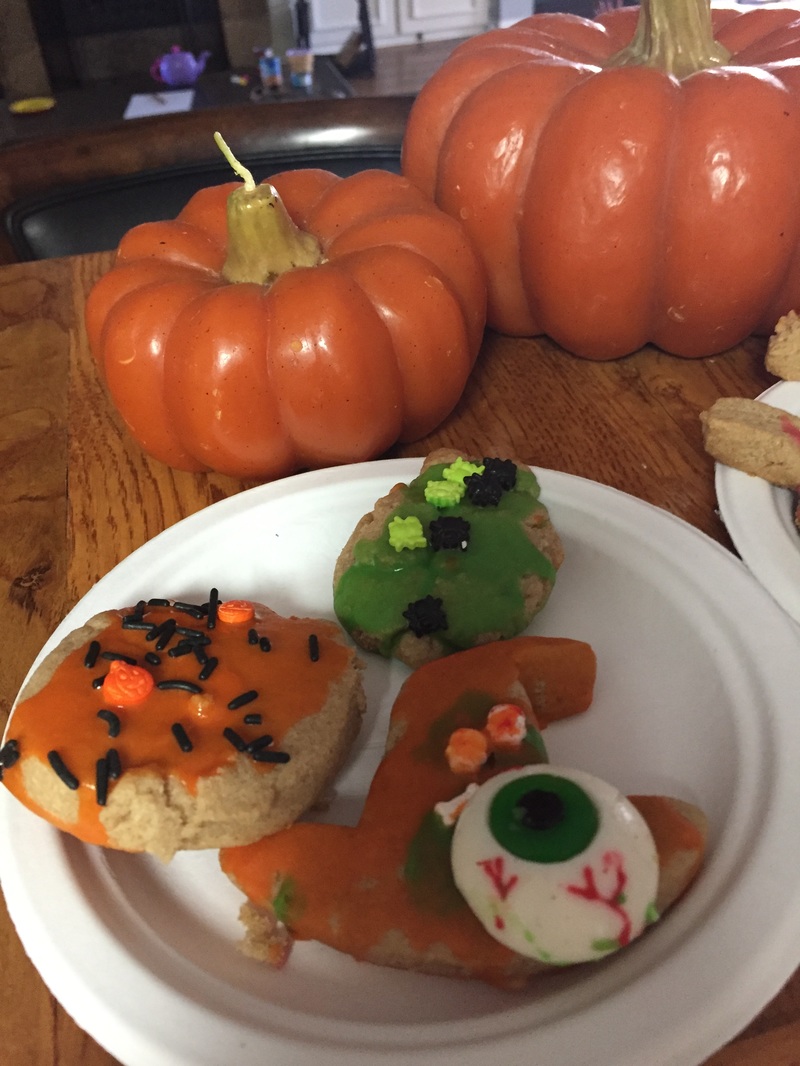 Products used in this project:
*Disclosure: This post contains affiliate links, meaning that I get a commission if you decide to make a purchase through my links, at no cost to you. Making your own sausage is actually a pretty easy to do. Get yourself the meat grinder attachment for your KitchenAid Mixer. If you don't have a KitchenAid Mixer... go out and get that too! You deserve it.
On your way home, stop by the grocery store and pick up the following ingredients. Homemade Italian Sausage Ingredients (using essential oils):
Directions: It's pretty simple really. You combine all the above ingredients and mix the herbs in thoroughly. One thing I'd note is doing get too diligent about cutting the fat out of the pork. I spent forever cutting all the fat out and then the sausage was a bit too dry. A little fat is a good thing. Products in this post: *Disclosure: This post contains affiliate links, meaning that I get a commission if you decide to make a purchase through my links, at no cost to you.
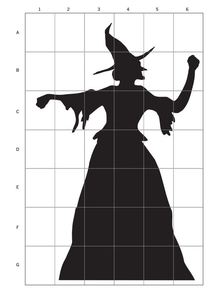
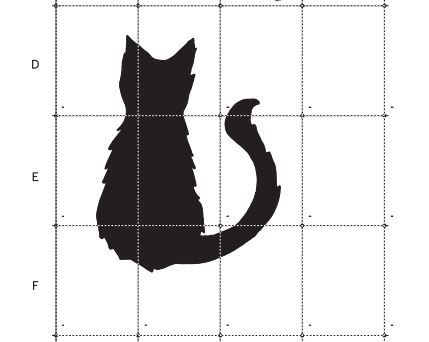
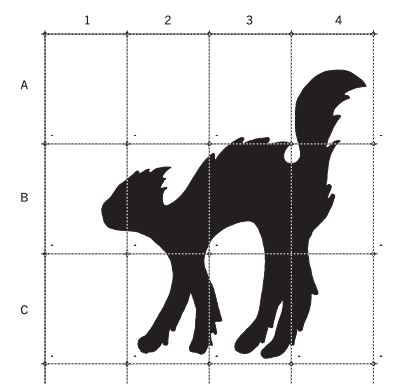
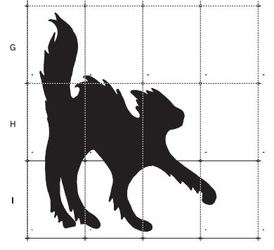
My husband and I made Martha Stewart's Witch and Cat silhouette lawn ornaments about eight or nine years ago. We put them out every year and we still love them! They're popular in the neighborhood and just make me happy. I highly recommend this project if you've got one weekend day to dedicate to it.. It's an easy one for beginners. I'm going to share how to get this done right quick: 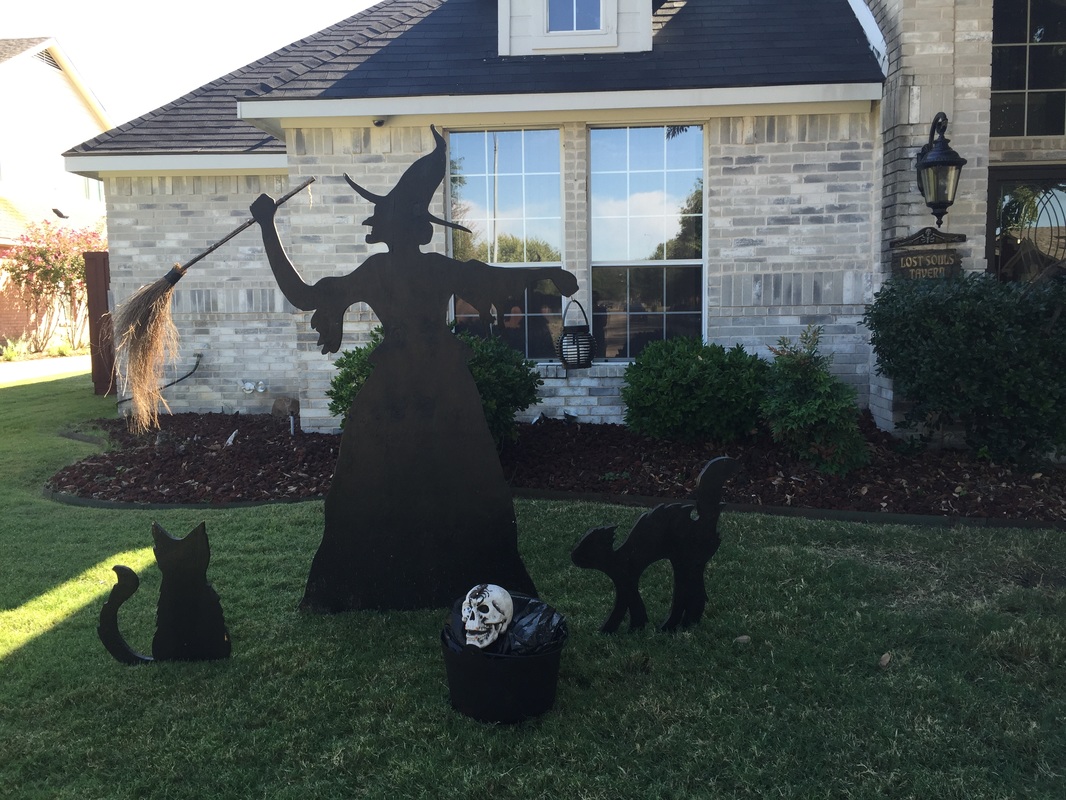 Products used in this project: *Disclosure: This post contains affiliate links, meaning that I get a commission if you decide to make a purchase through my links, at no cost to you.
2. Now use the spray adhesive to adhere the whole which onto the plywood. Do the same for the cats. Use your jigsaw to cut out the design. When you're done you peel off the templates. We sanded the edges slightly and then painted them all black. Let them dry for about an hour. 3. Now you attach the conduit to the back of the witch and each cat using the conduit straps - 3 for the witch and 2 for each cat. We cut the witch's conduit 6' long and 3' long for the cats using a saw. 4. Don't forget to screw the cup hook into the witches' left hand so she can hold her lantern. Screw one more conduit strap on the back of the witches' right hand for the broom to slide into.
And you're done!! It's time to put them out on your lawn. You just hammer them in using a rubber mallet. Slide the witches broom through the conduit piece on the back of her hand and hang the lantern from the cup hook. I highly recommend a solar lantern, because then you're guaranteed that it will go on every night. I tried candles - which blew out within seconds of course (and probably broke fire laws) and led battery tea lights that you have to remember to turn off/on. Which obviously you don't ever remember. So solar is definitely the way to go! Place a cauldron at the witches feet for the full affect. Back light the witch and her cats using a yard stake-flood light like this one. You'll be the hit of the entire neighborhood. I highly recommend this project! |