|
I had a real life epiphany today. I've always loved the holidays. Christmas and Halloween are tied for my favorites. It was only today that I realized why it is that I love Halloween so much! Because I'm from Maine! And in Maine we like old things. Scary things. Haunted things. Our state treasure is Stephen King. You can see a flash of my hometown in Pet Sematary as the trucker who hits the boy in the beginning is driving along. Pretty much everyone I know back home will swear they've seen a ghost (myself included). We were often doing creepy teenage things like seances in cemeteries and communing with spirits through the Ouija board. Our homes, and churches, and graveyards date back to the 1700's. I came across this article from a friend's facebook post today that my hometown in Maine (Bucksport) is officially "the most haunted town in Maine." and I'm pretty sure that Maine is the most haunted state in the U.S. The tomb of our town's founder is cursed by the witch that he burned at the stake (that graveyard is... maybe 6 houses down from my mom's house). Ghost Hunters have done several shows there (and found it haunted of course) and at Fort Knox across the river. It's all a lot of fun. The crisp fall air, piles of leaves, dressing up and trick o'treating. It's just pure FUN. Just watch Hocus Pocus and you get an idea of the joy that is a New England Halloween. So I try to bring a little bit of Maine to every place I've lived. If I had unlimited time and funds my whole house would be a walk through horror fun house. Each year we do a little more- this is last year: 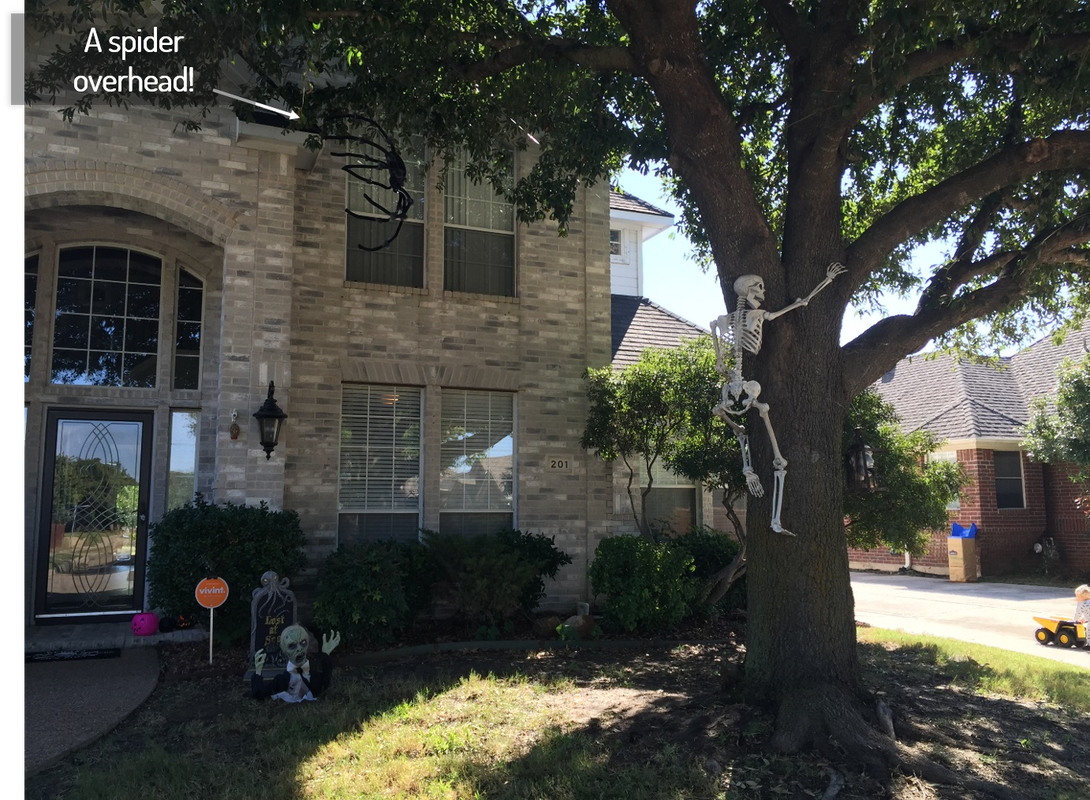 We hung the skeleton using fishing wire. A spider hangs above by fishing line as well.   I've always got to add a nautical theme. Eventually I'd like a whole graveyard with wrought iron fencing... I'll likely work on that this month!  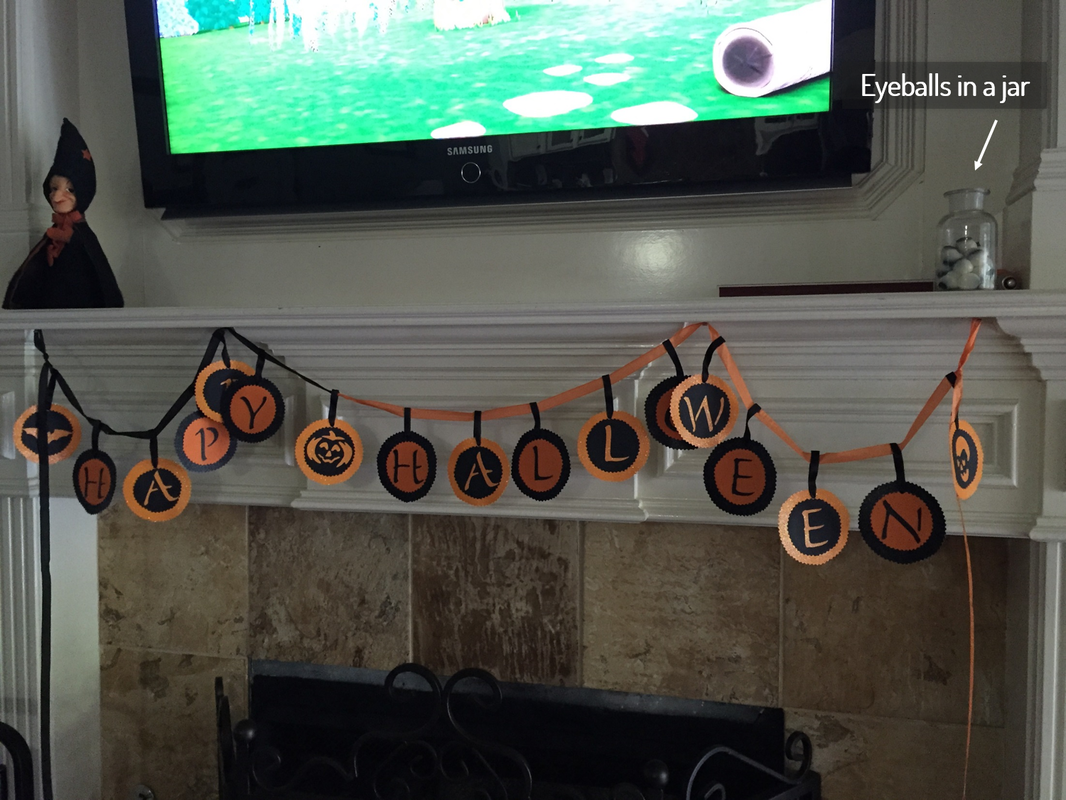    I dress up every year- because it's fun! Last year I was Maleficent and the kids were Hiccup and Astrid from How to Train your Dragon. Anyway, come back soon for a tutorial on how me made the Martha Stewart inspired large witch plywood cutout with her two cats. I'll also share the holograph how too. There are so many fun things you can do! Here's a share of my favorite scary front yards. Enjoy!
0 Comments
I was born and raised in a small town in Maine. My family's lived in New England since the mid-1700's. I would've been the 4th generation to work at the town paper mill if I hadn't up and joined the Navy right out of high school. I was still just 17 when I shipped off for a life of travel and adventure. A whirlwind of foreign lands, new cultures, and lots of hard work sped by as I served my six years. All the while, I'd occasionally feel the pang of homesickness. One of my remedies to assauge those feelings? My Grammy's Whoopie Pies!!! Now, you might not know what whoopie pies are if you're not from Maine. They're our official state treat.. and that's an understatement. They're at the register of every gas station, five and dime, or grocery store in the whole darn state.  Over the years I've made a few modifications. I don't use Crisco as a rule (the main ingredient being partially hydrogenated vegetable oil is listed as a food additive to avoid by the center for Science. in the Public Interest). I've added whole wheat. Anyway, I'll stop gassing on and give you the recipe already! WHOOPIE PIE CAKES RECIPE - 2 cups Organic Whole Wheat White Flour (I use King Arthur's) - 1 1/2 cup Organic Whole Wheat Flour - I prefer to mill my own from a soft white wheat grain like spelt) - 1 tsp Himalayan pink salt. I use Himalayan pink salt because it's loaded with tons of essential minerals. It hasn't been refined and processed like white table salt that's so common in America and completely lacking in any health benefits. - 1 1/2 cups of unsweetened organic cocoa powder. Choose a brand like Frontier that is Fair Trade and organic because most commercial cocoa powders contain high quantities of Cadmium, a metal linked to kidney damage and bone softening. - 1 cup (2 sticks) of organic butter at room temp - 2 cups organic sugar - 2 large organic, cage free eggs NOTE: you can tell how "free" the chickens were by the variations in the eggs. If they range in size, color, and markings that is proof that the chickens diets varied from each other depending on what they ate out in the yard. If they're raised in a factory farm you get eggs that are all exactly the same because there's no natural variation in diet/exercise. - 2 cups organic buttermilk. Buttermilk's pretty pricey and I never seem to have it on hand. So I just make it. Combine 1 cup of milk with 1 Tbl vinegar or lemon juice (double that for this recipe obviously) and let it sit 5 minutes. Voila - buttermilk. - 2 Tsp organic vanilla (see blog post to make your own organic homemade vanilla HERE) WHOOPIE PIE FILLING RECIPE - 1 cup (2 sticks) of organic butter at room temp - 2 cups confectioners powder sugar - 7 1/2 oz. jar Fluff (there's nothing organic/healthy about this particular ingredient - but it's so delicious I make a personal exception) - 2 Tsp organic vanilla (see blog post to make your own organic homemade vanilla HERE) DIRECTIONS
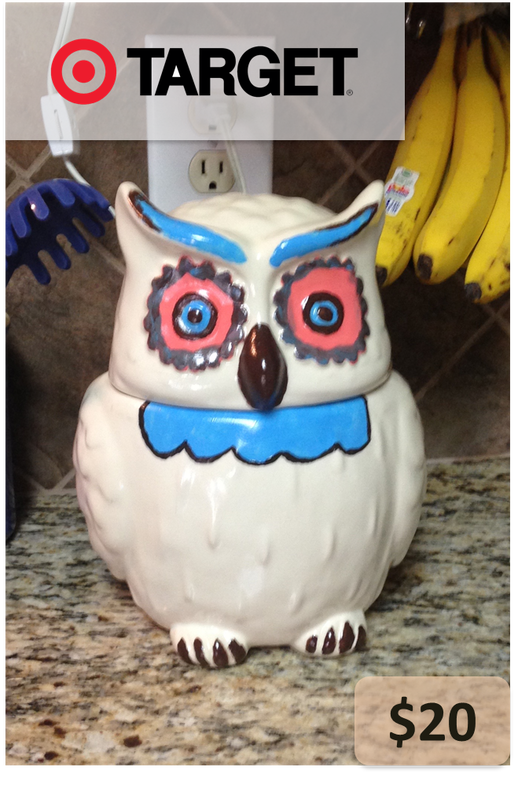
I had my eye on Anthropologie's "A Real Hoot Canister" cookie jar for ages. It was so darn adorable. But who buys a cookie jar that's $68? I mean, they're basically ornamental right? No. No they're not. Let me tell you about this. The most fascinating, riveting, enchanting tale you'll ever hear. So I was in Target one day, A delightful 1 hour staycation escape from the demands of urban working motherhood. All of a sudden I came across an adorable (cheap at $20) all-white owl cookie jar that was remarkably similar to the Anthropologie cookie jar I'd been coveting for months.  I can be a little crafty. Not a lot. But I figured I had the medicore amount of artistic talent that would be required to transform that boring white cookie jar into a look-alike Anthropologie Real Hoot Canister. So I hit up the Hobby Lobby for some $1 craft paints; I got blue, pink, brown, and black. I had some fine tipped paint brushes already. I channeled my inner-Bob Ross and copied the Hoot Canister as closely as I could. It's not perfect... but I kind of like it even more because I made it. And I saved money. It makes me happy every time my adorable perfect little children put their cute tiny little hands in the cookie jar. It's just quintessential Norman Rockwell childhood memory material that makes my heart happy. Saving $50 is just the cherry on top.
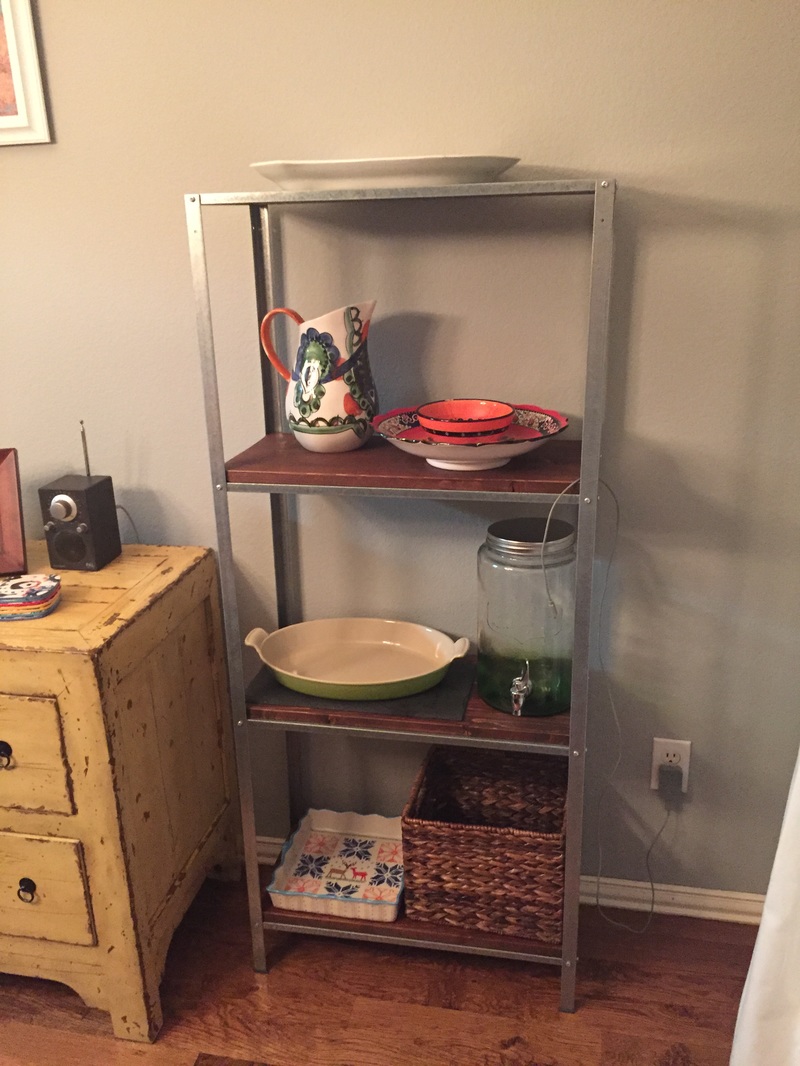
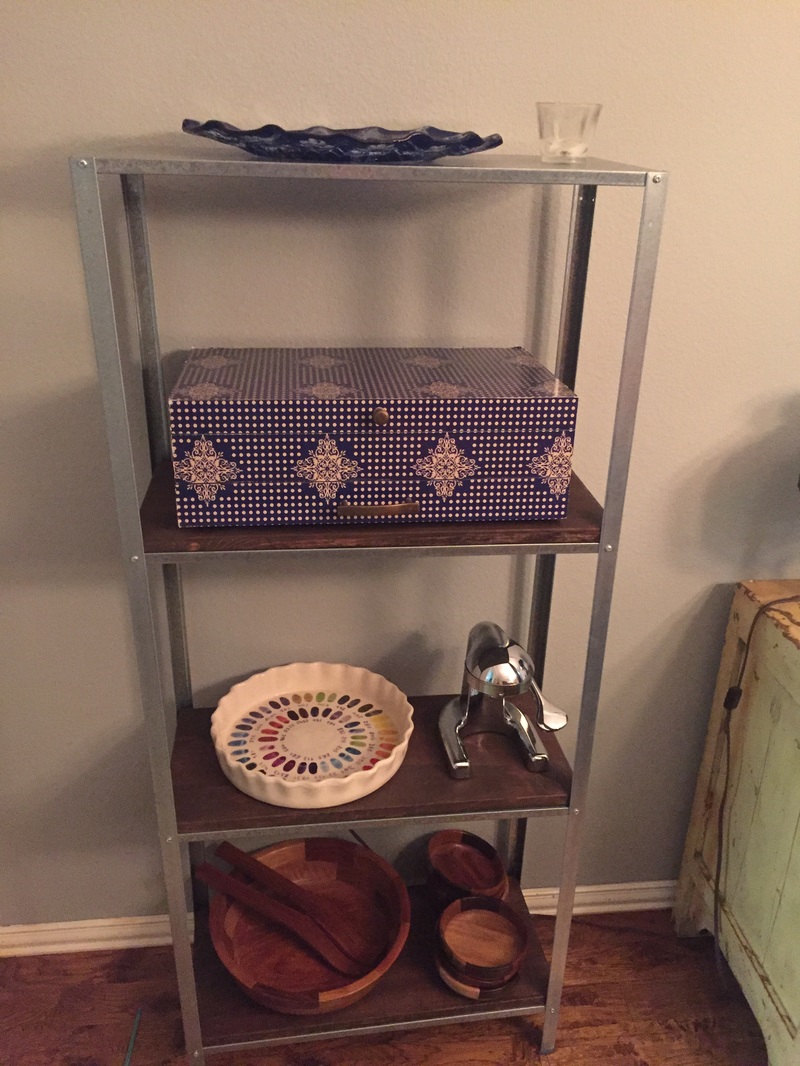
I worked at Restoration Hardware during college. It was a mistake. I ended up spending more $$ there than I ever made. $10/hour doesn't go far towards a $1850 Reclaimed Russian Oak Parquet Shelf when you've got college to pay for and ramen noodles to buy. Years later, I eventually came across the Ikea Hyllis Shelf for $15. Visions of industrial shelving that were 99% cheaper danced through my head. So I bought 3 of them - 2 for the dining room and 1 for the kid's play room. Converting the Hyllis to a fancy industrial shelf look alike was so easy it's hard to believe. Buy some wood. Cut it down to the shelf size. Sand the corners/edges to give it a worn down aged look. Apply 2 coats of wood stain. That's it. Literally.
AND...
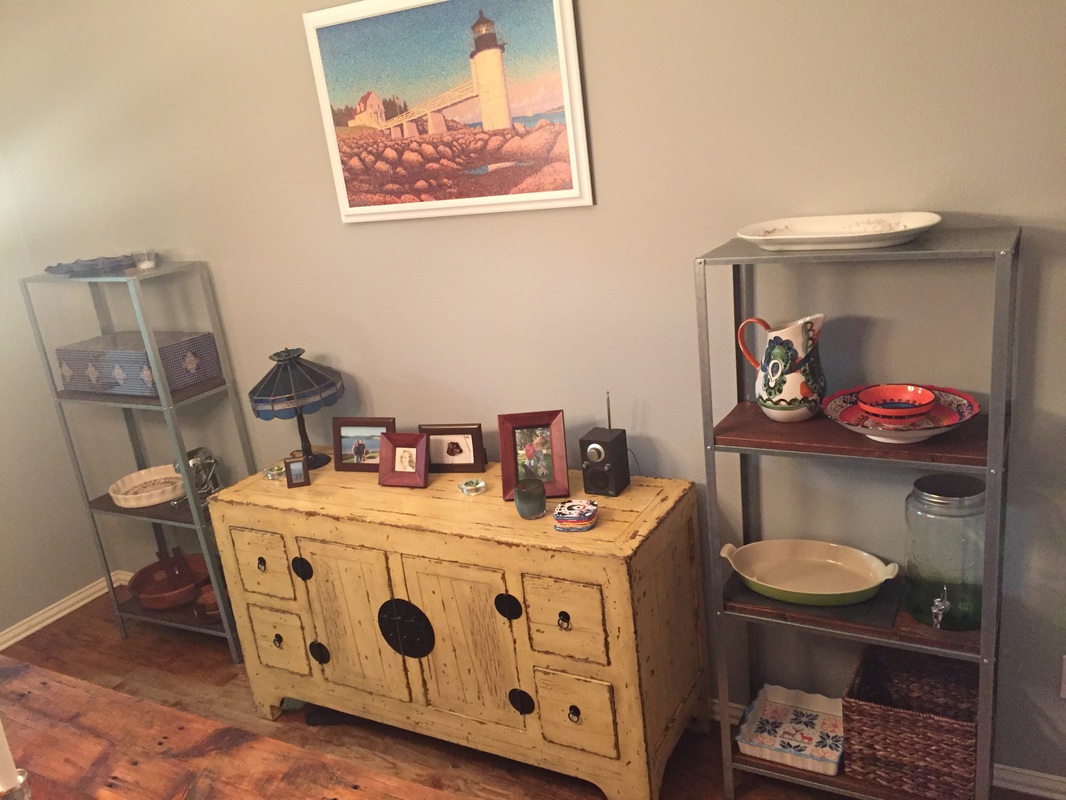 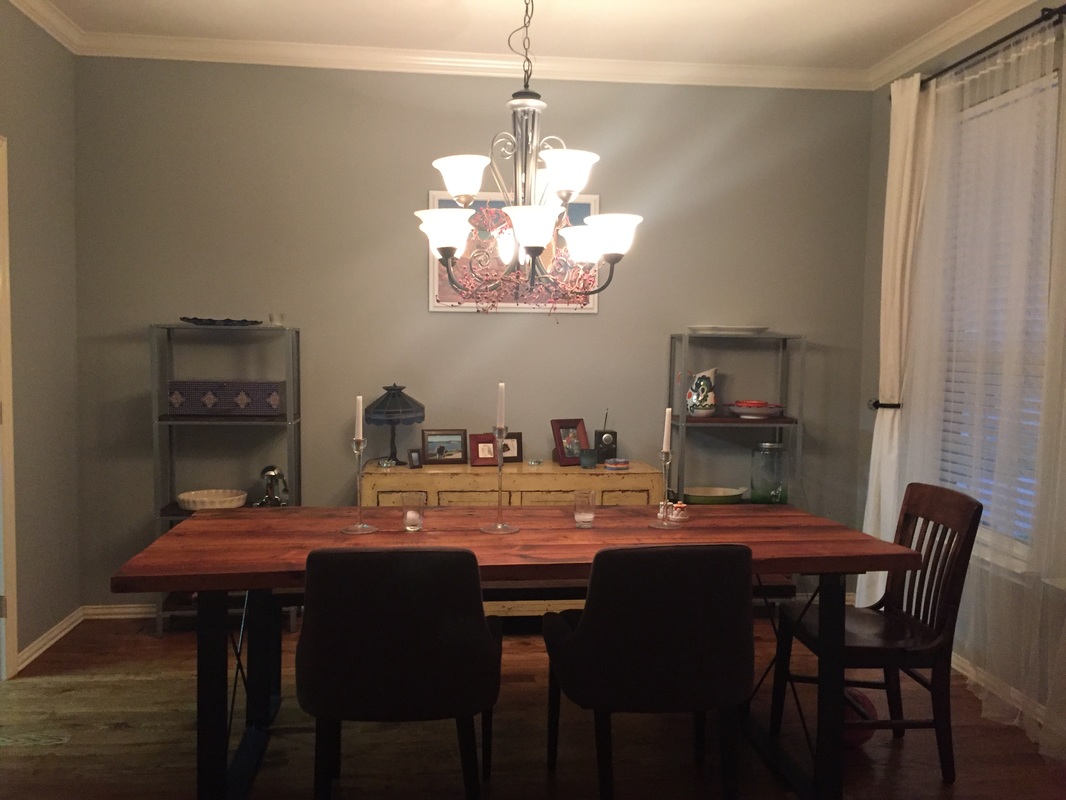 I'd like to add a disclaimer that I realize my picture on this wall is too small for the space. I need to make a larger custom frame... that's an upcoming DIY post one day.
The day has come!! The Solar City truck showed up bright and early and the guys were ready to get started. We reviewed the plans and they unloaded the 41 panels!! A new electrical box needed to be installed for the panels and a new inverter placed on the exterior wall. These are some hard workin dudes! Apparently 41 panels is a pretty big system and the guys told me it would take two days to finish up. They were busy placing conduit, running wires, installing equipment when a freakishly loud thunder clap rang out! It sounded like lightning struck right on our roof! It scared a couple of the guys, but with that, the work was delayed for the day. The next morning the installers showed up first thing again and got straight to work. Finally all the flashy panels would be hoisted to the roof and secured. Everything went smooth and they were all very friendly and professional. I noticed that the conduit running between the panels that would protect the electrical wiring was silver, which made it stand out against our black shingled roof. I asked if there was anyway that I could get the conduit painted black. The installers quickly said, sure, we’ll paint that for you! (Are you kidding!!!) How great is Solar City!! I was seriously planning on doing it myself or doing it while it was on the ground, but they said they’d do it no problem! Customer service is finally making a comeback! So day 2 of the installation was progressing smoothly when the installer brings in the icing on the cake………a new Nest thermostat!! This little gadget is so cool! It learns your habits and adjusts the temperature automatically when you leave the house. I mean, this thing is gonna help us save even more money! To say I was impressed with Solar City is an understatement! This company has been great from the first meeting until final install. The sales rep Jace has been in touch every step of the process and had even filmed the install for our own documentation. I can’t wait to see our first electric bill and see how much we saved with our new solar system!! Follow the link to find out if Solar City can help you go solar with no upfront money out of pocket! Share Solar City
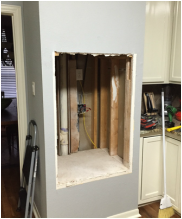
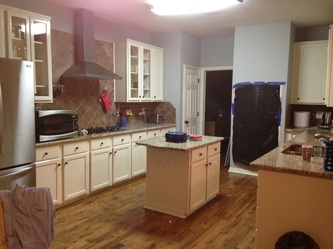
The very first project we did in our house after we bought it two years ago was to finish the kitchen renovation that the previous owners had left incomplete. The kitchen has nice cabinets with glass doors, granite counter tops, and all new stainless steel appliances... except for the microwave and oven! They were the original white appliances circa 1994 when the house was built; filled with rust inside. 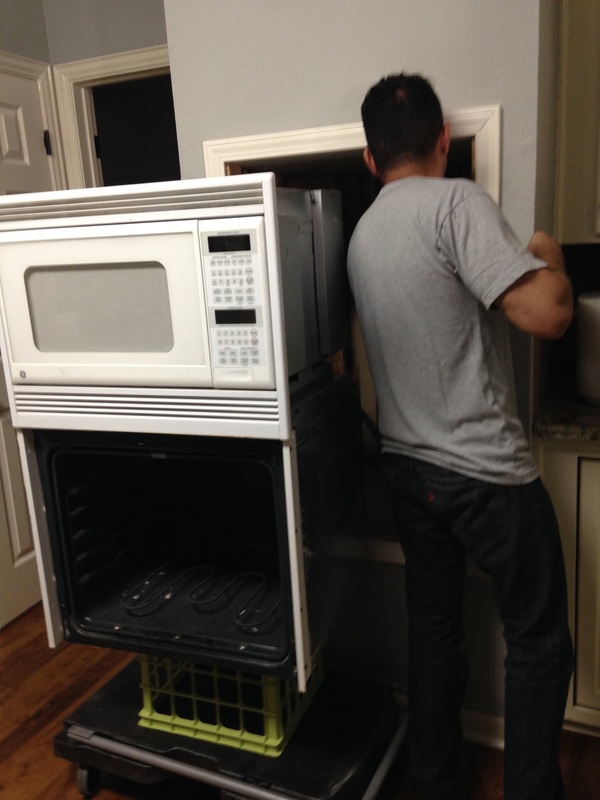 Now we'd spent a good amount buying and renovating the house before we'd moved in so we were a little gun shy to spend thousands more on a fancy new oven. I love cooking, so I was pretty passionate that I needed a nice model. Somehow I've never had a double oven before and I desperately wanted one. I'd coveted my mother-in-law's for years! Hers is a GE Single-Double Convection Wall Oven (PT925SNSS). It's the only double oven out there that is small enough to fit in the space of a single oven. We were pulling out a single oven so my dreams of a double oven were limited to this particular model. And it cost $3,000 two years ago! I looked in all the classic stores: Sears, Rodenbaugh's (at least in Allen it's a classic), Lowes, Home Depot, etc. but they all had the same price! Finally I turned to Craigslist, Typed in the model #, and held my breath, drum roll................................... Score! Someone really had recently purchased the exact PT925SNSS double oven I wanted in stainless steel!! The sellers were renovating their kitchen. when half way through they changed direction and it had been too long since purchase to be allowed to return it to the store. They sold it to me for HALF the price! I mean it was full-on still wrapped in plastic and in the shipping box - brand brand new. 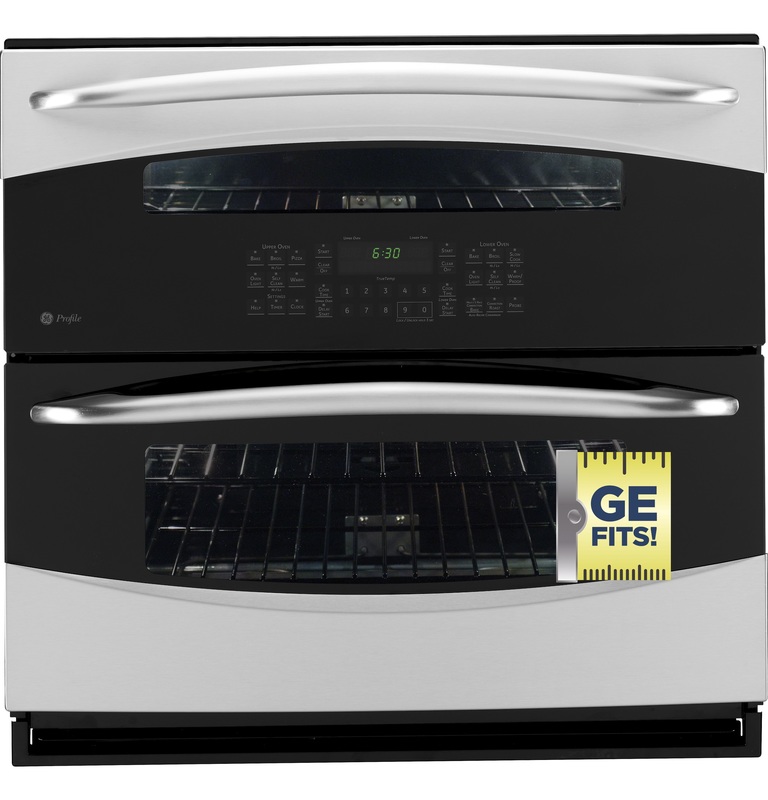 We snatched it up and brought it home in the back of our truck. The next step was to find the matching microwave. The old microwave we were pulling out was a built in above the oven; it would have to fit into the wall. I found the matching microwave, the PEB1590SM2SS, but come to find out - it was discontinued 2 years ago! No one carried it anymore! Which was a huge bummer, because this thing was a dual microwave oven/convection oven!! Seriously - you can pull out the glass rotating plate, put in the metal shelf and poof - it's a third oven!!! Mind blown right!! A THIRD oven! But none of that matters... because it's discontinued. Gone. Unavailable. What's a girl to do? 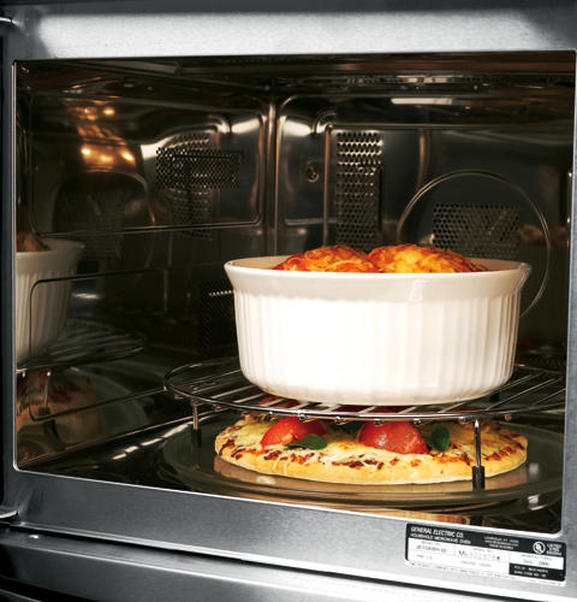 Not give up! That's what! So again I turned to Craigslist and searched for my microwave. It took a while but I really did find it on Craiglist! It was.for sale at a consignment shop about an hour away. So we made the drive and purchased it for pennies on the dollar- well for $200 anyway (and it was over $1K new). It was another huge score. Not quite perfect this time though - the front door had a good amount of scratches on it. I called GE Appliances and I was able to order a replacement door for like $50; so still a steal! We also had to buy the built-in trim kit in order to install the microwave into the wall for $264 which brought the total price to $500. Still a bona fide steal and a huge stroke of luck to find the one matching microwave left. INSTALL TIME! Pulling the old oven and microwave out was the easy part.
The hard part ended up being that the previous owner hadn't hardwired the microwave in, and we had to install a higher voltage outlet. Or I should say, we had to hire an electrician to add a higher voltage outlet within the wall space. That cost $150, but it was totally worth it (and necessary). Next,  Now came time to finally install our fancy (but cheap) triple oven!! Challie still ended up having to use a saw to widen the hole. He then built a shelf to hold the microwave because it was a different fit/size than the last one. 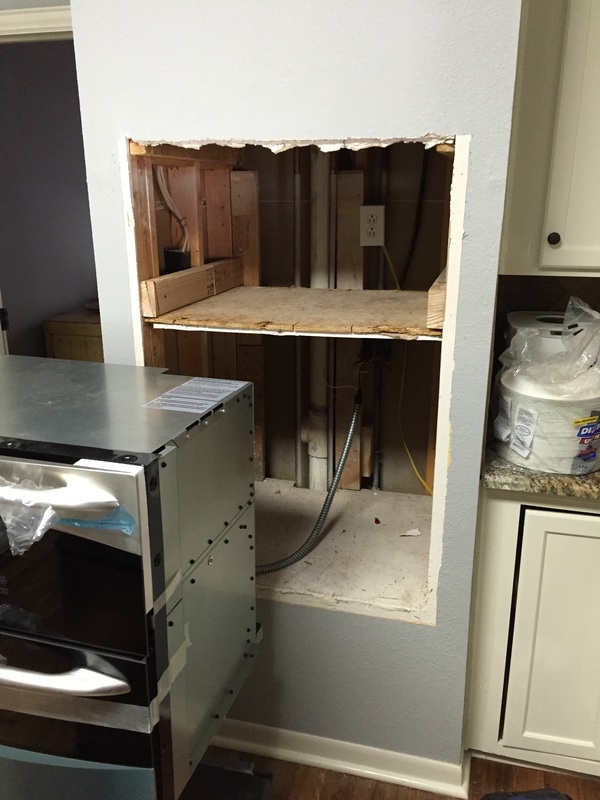 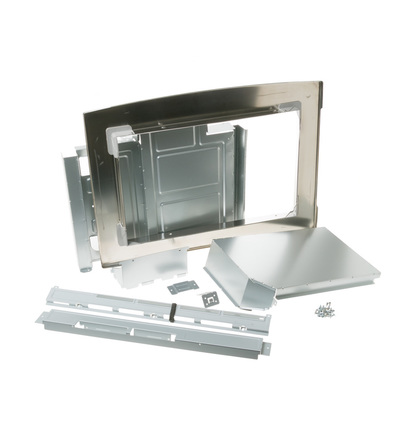 Using the built-in trim kit Challie was able to mount the microwave/convection oven into the wall above our double oven. The oven slid in pretty easily. The hardest part was the final framing. It wasn't a perfect fit so we had to hide some a gap at the bottom and bridge the new gap between the oven and microwave. 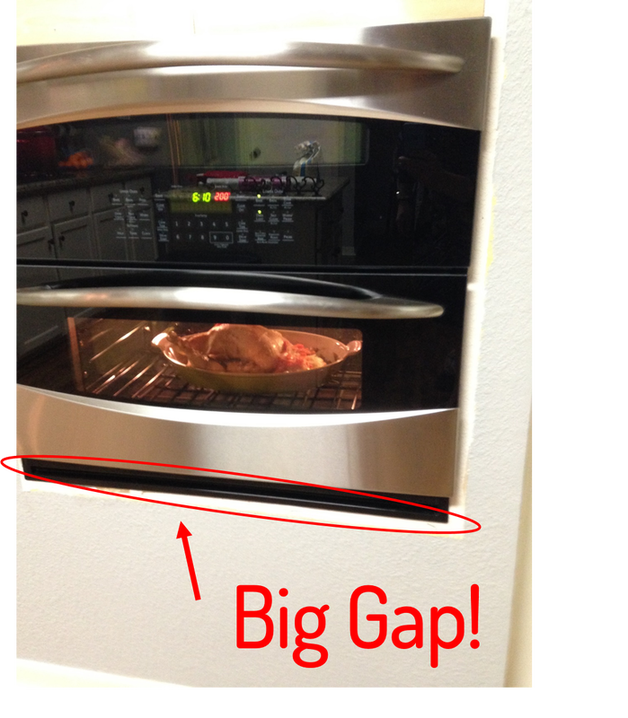 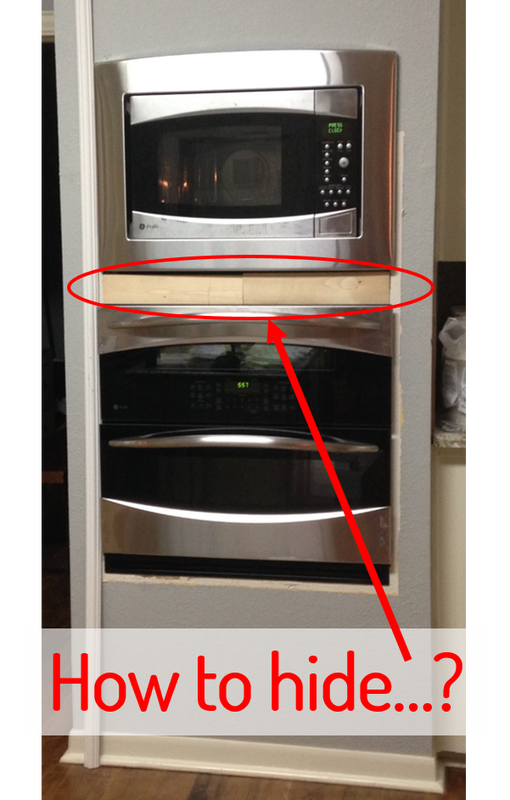 We cut out a strip of wainscoting beadboard and added a picture frame around the whole thing. We used wood filler to perfect any imperfections. All that was left was to slap some ivory paint on there and had a P.A..R...T....Y!!! Challie deserves all the credit on this one. 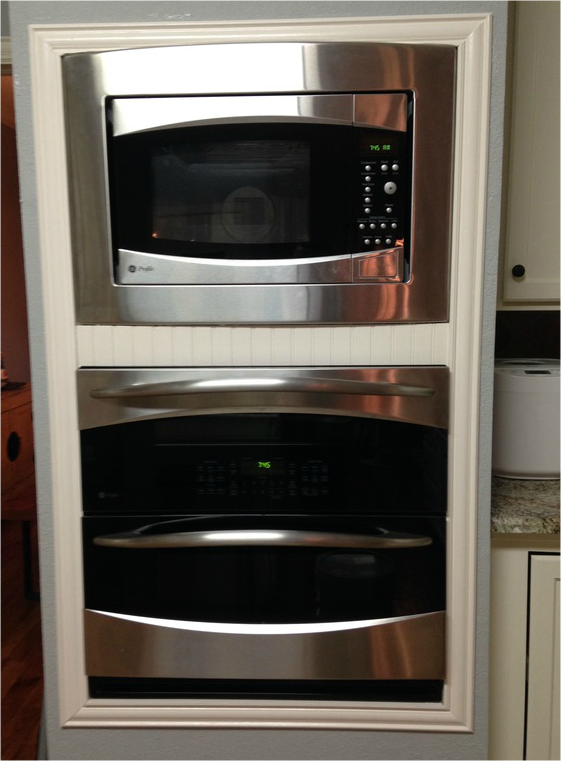 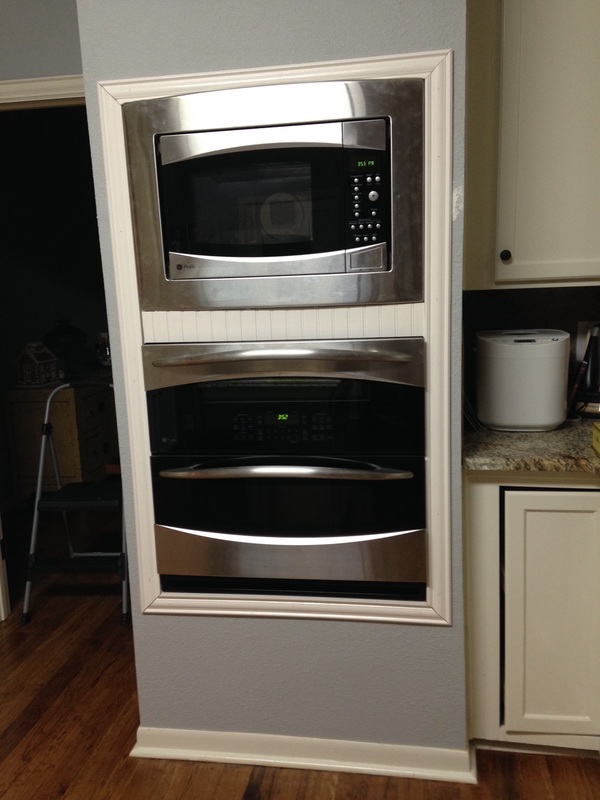 Now for anyone wondering, the ovens all work AWESOME. I've cooked a huge turkey in the bottom oven that came out perfectly. I've run all three ovens at the same time and cooked dinner in NO TIME. Holidays are fun using these appliances. I use the smaller middle oven the most- anything that goes on a baking sheet. It heats up in no time and uses half the energy of a full sized oven.
It's been two years and I still love love love my triple oven. I do want to make a final note to say that I'm actually planning on stopping the use of microwaves in my family. Standby for an update on weaning ourselves off radiation heating which destroys the nutrition in our food. Challie will have a hard time with that one... but I'll get him to come around. We moved into our house two years ago. We were looking for a home with a great layout that comes with a pool and a bigger backyard; preferably one that backs up to a greenbelt. Unfortunately, real estate in Allen is tough to come by – homes are selling the first day they’re on the market; site-unseen in some cases. Luckily, we found a home that had everything we were looking but even luckier – it was UGLY so we had a shot at buying it at a decent price. I posted some good before/after photos in my blog post HERE when it was a mustard yellow with dirty carpets. Anyway, this house had the bones we wanted but needed a million cosmetic updates to really reflect our personal style and preference. We have plans for the front of the house: Painting the whole brick house in gray or white, adding shutters, and painting the front door. We don’t have the time or $$ for most of that yet (one step at a time!) so we’re tackling each piece one at a time. First task – let’s update our boring white door. The front of our house is quite washed out and is in need of some contrast color. A statement piece. 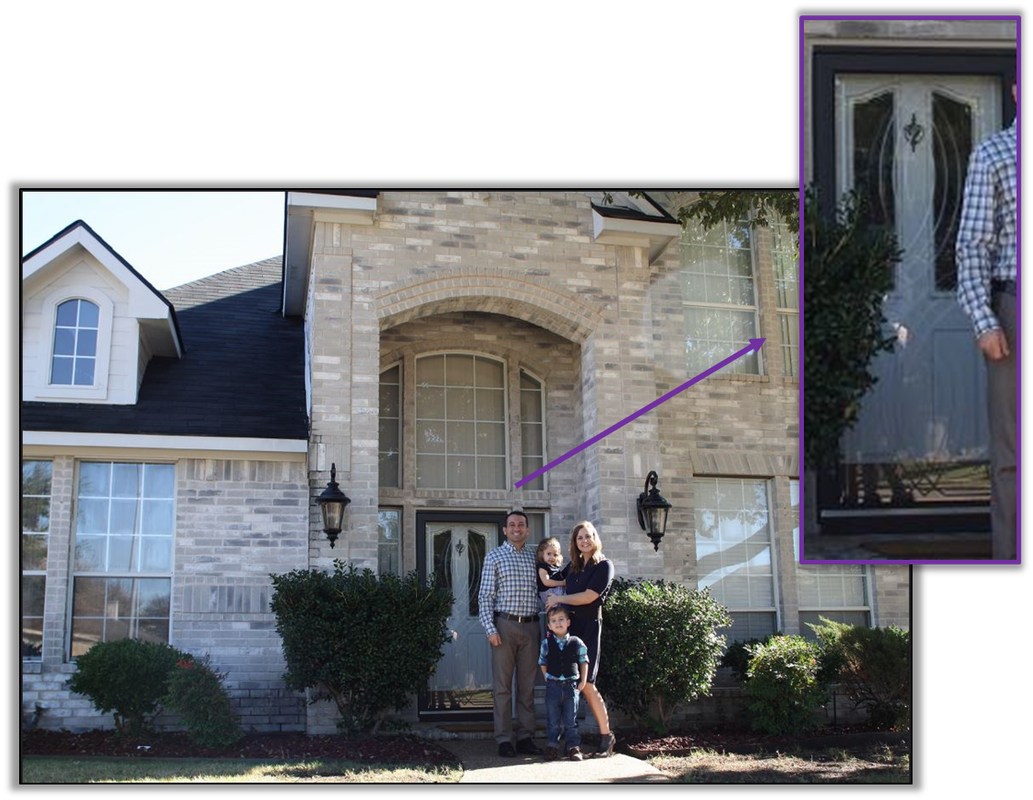 So I went looking for ideas on Pinterest. I found the perfect front door color at Miria Killam, # 5 in Sherwin Williams color “Dignified” (6538). 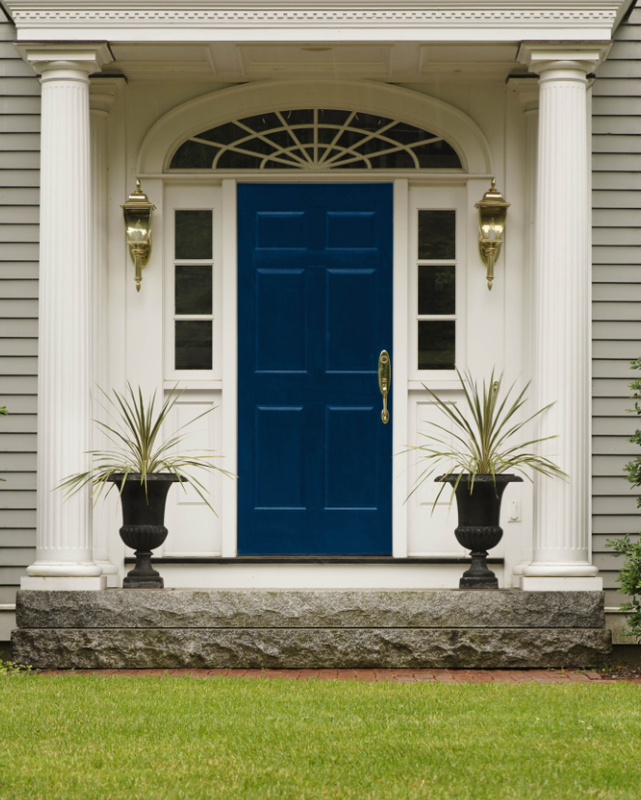 When I picked it up from the store, the dob they put on the top of the paint can looked a little too purple for me. The picture in the blog looks different from the color on the website. So I was a bit nervous... I was looking for character/statement color; but not too far out there. 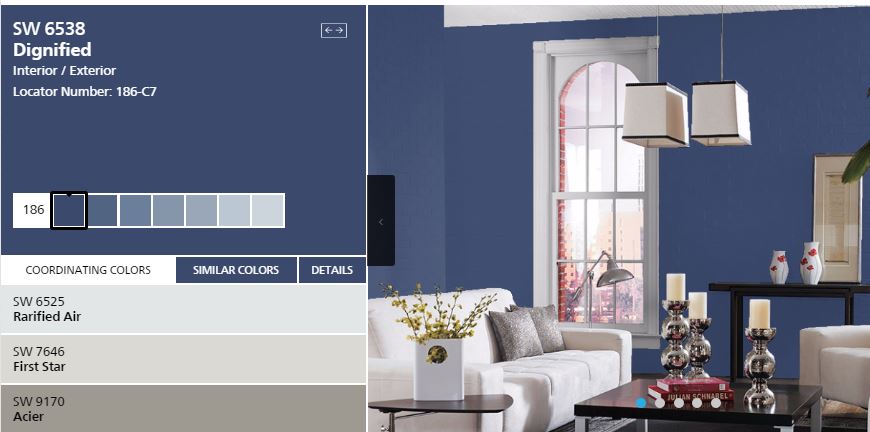 Painting a front door is pretty darn easy. My husband took the door off its hinges, we put it up across two sawhorses in the back driveway and sanded her down. I had to run to Lowes half way through because our fine grit sand paper was taking way too long. I bought a medium course grit of 60 and that did the job much faster (that and my husband’s taking over helped). We have a little Palm Sander that’s fantastic for smaller projects, but I wouldn't recommend it on a surface the size of our front door or larger. Note: Make sure you wear a dust mask. Safety!  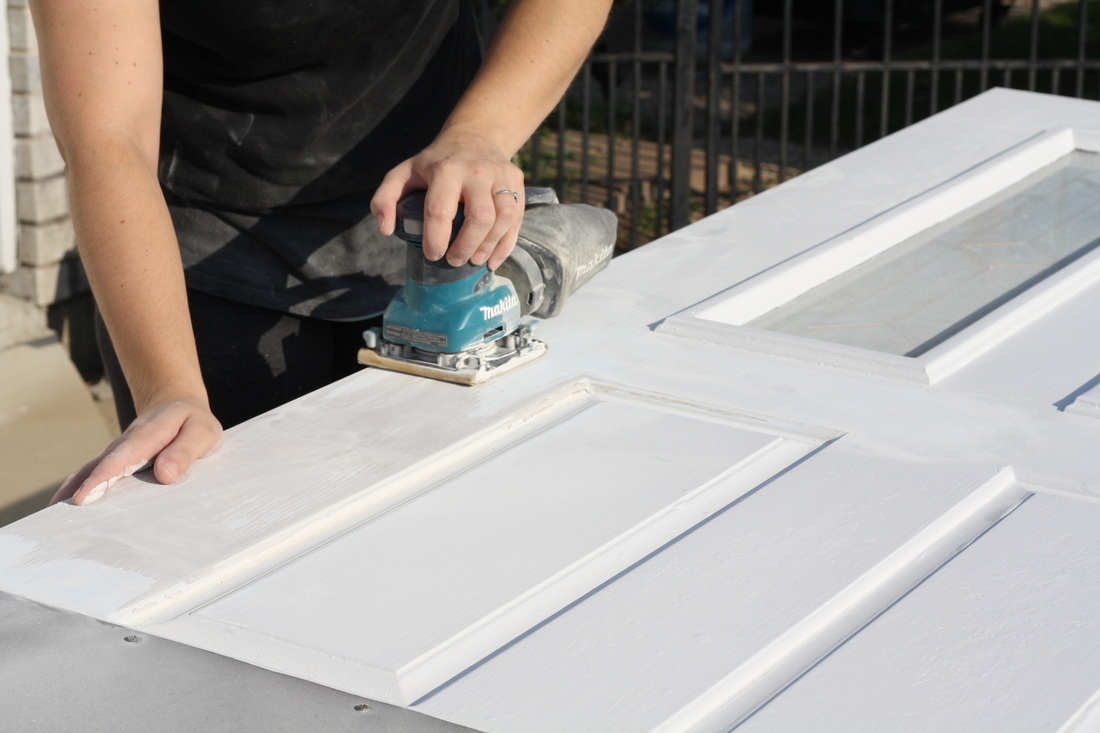 We didn't sand it down 100% to unfinished wood. It was more about removing a layer of two of paint and scuffing it up enough to ensure the new coat would "stick." We put the sanded down door back on it's hinges so I could paint both sides in one go. Make sure you 1) Dust it off 2) wipe it down with a wet rag 3) tape off all hardware and the floor below. 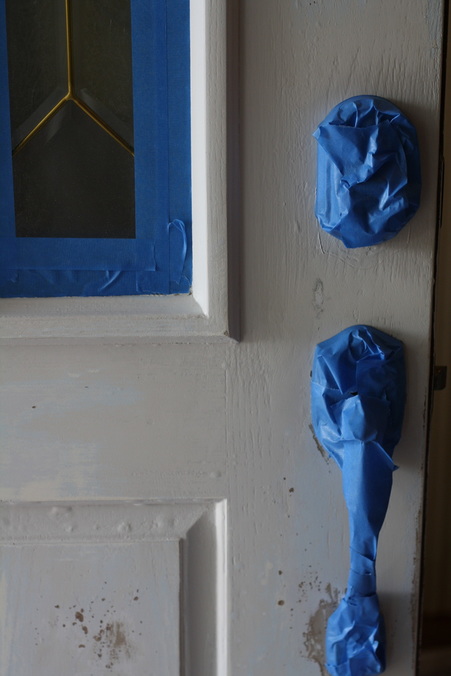 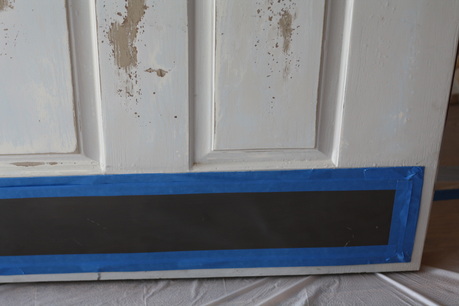 Now it's time to grab your tablet, put on some Netflix (I was zoning out to some Murder She Wrote) and get to painting. It took two coats. Here's my little key of what direction to paint: 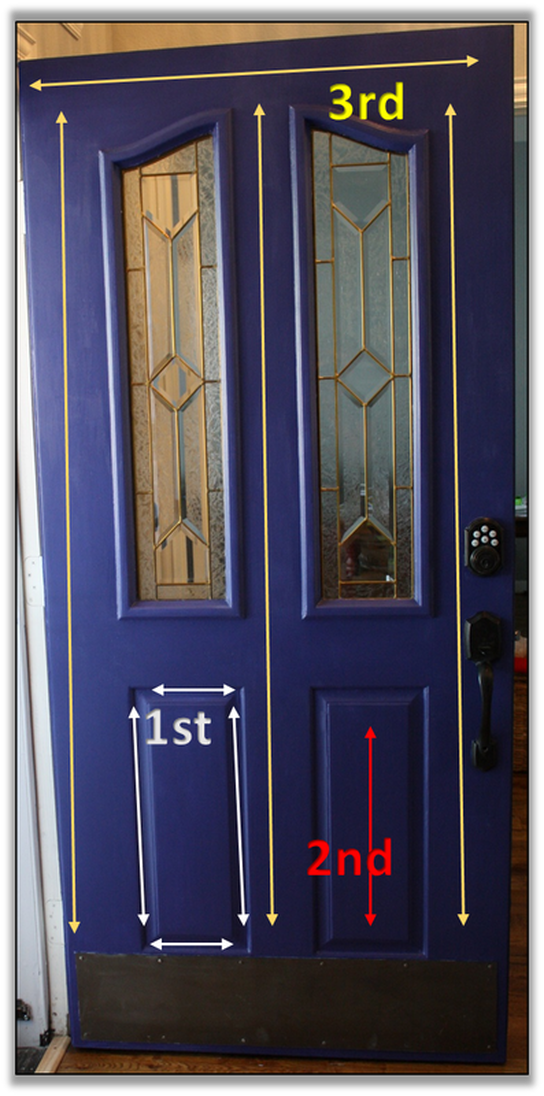 Next I let the paint set over night. I pulled the tape off. There were a few white edges peeping through the corners or that got pulled off with the tape. It took me about an hour to clean up the paint with a fine tipped brush (I'm a bit of a perfectionist with paint). And that's it. A great new update to the house done in one weekend; probably ~6 hours of work at most. Check it out! 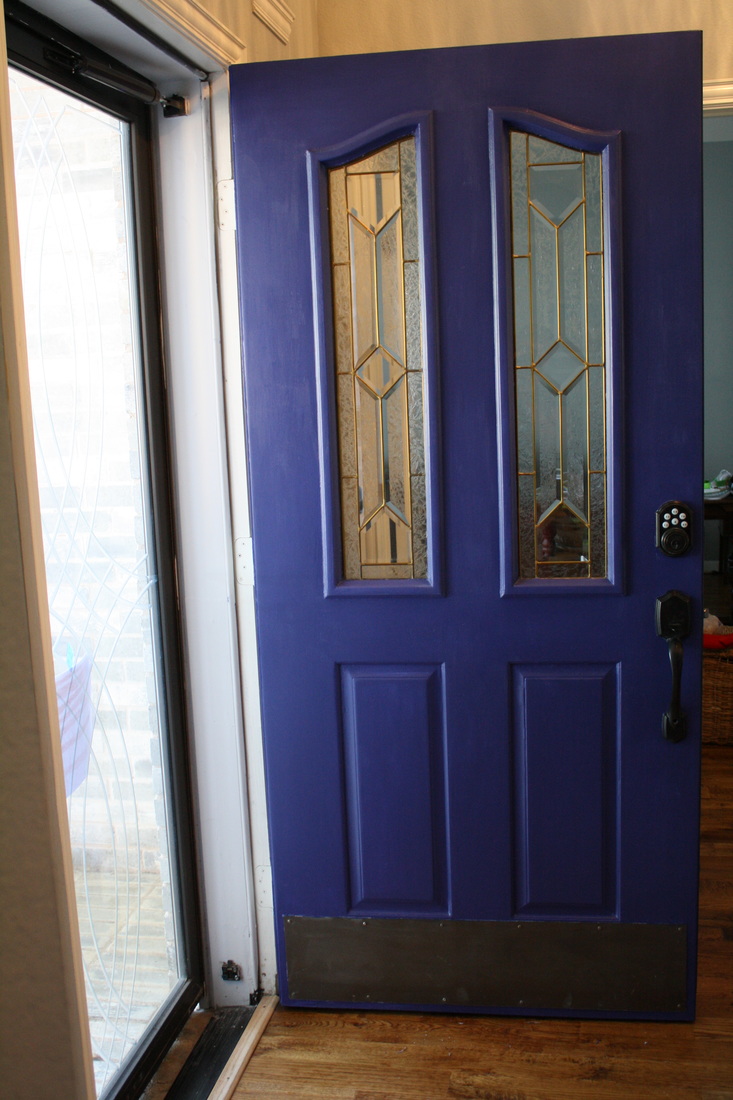 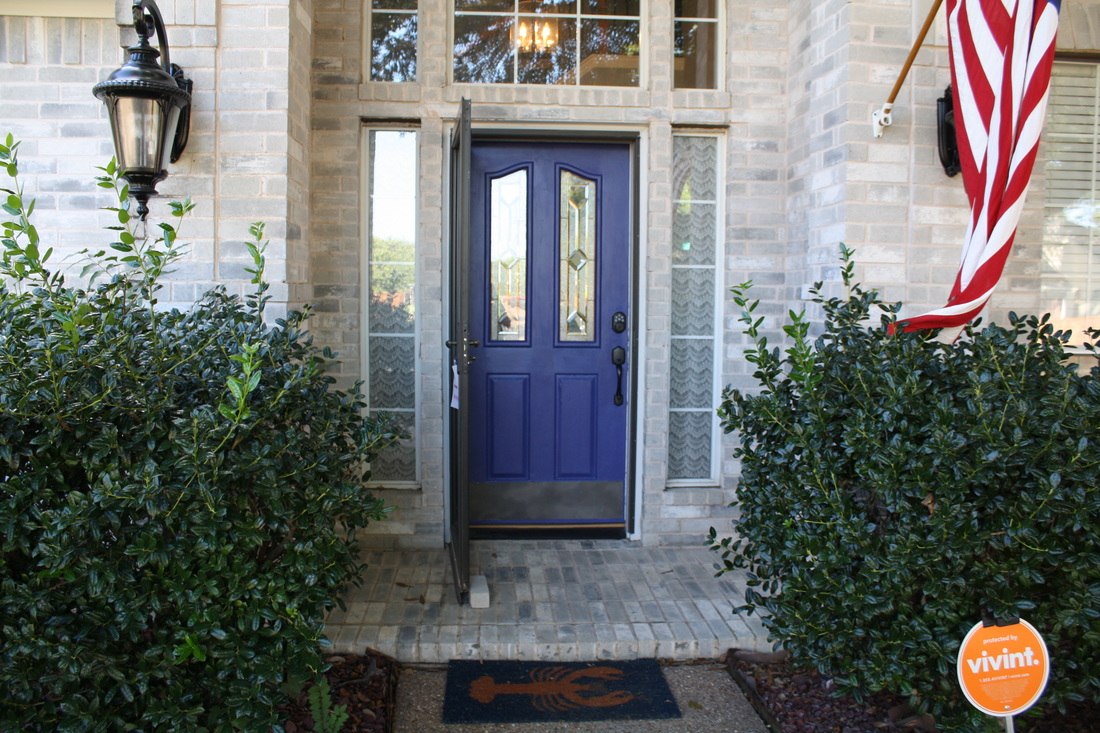  I've got one question that I need help with... Challie and I are debating whether or not to remove the storm door; what do you think? I'm not a big fan of it. It blocks the street view of any seasonal wreaths that I like to put up and it hides my pretty new paint color. See what I mean (What do you think?): 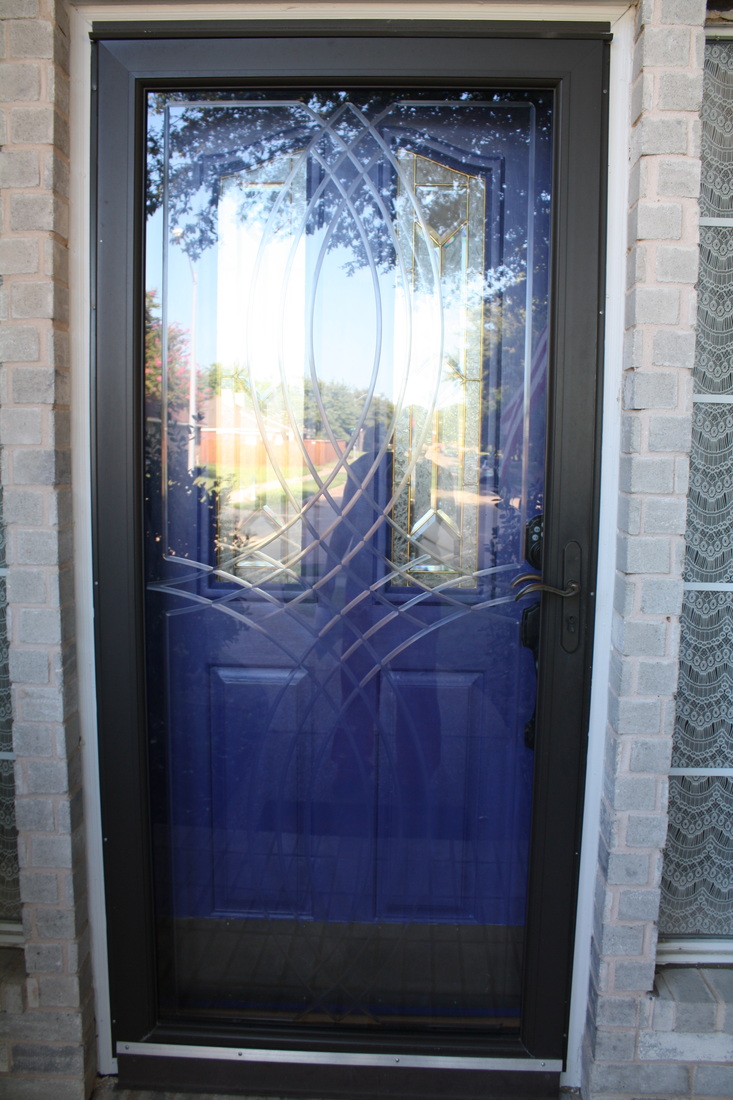 |