By Amber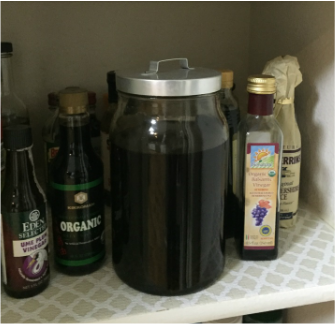 I've been buying RIDICULOUSLY expensive Organic Fairtrade Madagascar Vanilla Extract from Whole Foods for... like $18 for a tiny little 4 oz. bottle. It basically would kill me every single time to buy the darned thing; but I swear it makes a huge difference in baked goods. I'd put it in the cart all quick-like and buy it with the rest of my groceries; refusing to allow myself to re-consider. I'd never really paused to think about what vanilla is or how it's made. Up until I switched to organic ~7 years ago I would buy the cheap "imitation" vanilla. I definitely don't know what's in that and honestly don't want to know. So anyway, we go on a family trip to visit our old Navy buddies and my girlfriend Adrian gave me a bottle of vanilla that she'd made herself. She packaged it up all cute and had given it to friends/family over the holidays. I was very impressed and so excited to use it in my next recipe! She told me how she did it- you just buy vanilla beans and soak them in alcohol for a few months and that's it! My mind was totally blown. So I took it home and gave it a shot.... drum roll.... It was fantastic! Awesome! Just as good as the expensive stuff; except even better because it was made with looove. :) So, I was HOOKED! I went through the bottle pretty quickly and wanted to refill my next supply myself. So I decided to get started on my own home-brewed batch. First things first, I went to Costco and bought a big jug of the cheapest vodka Costco has. I felt a little embarrassed since I'm over the age of 23 and I'm pretty sure they thought my next stop would be the Jello Mix Aisle or to buy ping pong balls or something. Note on the alcohol: I thought about using Grey Goose and making it all fancy, but I read up on it and apparently the quality of vodka really doesn't make a difference. Then I went on amazon and ordered myself some Madagascar Bourbon Vanilla Beans. Once the vanilla beans arrived I sliced them in half without finishing the cut so that it looked like a chicken bone. I read that this step isn't really necessary, but it makes the vanilla beans look cute in the bottle so I went for it. I'm assuming the point is to allow the vanilla escape and permeate the vodka a little faster. The rule of thumb is that for every 8 oz of vodka, you add 3-4 whole beans. So you can scale the recipe to as much as you want. I bought a huge package of beans so I could make a big 36 oz batch of vanilla. 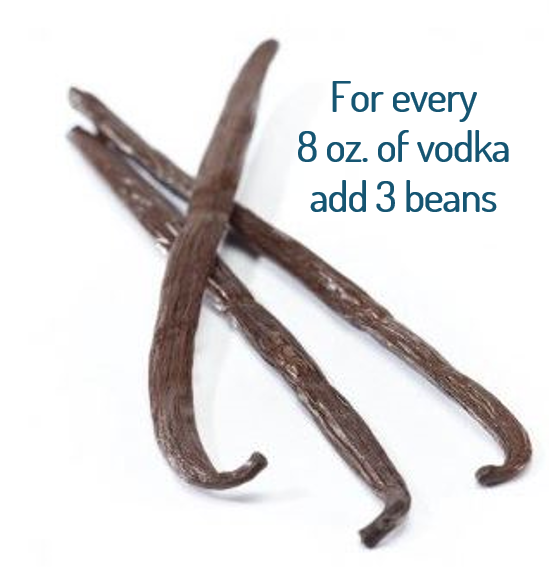 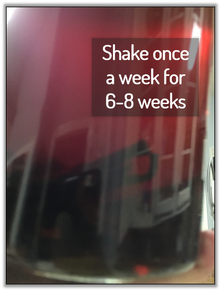 Rummage through your kitchen and find a large glass bottle with a tight fitting lid. A mason jar works or something like THIS. Make sure the vanilla beans are completely covered in vodka; cut them in half if you need to make them shorter. And that's it. You store it somewhere cool/dark - so basically just don't put it on the window sill. Once a week you need to shake it up for a second until it's "done" (6-8 weeks). The longer you let it brew, the stronger the vanilla. When you're ready to bottle it you just pour it through a typical mesh strainer to remove the pieces and any large sediment. Pour the vanilla through a funnel into glass bottles like these that I ordered on Amazon.  To finish the project off I made super labels for my vanilla bottles following the instructions on happymoneysaver.com. I wouldn't really recommend though. The labels printed all skewed, the burlap unravels, and the glue didn't work well at all. It did still end up pretty cute though...
I leave it to you to label your bottle - you can be as simple or crafty with labeling as you'd like. Use burlap, ribbon, twine, a label maker- go cray cray. Hope you enjoy! Products mentioned in this post:
2 Comments
by Challie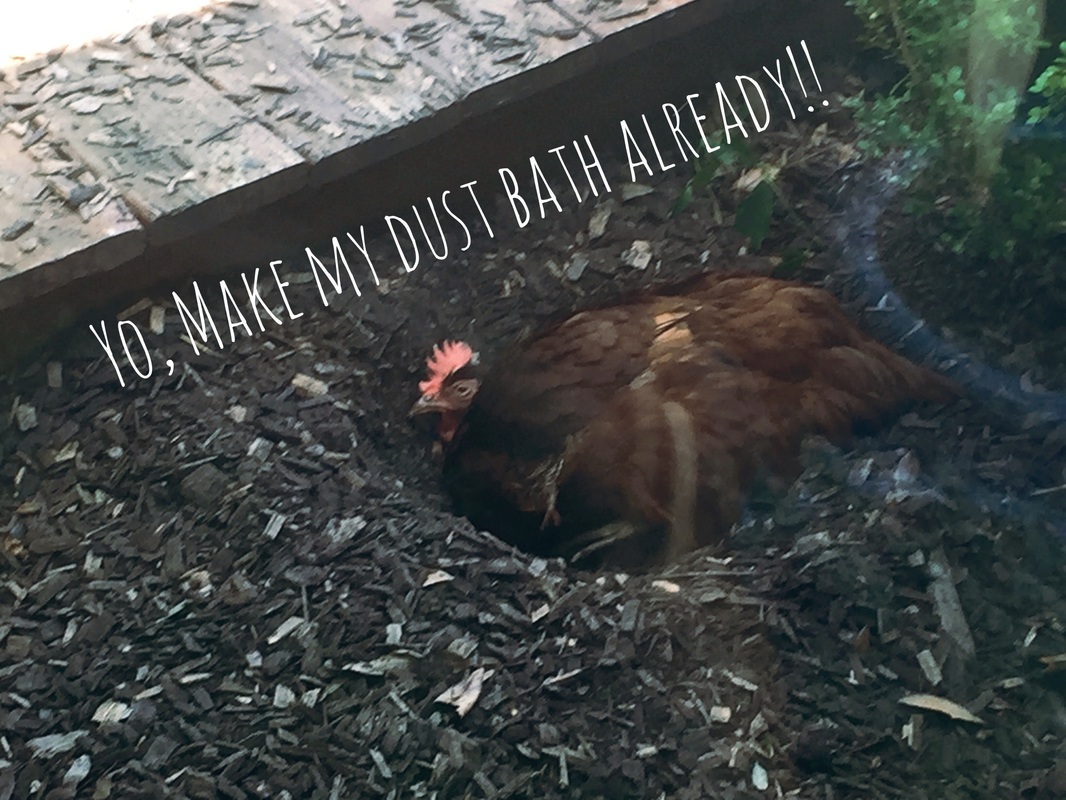  This morning I dropped the kids off at school and came home to find two of the four
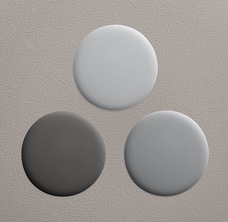
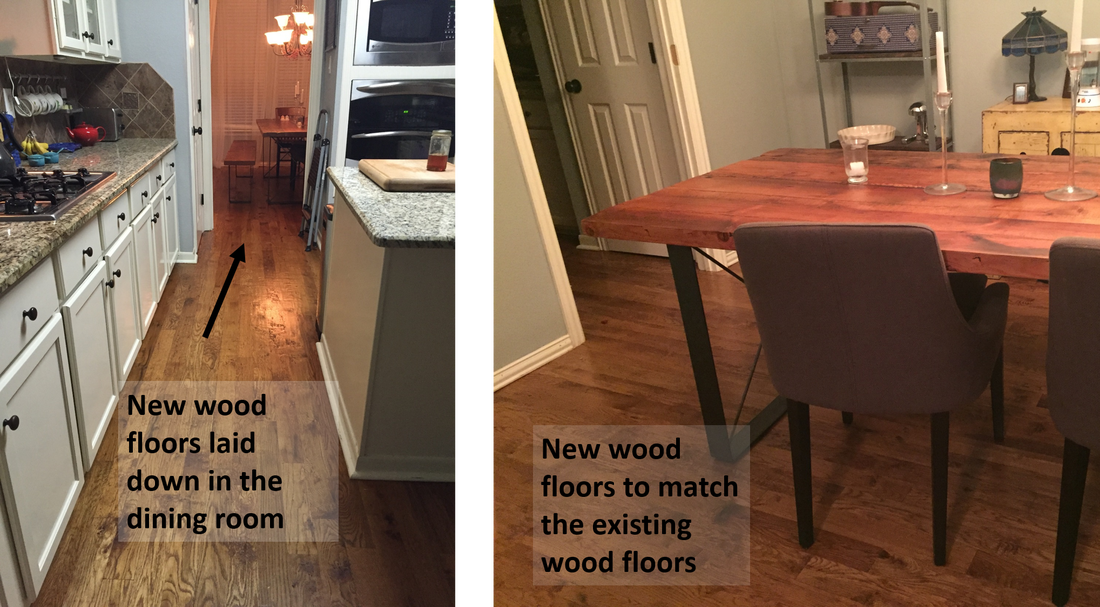
chickens had escaped their coop/run yet again. It appears that we need to clip their wings again so the little escape artists can't get out as easily. Once they're out, they're out. They usually will not just walk back into their coop without persuading. That means, they get to stay out until I find some food or scraps to toss in their run to get them to agree to go back. I'm rarely in the mood to re-enact the Rocky scene of chasing chickens around for hours trying to prove who's the fastest, and since I have no plans to fight Apollo Creed, then I don't see the point. (Next time they escape, I'm totally putting on a sweatsuit and a red headband......Yo Adrian!) Anyway, I get home, look out the window and I see Red buried down in the little patch of dirt that runs along our back window. She spots me getting closer to the window and I can see it in her eyes........."I wouldn't be digging a hole out here if you would get your act together and build me a REAL dust bath". FINE red, I'll move it up the list of priorities. For those of you who are pretty new to chickens, a dust bath is way for the chickens to keep themselves clean and help them cool off a little in the heat. The fine sand or dust keeps their feathers nice and clean and free of mites and lice. You can use different sorts of materials for the birds to bathe in and I've read that people often use dirt or sand and mix in wood ash from the fireplace, diatomaceous earth (food grade), and/or dried herbs. The wood ash is good for the chickens to nibble on because the charcoal acts as a laxative and rids their bodies of any toxins or internal parasites. The diatomaceous earth kills mites, fleas, ticks, and lice. Take precaution when using the diatomaceous earth because it comes as a fine powder that can easily blow in the wind and it can cause irritation to the lungs or eyes, so you may consider adding a small amount to the dirt and mixing it in or putting a layer of dirt on top of the DE. Use dried herbs in the dust bath to act as natural insecticides. Herbs such as mint, rosemary, and lavender are all good choices. I've read that dried thyme and rosemary have good anti-inflammatory properties which would be beneficial for respiratory illnesses. So now that I have just enough information to be dangerous, lets get this project moved up the list so the poor little darlings have a nice place for bathing. Sometimes I think our animals have it better than I do........... We moved into our new-to-us house in Oct 2014 and began work on the laundry list of projects we wanted to do to make this place our home. First things first, make it functional and convenient. When you walk in the house we’ve got a small entry area in front that’s perfect as a mini-mudroom at our entryway. I started searching for benches, coat racks, entryway storage units etc. and found that they’re one of those items that’s over-priced (in my opinion); at least the ones I like. This Pottery Barn Wade entryway bench set was my favorite at $1600 (not even counting tax & shipping)! Even just the wood and wired cubbies piece was $300! So we put our DIY-caps back on and got to thinking. I’ve seen tons of pins on Pinterest using crates as furniture like these on Amazon or check your local Micheals. Their $14 price tag made it an appealing option. My favorite concept was from Elsie Larson’s blog “Elsie’s Mudroom Organization” on A Beautiful Mess. We made a few tweaks in our plan to customize to our space and style. So I bought 4 crates and stained them a walnut brown with some wood stain I had laying around. I used a stain sponge and it took maybe two hours to do two coats. Very easy- although the little slats were a little annoying to make sure they were covered entirely. Once that was done I had my husband cut down a piece of wood we had laying around. I sanded the edges and rounded the corners so it would look a little more polished. Stained the board with the same walnut brown stain as the crates. We bought four Liberty Hooks which are extremely well priced at $3 each. We screwed them into the board and mounted on our wall using some heavy duty wall anchors. We load those hooks up with coats during the winter and it can get pretty weighty. Then I went through our most recent photos and picked out one for each of our family members to put above their respective hooks. I printed them out via walgreens online photo shop and hung them up above the hooks with push pins. Added a galvanized bucket and oval mirror from Restoration Hardware (purchased while I worked there during college circa 2005). Some baskets for shoes overflow helps keep our entryway tidy. So instead of spending $1600 on PB’s fancy entryway set, we made our own for under $100! We’ve been using it for almost two years now and it’s incredibly functional. It holds tons of kids shoes and coats; so it’s functional and I love its unique look. I’m personally pretty proud of this very easy-to-do project. 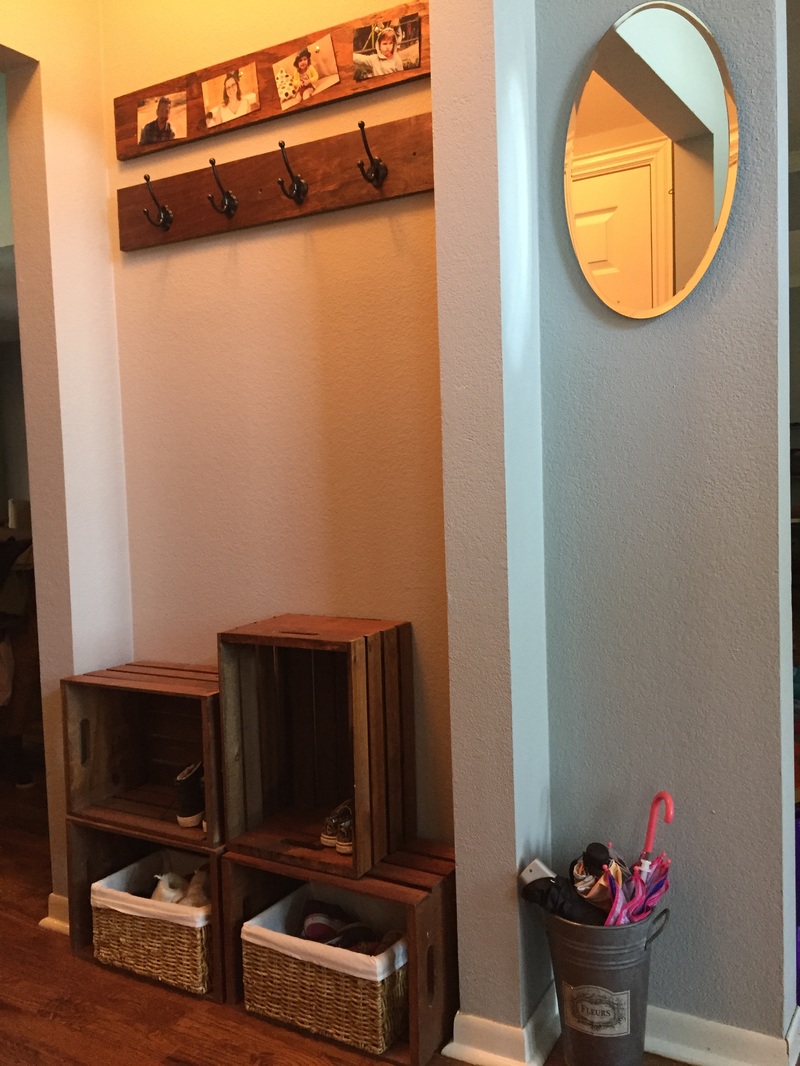 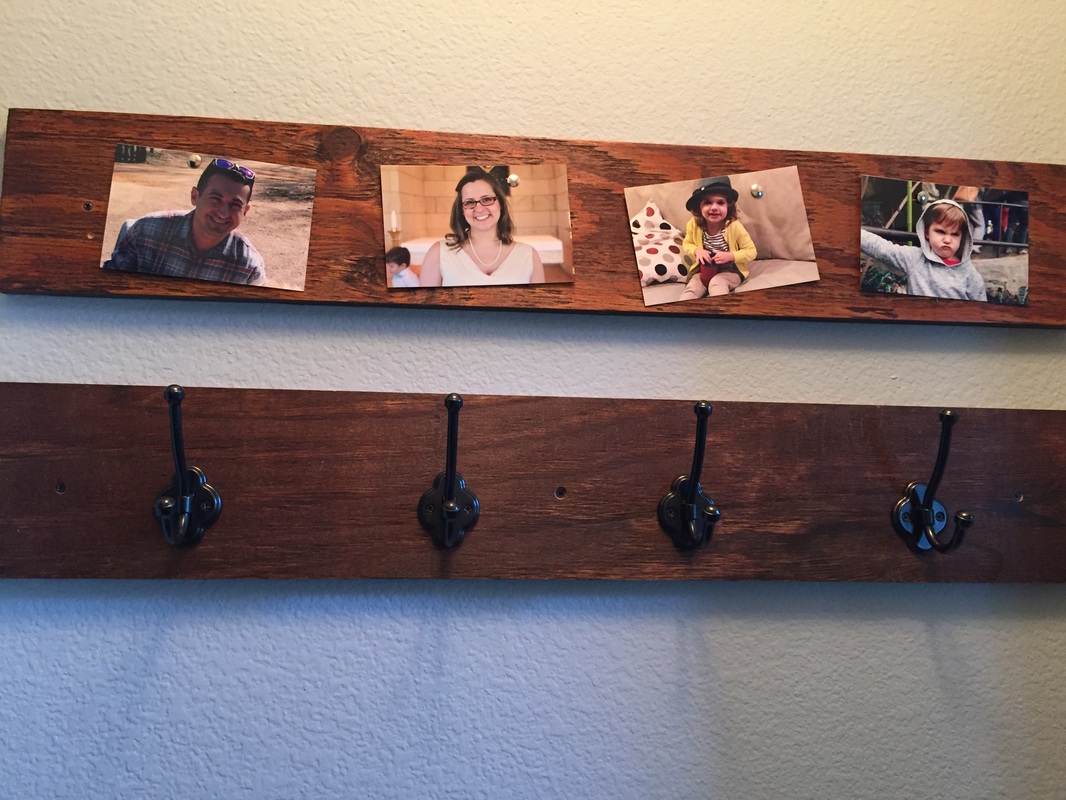 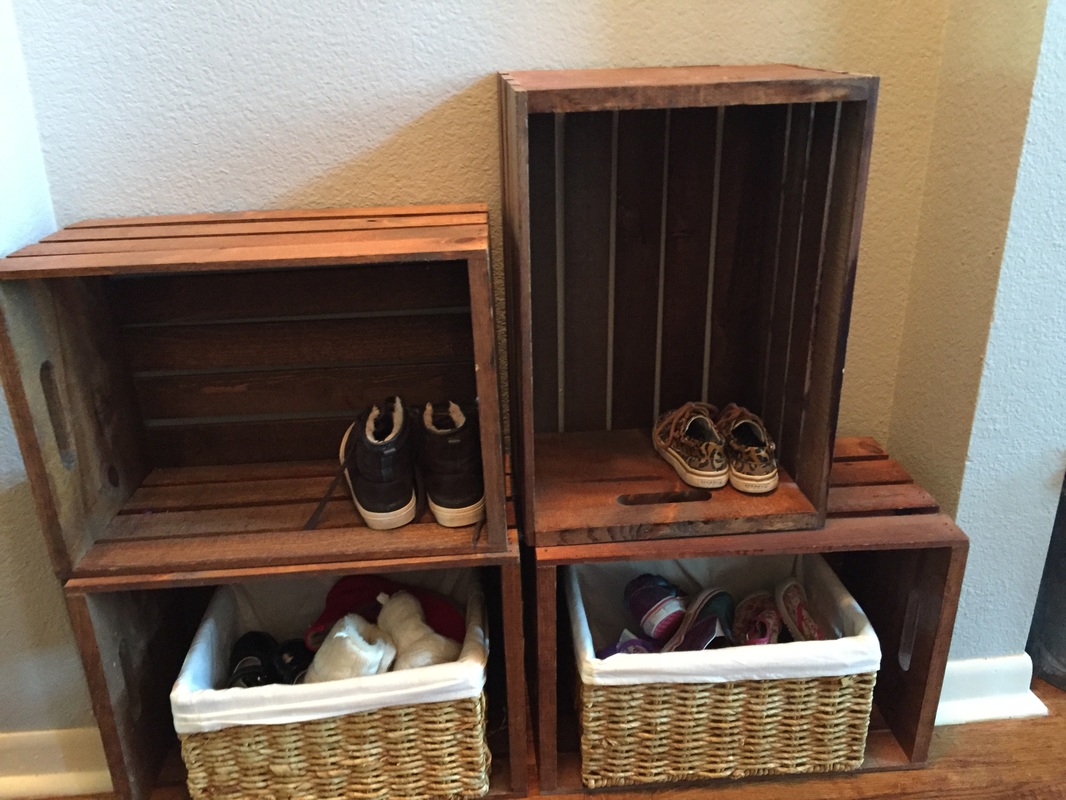 We bought the house we’re living in now back in Oct 2014. It was an awful mustard orange color, had the original “builders grade” carpets from the 1990s, and a room addition off the living room whose woods floors didn’t match with the rest of the floor. For the first time ever, we didn’t DIY all these issues. We were in a rush to move in and there was no way we could do everything that needed to be done in time; plus it was an extraordinary amount of work we simply didn't have the time for. I know that this blog isn't DIY within a DIY blog. But I can't talk about the other projects we've done in our house without mentioning the first and biggest one we did, despite the fact that we turned to help. So while we were in Seattle at my brother-in-laws wedding (shout out Zac & Rach!) we had some renovations going. First they painted the whole house- I wanted Restoration Hardware's paint color Flint. The painter insisted he could match the color in a cheaper brand and since we were stressed about the cost of all this we went against our better judgement and said okay. We were in Seattle when they painted and they painted the entire 3,000 ft2 house in a blue/gray that looks nothing like Restoration Hardware's Flint. I ended up still really liking the color, but at first I was pretty damn annoyed. We went a shade darker in the bedrooms and two shades darker in the media room.
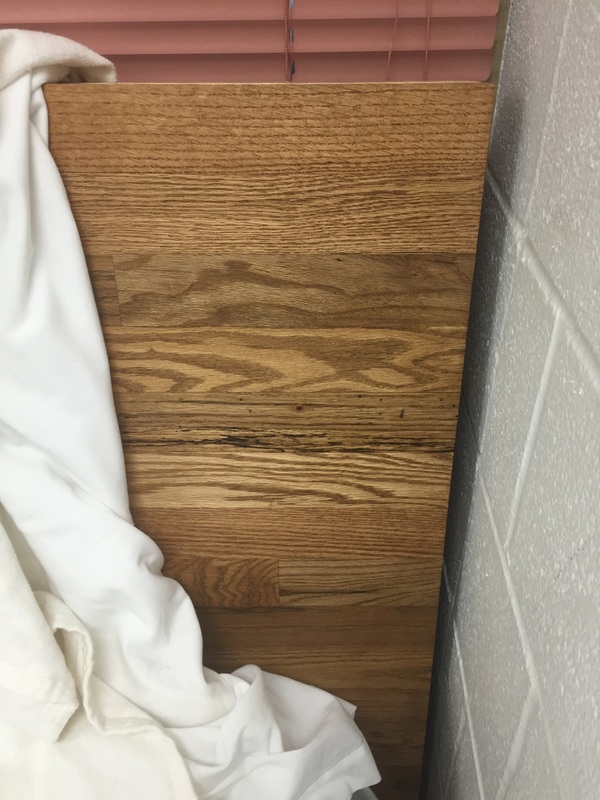
Then they pulled up all the carpeting and replaced it. The random patch of carpet in the dining room (surrounded by hardwood in entire rest of the bottom floor) was replaced with matching hardwood and the entire downstairs we had lightly hand-scraped and re-stained so the woods all matched and you couldn’t tell two sections had been added at two different times. Word to the wise – deep hardwood scraping and dark stain color is on its way out according to HGTV.
  And here's the new carpet. I was worried about two shades of blue/gray competing or being too much. But I think it worked out well. We did a patterned carpet going up the stairs only. I love the pattern and think it's pretty timeless. It definitely classed up the joint. 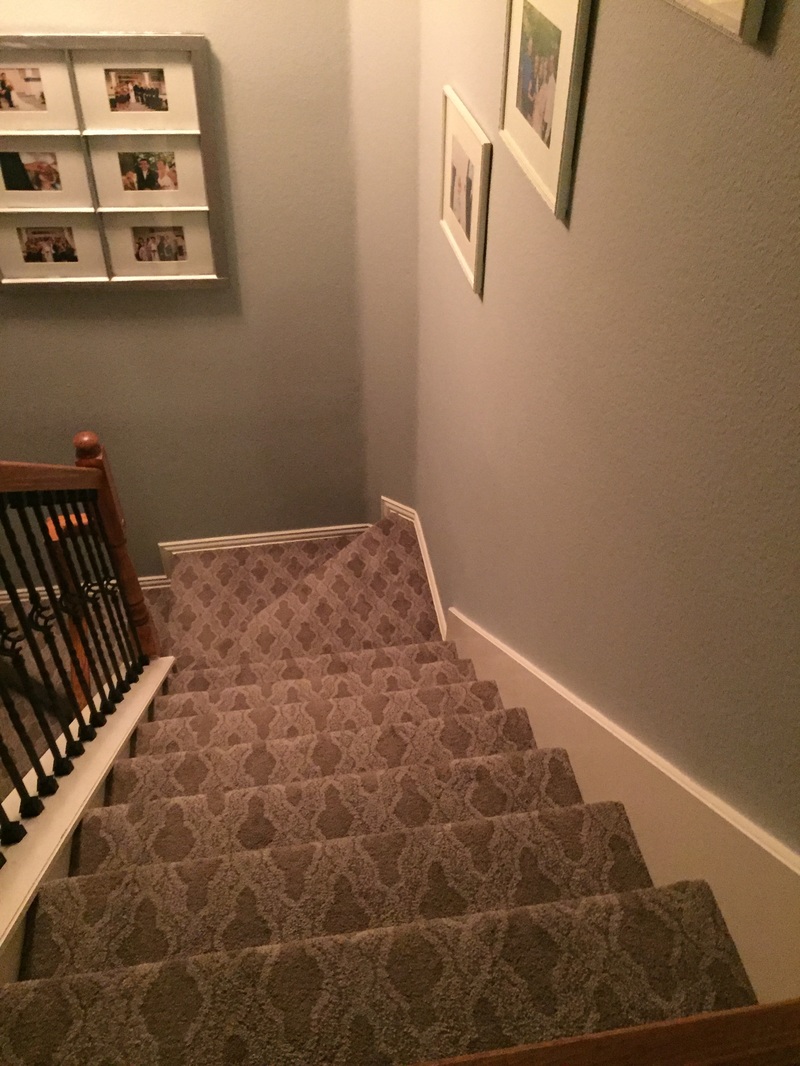  The most random and ugly thing we changed was to have the tile floor that was on 1/2 the media room floor removed and carpet put down across the entire media room. The previous owner told us he put the tile in because him and his buddies would spill food/drinks while watching the game and he didn't want to deal with stained carpets. Hahaha what!? Sooo much better now! 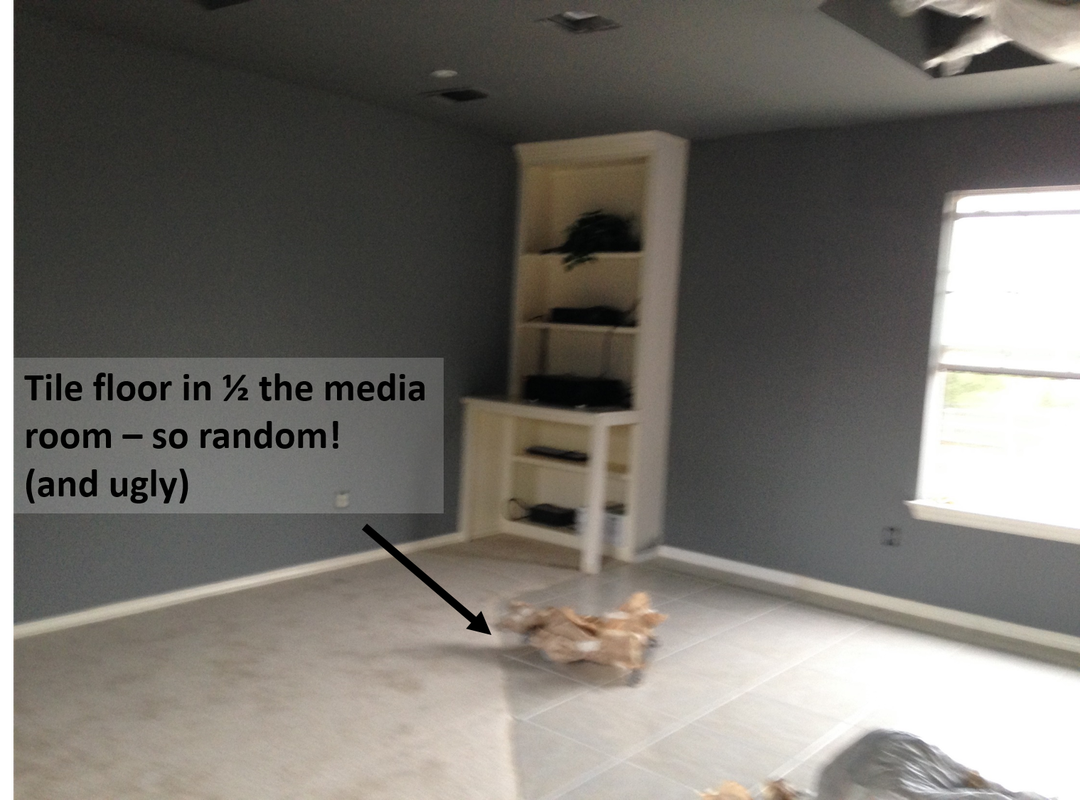 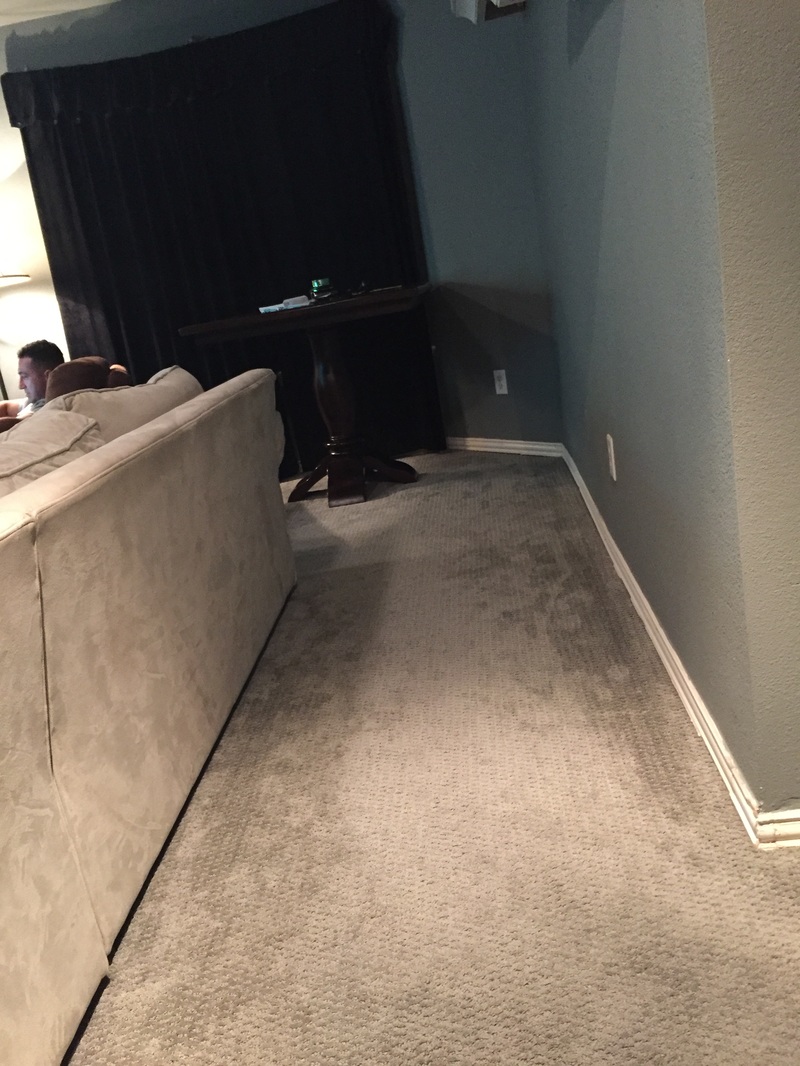 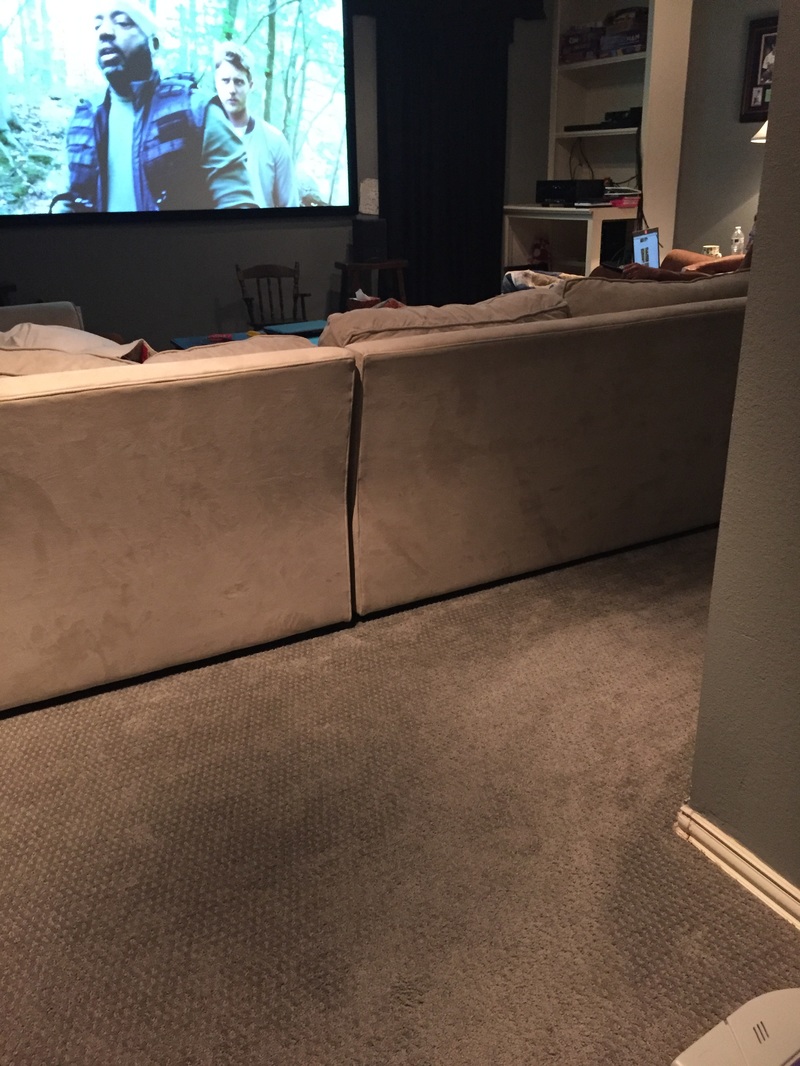 If I remember, or care enough, I'll update the picture with the carpet once it's been vacuumed and the place has been picked up. Anyway - that's it! New paint, tile pulled out, new carpets, and new/refinished wood floors in one week's time. We moved in and starting the remaining 100+ list of projects we have to truly make this place our own. Follow me and see!
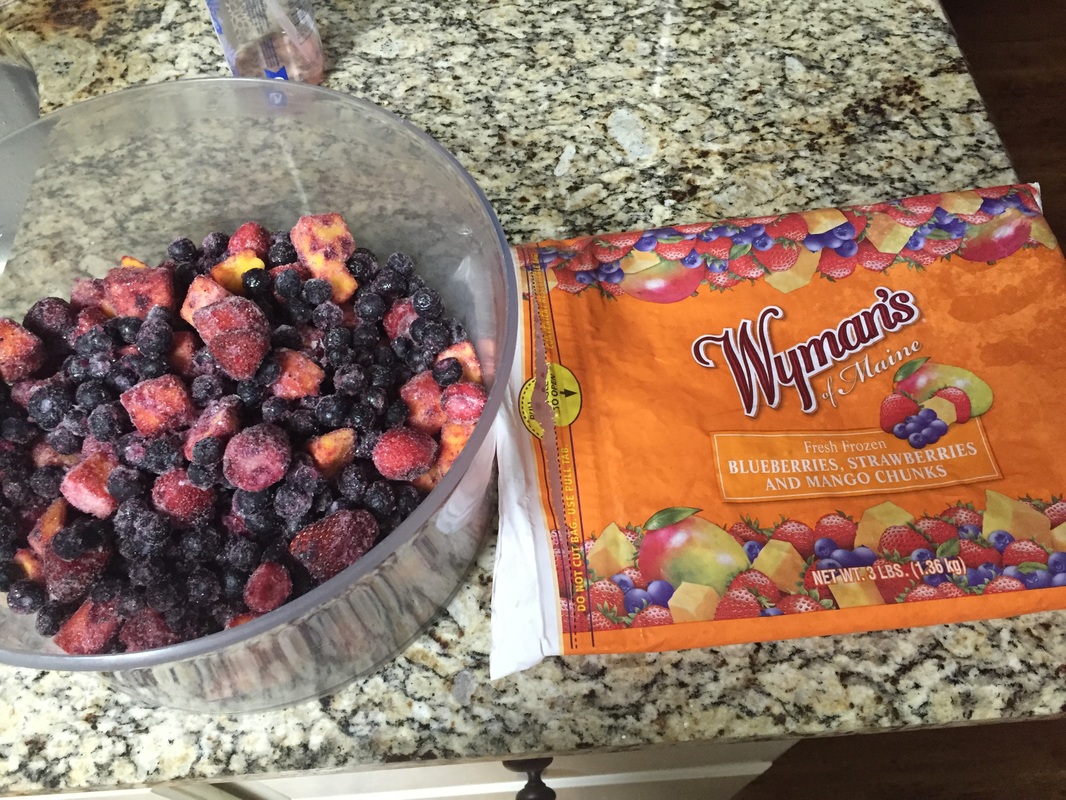
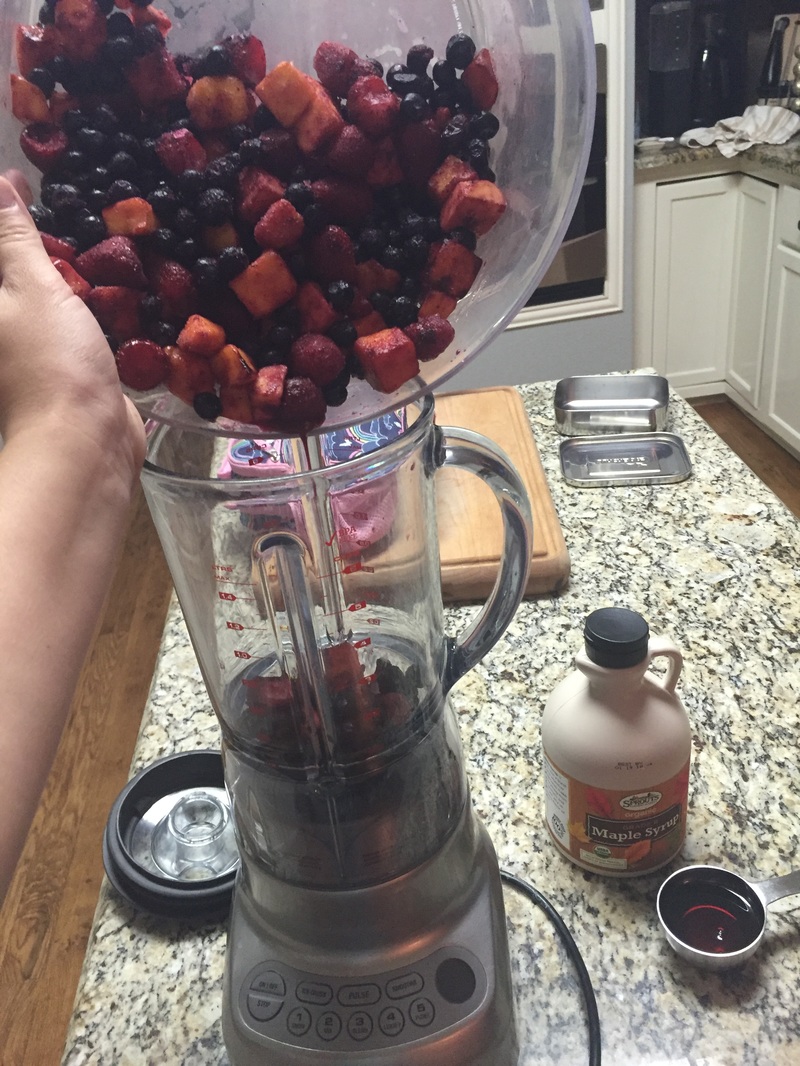
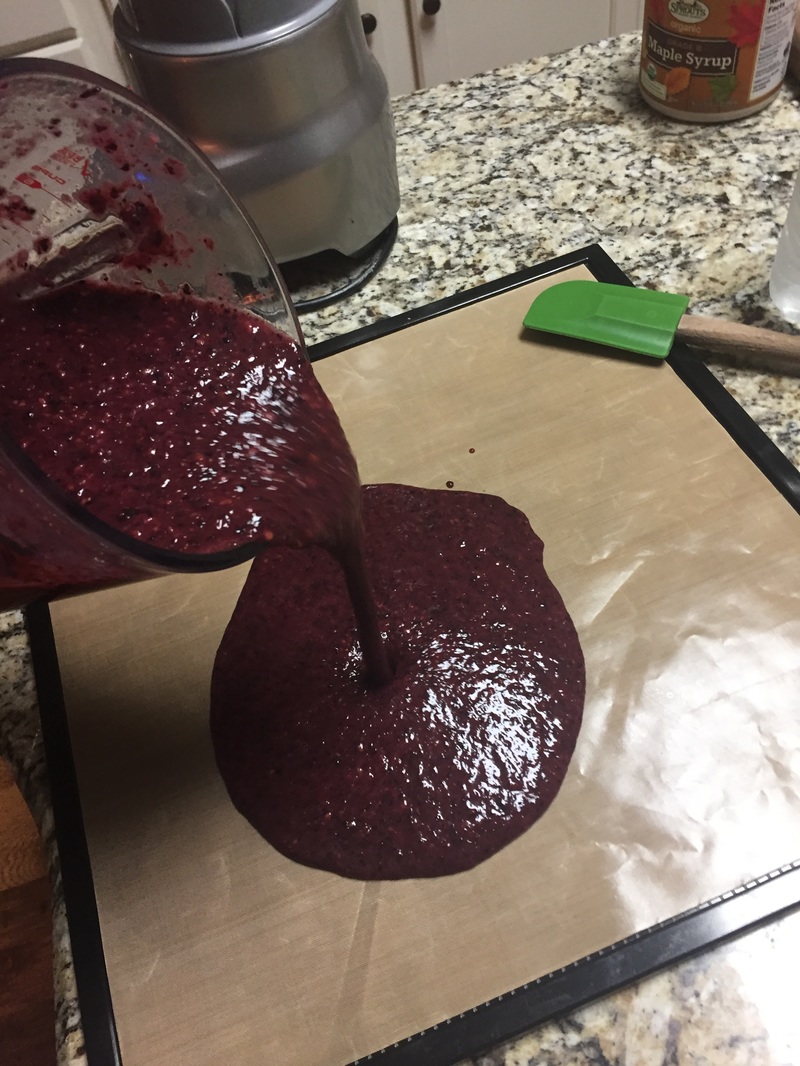
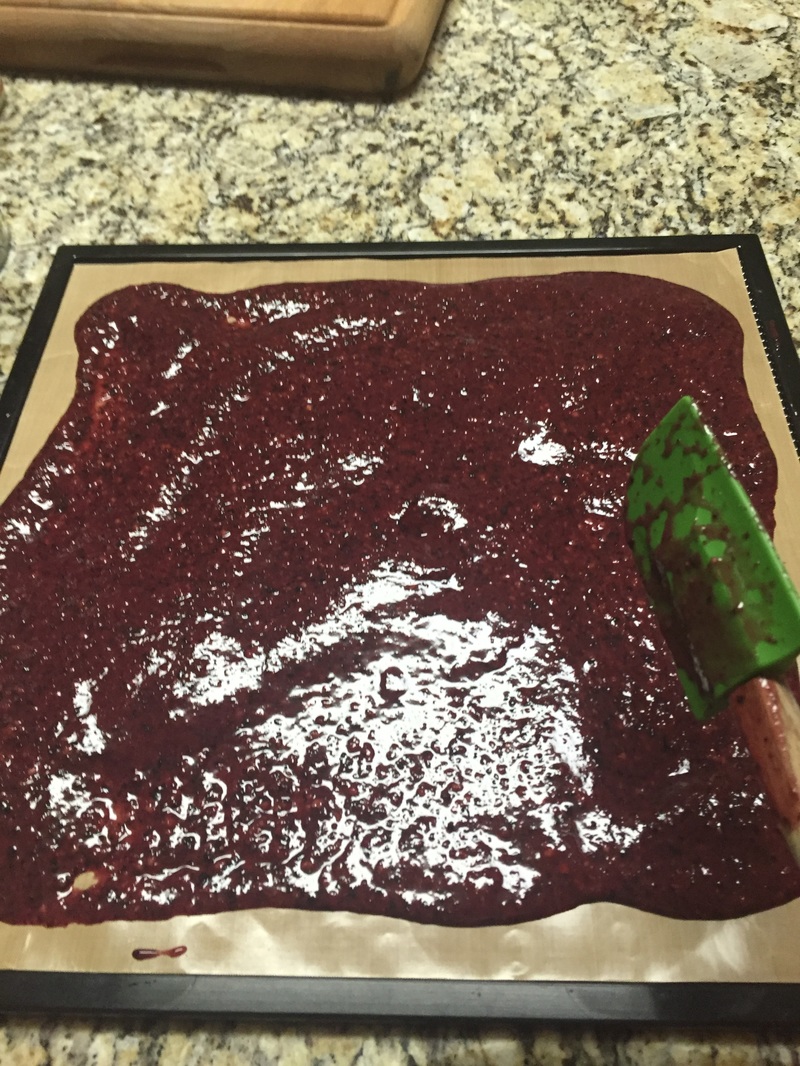
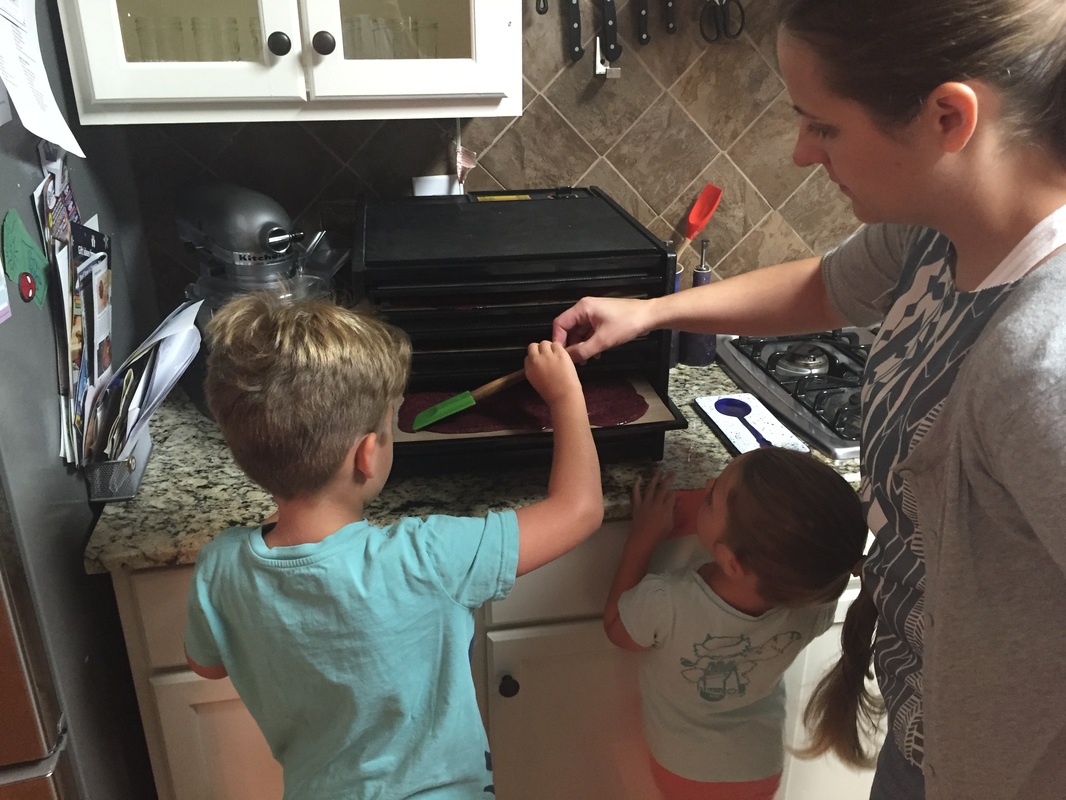
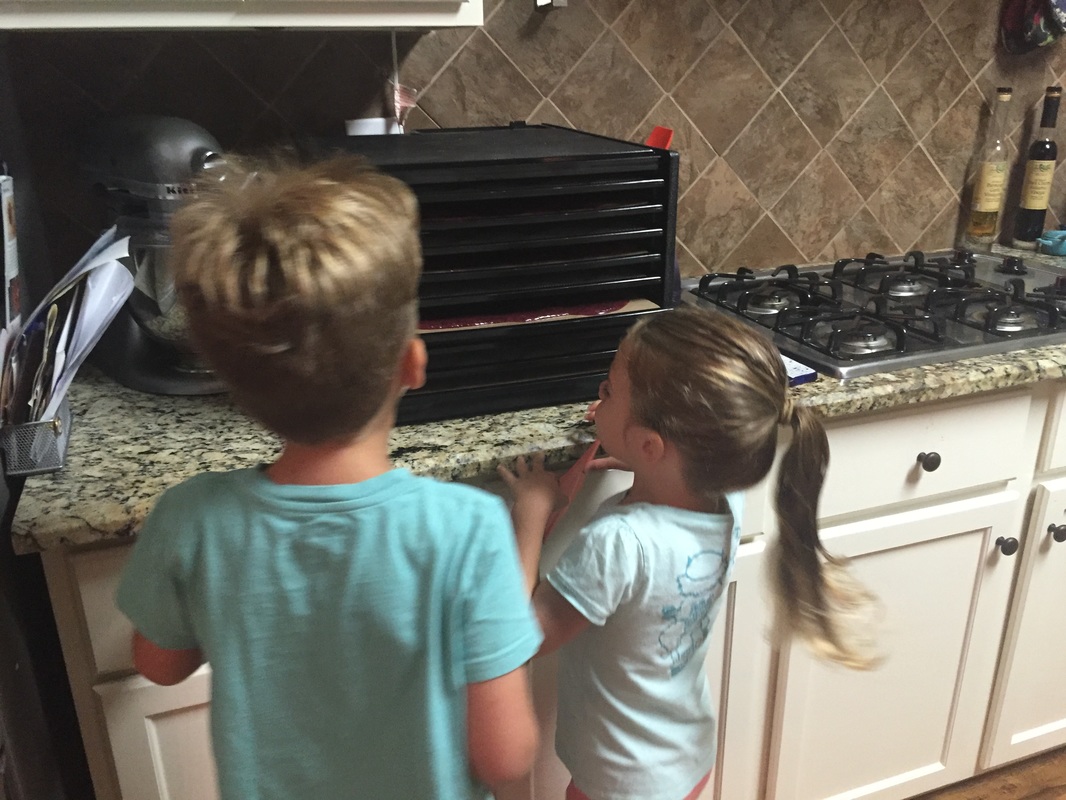
Hello again, my name is Amber, and I'm a Dehydrator junkie. No for real. This is no joke. I've tried to cut back on how many times I make fruit leather - because no matter how healthy, organic, and natural fruit leather is - when you eat 2 lbs of it in one sitting; it's no bueno! Anyway, like all junkies, I like it when others join me :) So welcome! What does a dehydrator do? It runs at a low temp (lower than your oven will go) to remove the moisture from your food old-school style (like circa 1700's Native American days) drying out and "processing" food for long term storage. My first, and favorite, dehydrated food is Fruit Leather! What is Fruit Leather you ask? Well it's any countless combinations of different fruits, blended up together, poured on a non-stick sheet, and slowly dried out at 135 degrees over ~10-12 hours time. So basically fruit roll ups, but without the additives, chemicals, and "delicious" scientifically manufactured plastic taste. 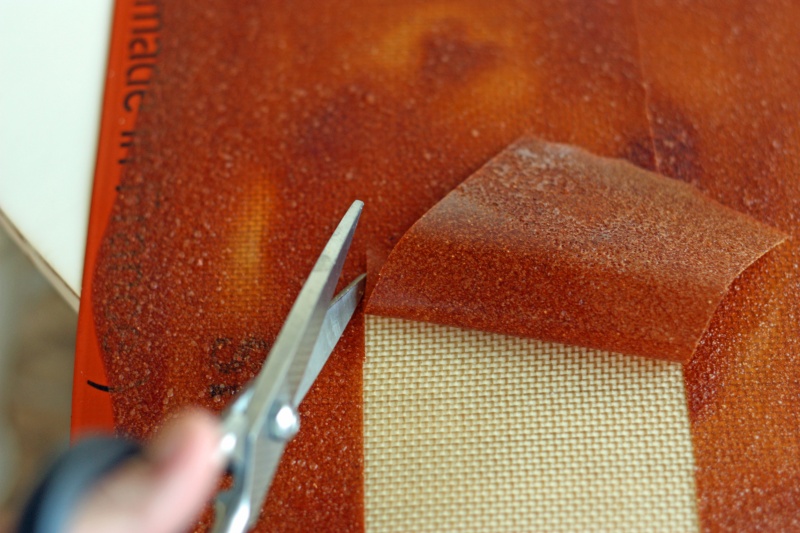 VERSUS 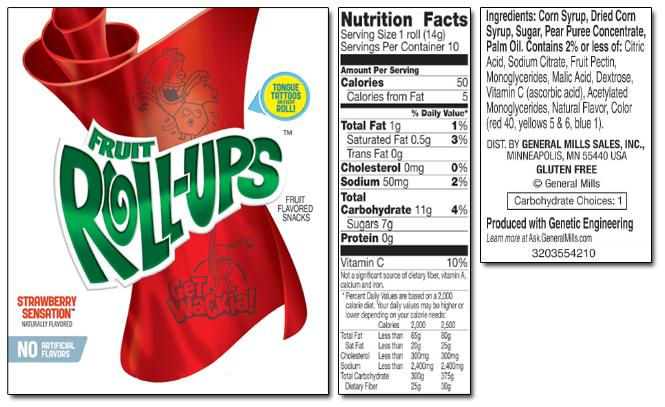 I went out and bought my ahhmazing Excalibur Dehydrator and the first thing I made was fruit leather. I probably make it about once a week now and we eat it within 2-3 days. FRUIT LEATHER INGREDIENTS: Any fruit you have laying around the house. We buy/eat a ton of fruit in our house. But sometimes I buy too much and if anything looks like it's getting over-ripe or about to spoil I remove any peels or seeds and throw it in the freezer. So when it's time to start a batch of fruit leather I dig in the freezer and put all my fruit in the blender. This makes me happy, because I'm a miser at heart and food waste kills me. I've never made the same batch of Fruit Leather twice and I've never had a bad batch. I think it's nearly impossible. Some of my favorite combinations are listed below (and I love adding a lime or two to any of these if you like it a little tart). I also buy the big bags of organic frozen fruits from Costco at a bargain and they're usually in pre-mixed varieties. :
Honestly this list could be 100's, 1000's deep. I do any and every combination of pretty much every fruit possible. FRUIT LEATHER RECIPE:
       A Few Tips:
Products mentioned in this blog:
 Lemon Cupcakes
Cupcake Ingredients 1 stick plus 1 tablespoon soft butter 1/2 cup plus 1 tablespoon sugar 2 eggs 3/4 cup all-purpose flour 1/2 teaspoon baking soda 1 teaspoon baking powder 2 teaspoons vanilla extract 2 to 3 tablespoons milk 1 Lemon- zested For the frosting: 2 large egg whites 3 cups confectioners' sugar 1 teaspoon lemon juice 2 tsp Lemon juice (same as above- but you're using the juice) Directions Bring cold ingredients to room temperature and preheat the oven to 400 degrees F. Put all of the ingredients for the cupcakes except for the milk into a food processor and pulse until smooth. Add the milk down the funnel, to make a smooth dropping consistency. Divide the mixture between a 12-bun muffin tin lined with muffin papers, and bake in the oven for 15 to 20 minutes. Let them cool a little in their tins on a rack, and then take them carefully out of the tin to cool in their papers, still on the wire rack. Royal Icing: Combine the egg whites and confectioners' sugar in a medium-size mixing bowl and whip with an electric mixer on medium speed until opaque and shiny, about 5 minutes. Whisk in the lemon juice, this will thin out the icing. Beat for another couple of minutes until you reach the right spreading consistency for the cupcakes. Yield: sufficient to generously ice 12 cupcakes * Recipe adapted from Nigella Lawson cupcake recipe, Foodnetwork.com I've been milling my own flours for a few years now. After the first time I tried it, I never went back! When you take a bite of your freshly baked bread that you made from grain - you'll basically die and go to heaven. See the world's best cornbread recipe; starting with actual corn kernels in my blog post here. 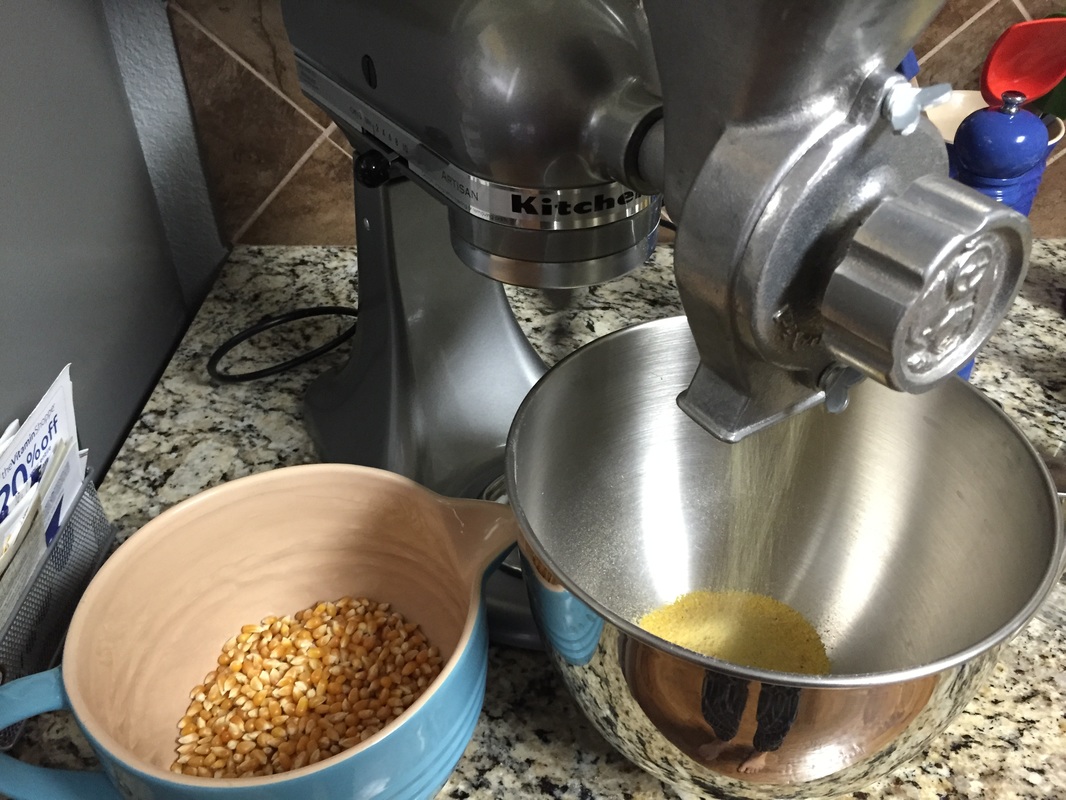 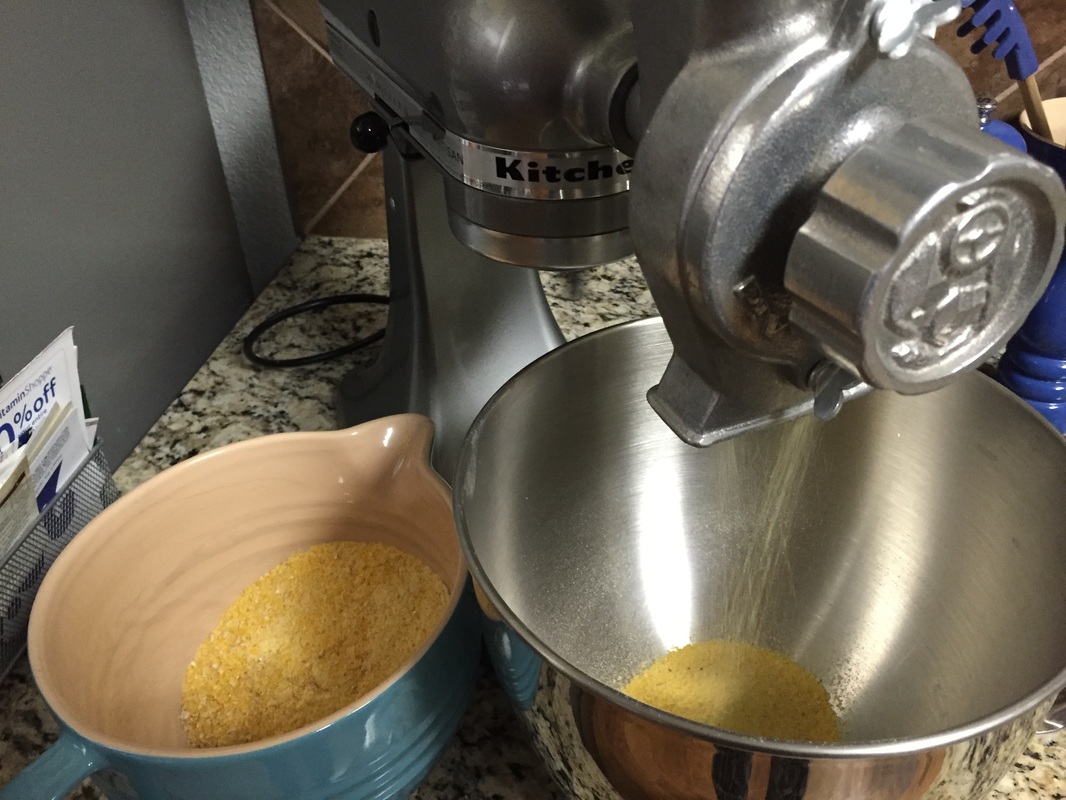 White flour has been processed, refined, and striped of it's nutrients. Here's how in plain English: Wheat berries consist of three main layers: (1) Bran, (2) Germ, and (3) Endosperm. Nutrients mainly live in the outer layer, the (1) Bran. In milling white flour, this bran layer is the first to be removed. The grain then goes through a second milling to remove the (2) Germ, which also contains nutrients. The end result is the (3) Endosperm which is then milled and often bleached; which makes it filler with few nutrients. . Milling wheat berries and grains at home allows you to keep all the nutrients in the flour. First, let me recommend the book that helped get me started The Homemade Flour Cookbook. Cooking with fresh unrefined flour can be a little more tricky than opening a bag of all-purpose white flour, so a little preparation can be very helpful. Let me give you the long and short of it and save you a few hours. To get started you need a Grain Mill. There are Hand Mill's - but I can't relate to wanting to add manual labor and more time to the cooking process. Unless you want to multi-task and get a work out in while you're cooking - I recommend you pass. The other options are an electric grain mill, a large coffee grinder, or a high-powered blender. I found an electric grain mill on craigslist before I found a coffee grinder or a high-powered Vitamix Blender (which is the most expensive option), so that's what I use. I started with a Blendtec Kitchen Mill that I bought for a steal- that's actually how I met my essential oil sponsor; I bought her flour mill. I've since moved to the KitchenAid Mixer Grain Attachment. Both these mills work great. The main difference is that you can adjust the fineness of the flour from slightly gritty (like for cornbread) to more fine powder for something like baking pastries. I love them both though, either one is fantastic and I highly recommend either one. If you've got a Vitamix or have been looking for the excuse to buy one - here's your chance. They're fantastic for making flour. I've never been able to stomach the price tag, so I haven't used one myself. But I've stared in awe as the Whole Foods employee gave the in-store demo and I've read how well they work milling grains. Why is it great to mill your own flour? Wheat berries consist of three main layers: bran, germ, and endosperm. Nutrients mainly live in the outer layer, the bran. In milling white flour, this bran layer is the first to be removed. The grain then goes through a second milling to remove the germ, which also contains nutrients. The end result is the endosperm which is then milled and often bleached; which makes it filler with few nutrients. . Milling wheat berries and grains at home allows you to keep all the nutrients in the flour. All-purpose flour found in stores comes from wheat but it has had all its nutrients stripped away and has often been bleached to remove any color of what. Now that you've got your mill, it's time to choose your grain.
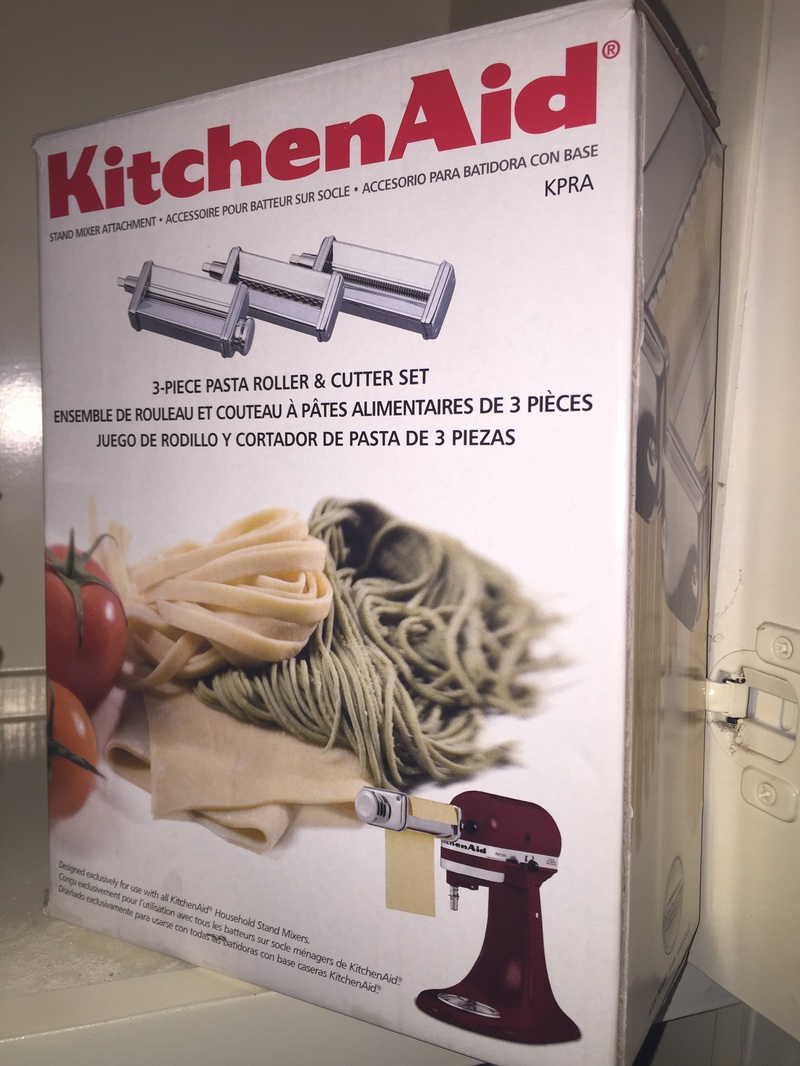
The above list is a great selection of grains that are fairly easy to find at either Central Market, Whole Foods, or Azure Standard (online). Take your old bread or pasta recipes and switch out the types of flour. My next post will focus on Gluten Free Grains. About three years ago I bought a KitchenAid 5-quart Artisan Stand Mixer. Pretty quickly I started acquiring all the fun attachments that can go along with it. I bought the slicer/shredder attachment, the food grinder attachment, and the grain mill attachment. The grain mill is tied for my #1 favorite - it works so great I started using it more than my Blendtec Kitchen Mill so I ended up giving the Blendtec to my mother since she wanted to start milling her own flour too. The other attachment that is tied for my #1 Favorite is the Pasta Roller and Ravioli Maker. Come to find out, making pasta is actually really easy!
The pasta roller attachment comes with a handy little manual with some really accessible pasta recipes. To make an egg pasta it's literally only four ingredients: 4 eggs, 3 1/2 cups flour, 1/2 tsp salt, and 1 tbs water. Egg Pasta Ingredients:
*I like to use flour that I mill myself from organic Durum Wheat Berries; the hardest of all wheat and the most commonly used for pastas. I had a hard time finding these - Whole Foods and Central Market never carries them. I've purchased from Purcell Mountain Farms (Azure Standard has them, but they only sell in bulks of 20 lbs). Mill the Durum Wheat Berries until you get the 3 1/2 cups of Durum Semolina Flour you need. It's confusing - but apparently grinding the grain is a simple form of processing that turns Durum Wheat Berries into a flour called "Semolina Flour," Egg Pasta Directions:
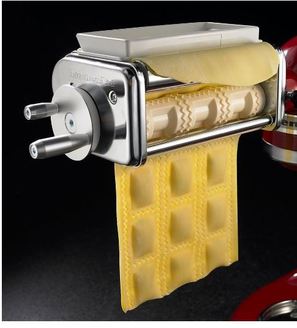
The absolute best lasagna I've ever had was an adapted Martha Stewart recipe using my own homemade lasagna sheets (honestly)! Recipe is shared at the bottom of this post. 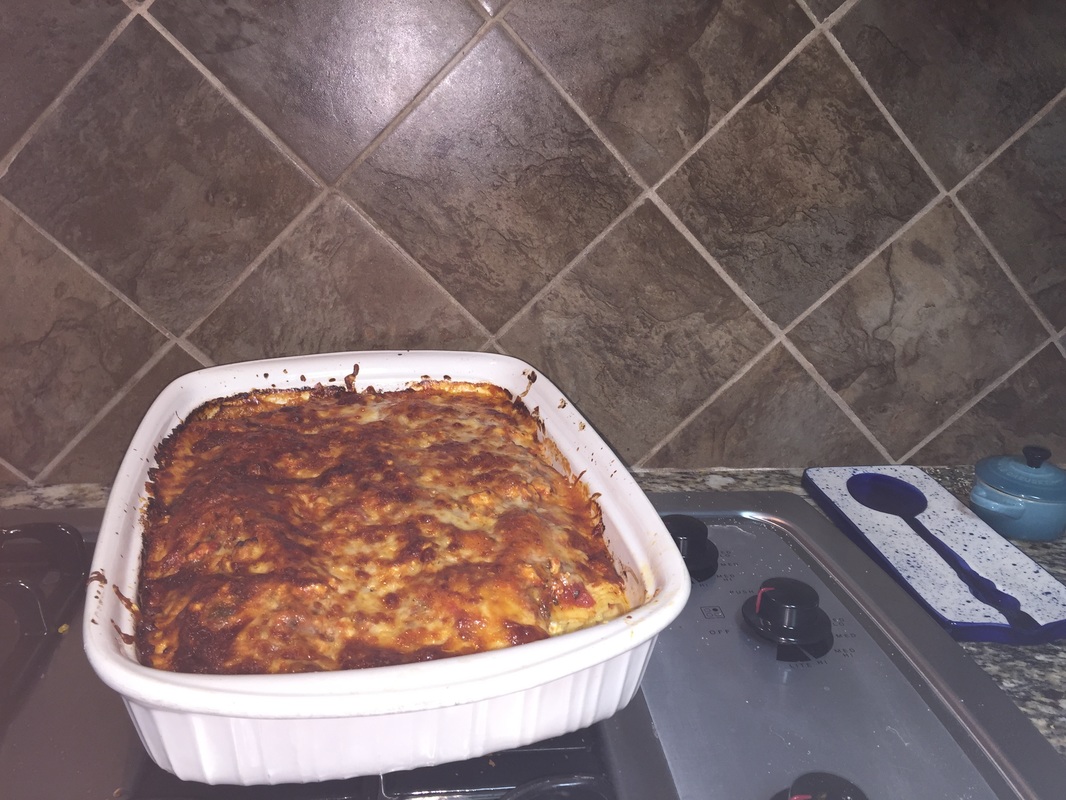 If you want pasta that's not lasagna, you switch attachments to either the spaghetti, the fettuccine, or ravioli attachments and run the sheets through one at a time. They sell pasta drying racks, but my Uncle in Maine was kind enough to make me one (he's a woodworker). 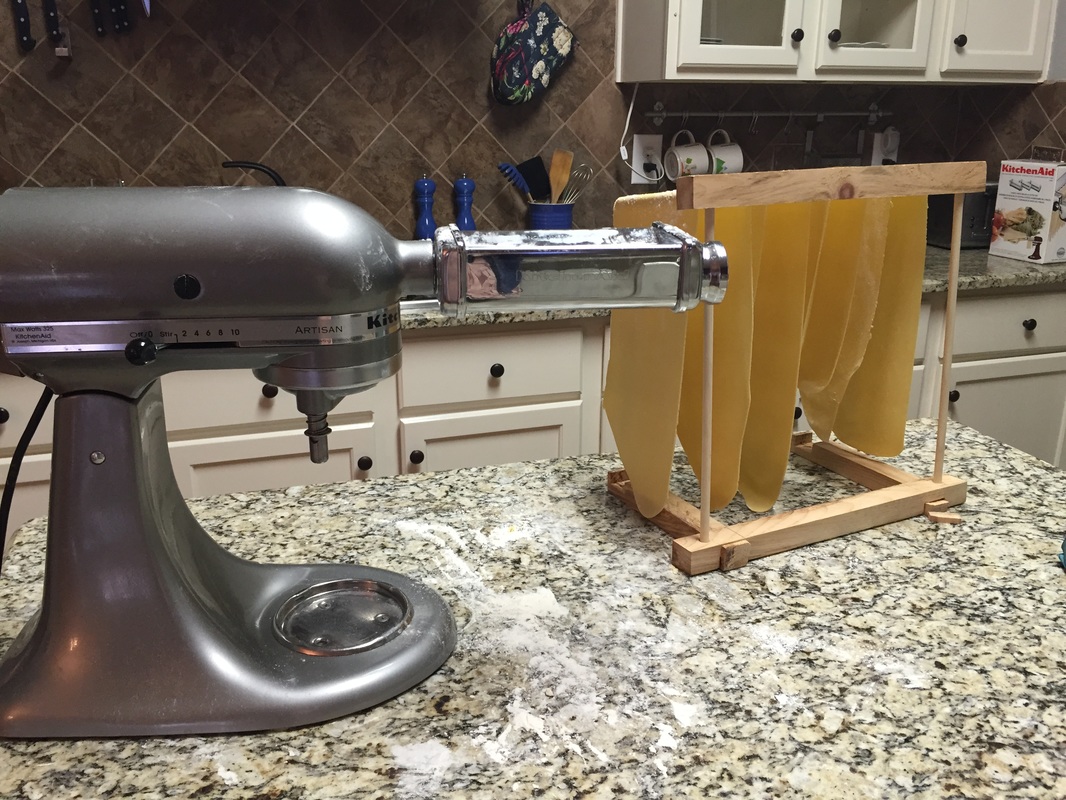 To make ravioli is pretty easy too. You take your pasta sheet (that you flattened up to setting "7") and feed it through the ravioli attachment while pushing in whatever stuffing you've cooked up. There are tons of delicious filling recipes: my favorite is a basic 1 part lump crab + 1 part ricotta cheese (salt and pepper to taste). The one mistake I made on my first batch of ravioli was to make sure you flatten the lasagna sheet the full width of the attachment. Mine was a little thin (because when you do spaghetti or fettuccine it doesn't really matter how wide the sheet it) and the ravioli filling oozed out the 1/2 finished sides. 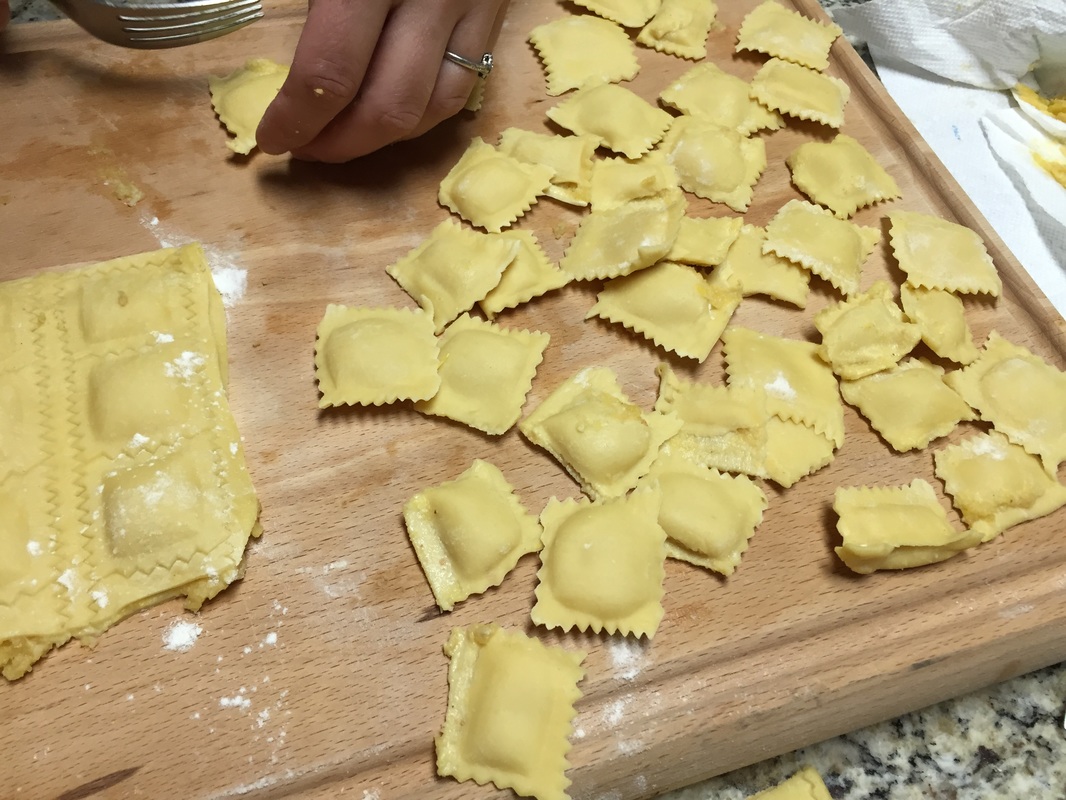 Making ravioli is easy, but it's not as easy to visualize as everything else. There's a good video by Williams Sonoma you can watch that demonstrates it. I've watched pretty much every kitchenAid video on Williams Sonoma's YouTube channel: Martha Stewart's Three Cheese Skillet Lasagna, with some personal modifications in the below recipe (I like to add homemade Italian pork sausage that I grind myself using my sausage grinder attachment; I'll post that recipe in a separate blog) My version of Martha's recipe is better in my opinion - I'd recommend you follow the below: INGREDIENTS
DIRECTIONS:
Products mentioned in this blog:
The day I became pregnant with my first child (Greyson, who's six now) was the day my husband and I switched to organic eating and began on the path to a "traditional cooking" lifestyle. It's all about eating healthy, organic and unprocessed whole foods like our great grandparents did before the food industry went all industrialized corporate on us. Basically I don't want my family eating anything that was made in a science laboratory.
The first step of our adventure was to get educated. We watched a bunch of food documentaries like Supersize me, Fed Up, Food Inc, Ingredients, etc. Once you watch one, your perspective changes pretty quickly. We spend many hours reading books and blogs like 100 Days of Read Food, Traditional Cooking School, etc. Information is one thing, but changing a lifetime of habits is another thing... I worked with a woman in her mid-20's, an electrical engineer, who'd moved to Dallas from Minnesota and casually mentioned that she mills her own grain into flour. That sounded so foreign and odd to me- but kind of cool. I thought on it for a while and I finally just felt compelled to try it for myself. I quickly found the Blendtec Electric Grain Mill and embarked on this new adventure. I went to whole foods and bought a couple of different varieties of grains: Spelt Berries, Wheat Berries, Corn even. "Milling" just means you dump the grains into a blender designed for hard dry grains and fresh ground whole wheat flour comes out the other end. Cornbread is my favorite bread. Martha Stewart has a cornbread recipe (see below) that is out of this world. I've made it for years now and it's made every other cornbread I've had since pale in comparison. So I immediately dumped some corn in my fancy new Blendtec Mill and used my freshly ground corn meal in this ahhmazing cornbread recipe. Perfection is an understatement. That was all it took - I was hooked. Pancakes taste better. Breads taste better. My chocolate chip cookies are famous in my family and it's just the nestles classic recipe. It's only because of all the whole fresh organic ingredients I use that make a big difference. One word to the wise though (which took me quite a few times to figure out) - 100% whole grain flour doesn't rise like multi-purpose white flour. It doesn't have the stretchy network of gluten that forms the structure of bread dough and let's it grow! I made a few of the flattest batches of cookies you ever saw. They actually tasted pretty decent... but they were super thin and sad. So word to the wise - do a 50/50 mix of Whole Wheat and King Arthurs White Whole Wheat Flour in your baking recipes. After playing with different grains and flours, the next step was to use them in fresh made pasta. Which led to making sourdough bread from living yeast. Now I make homemade yogurt. I dehydrate foods - fruits, vegetables, beef jerky. We raise our own eggs and I do my best to make everything from scratch: BBQ sauce, ranch sauce, spaghetti sauce, alfredo sauce, jams, and tons more. WARNING: Once you try anything from scratch you can never eat the stuff from a box or jar again. Seriously - make this brownie recipe and tell me if you'll ever eat boxed brownies again. I'll add one disclaimer to this post. I'm not judging anyone who prefers it a different way, a different taste, a different style. This is just me sharing my cooking journey. Everyone likes food, the way they like it. Sometimes I just don't have time and I make a frozen pizza. I work full-time, I get it. Time is limited and I admit that doing it this way takes more time... but honestly not as much as you might think. Sometimes it really is negligible. Source referenced: * http://phys.org/news/2010-01-chemical-additives-food.html#jCp Martha Stewart's Jalapeno Corn Muffins INGREDIENTS:
INSTRUCTIONS
Products mentioned in this blog:
Once we decided what age and breed of chickens we wanted, we thought about how many we wanted. We thought six was a good number because we wanted enough eggs for a family four and some left over to share with friends, family, and neighbors. The average hen lays five eggs a week; so 30 eggs a week seemed like a good big number, but not TOO much. We thought if six worked out and we eventually might want to get more and maybe start selling some eggs at a Farmers Market. So anyway, we meet up with Becca at RGB Ranch to pick up our five Australorps and one Rhode Island Red (see how we decided on their breeds/ages in this blog). Tip #1 - bring something to put the chickens in! Hahaha - yeah we didn't even think of that one. Becca was kind enough to loan us her chicken crate. We paid her $15 for each of the chickens, which is about average. They were 3 months old (teenagers) and ~3 months away from laying age. We couldn't be more excited to bring them home!  Now I'd like to introduce you to our two dogs, Maggie and Zoe, who were waiting for us at home. Duunnn... dunn... duuunnn... duuunnn... duunnnnnnn... Dun. Dun. Dun. Dun. Dun. Dun. Dun. Dun. Dun. Dun. duuunnnnn duunnnn!  Normally they're the sweetest little angels on the planet. Mild, sweet, soulful. Maggie's the black one... she's not too smart, but she makes up for it in kindness. Oh except for that one time she caught the rabbit hiding out under our shed... that should've tipped me off. Now we'd done our research and had the common sense to know not to put the dogs in the backyard with the chickens right away. To give them time to acclimate to each other. But try doing that with a house with a dog door and a back door that's being used by two young children. Our biggest mistake was not keeping the chickens securely cooped up until we'd made sure the dogs weren't going to eat them. We hadn't finished building the chicken run yet, so we had to allow the chickens to free range all day. We kept the dog door locked, which was difficult because both Maggie and Zoe are getting super old (12 and 13), so if they can't go out immediately we run the risk of an accident. Well anyway, I left the door open by accident on one of the first days after bringing the chickens home and Maggie was in the backyard in a flash. Within 3 seconds she'd caught one of the black australorps and shook her until she was dead. It was pretty horrifying. Feathers everywhere. I'm screaming like a banshee. I was just glad the kids weren't out there. I used a shovel and rake to pick it up and put it in the trash bin so that the rest of the chickens wouldn't see it and be sad about their lost friend. Unfortunately my kids are a bit smarter than the chickens (errr a lot more actually) and that same day Greyson (my 6 year old son) says,"We're missing one! I can't find her." I gave him a long look and he says "What?" I went with my gut, which is to never lie to my kids. I think they can handle more than most people give them credit for and learning about life/death is part of growing up. I didn't want to make a big production out of it, I matter of factly told him "Well babe, Maggie got one." Charlotte's too young (4) to really get it or care. Greyson seemed pretty unfazed and took it in stride. I felt like it was pretty a good parenting moment. It was about a week later that the next sad sad murder happened. I was sanding the chicken coop making it pretty for our hens (and neighbors). The kids were coming in and out of the backyard while I was working away and Maggie pushed past Greyson into the backyard. I'm using a sander machine so I don't hear him shouting as Maggie darts around the backyard chasing the chickens around. She full-on chases a chicken in a circle around Greyson's legs and catches and shakes the poor bird to death in front of him, At the crescendo of the attack is when I finally hear it all and seconds too late to reach them. My son has witnessed a murder. I can definitively say that he has had his first traumatic childhood event that is sure to be burned into his memory. (sigh) Parenting fail. But this kid is a champ. He's a bit shaken up, but he takes it on the chin. I'm pretty impressed by the guy's resilience. Now Maggie knew this time that she'd done something bad. Naturally I'm very upset with her and put her in her crate (don't worry, I love my dogs. I didn't beat her or anything, but she knew I wasn't happy and that she'd done wrong). I was worried she'd never be allowed in the backyard at the same time as the chickens again. For the next ~2 weeks we did a pretty good job of keeping the dogs and chickens apart. We'd bring the dogs into the backyard on their leashes so we kept a controlled environment. We let them get to know each other and get acclimated. Once they got over the novelty you could see the dogs ignoring the chickens and everyone relaxing. Our next step was to let the dogs off their leashes while standing protectively by the chickens. Maggie never again attacked a chicken! It just took some time and patience. Things are so great now. Here's Maggie hanging out with the chickens and eating kitchen scraps with them! I'm not sure if she thinks she's a chicken or if the chickens think they're dogs. But they're definitely good ole' friends now! Everything's forgiven. 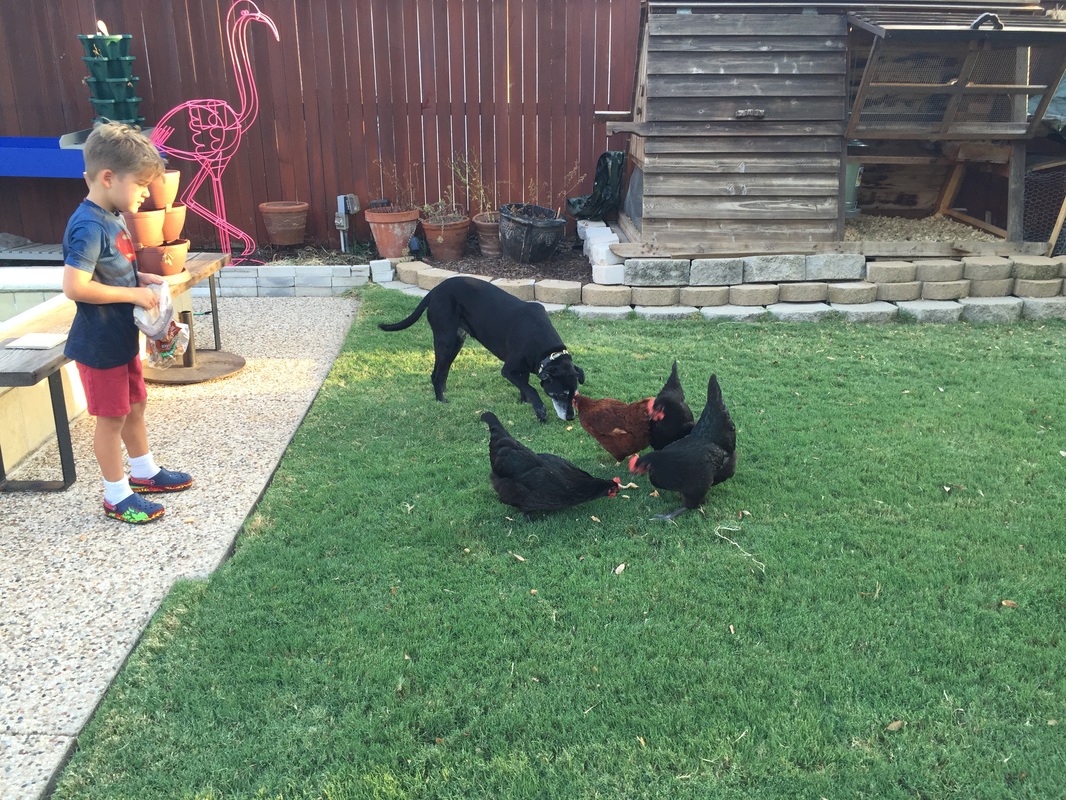 Long story short - Have a secure place for your chickens to safely keep separated from any pets you've got. That was our big mistake. We rushed bringing the chickens home too quickly. We should've built their secure run first.
Make sure you do the long drawn out introduction and acclimation period before letting any of your other animals in the same space as your hens. Side note: four chickens is not enough for a family of four. We're getting 3-4 eggs a day which we go through pretty quickly. I like to bake and I make eggs more mornings than not. We're still having to buy eggs from the store every now and then to supplement, which is a complete bummer. The City of Allen just passed a new ordinance finally allowing backyard chickens (see my journey passing the ordinance through in the blog post HERE). They limited it to four chickens (I'd been pushing for six, but I figured compromise is a part of democracy). So we're going to try and make four work. I might consider working on pushing for an increase in the # of allowed hens once enough time's gone by for them to see that residents don't complain like they were worried they might. But we'll give it some time and see... |