|
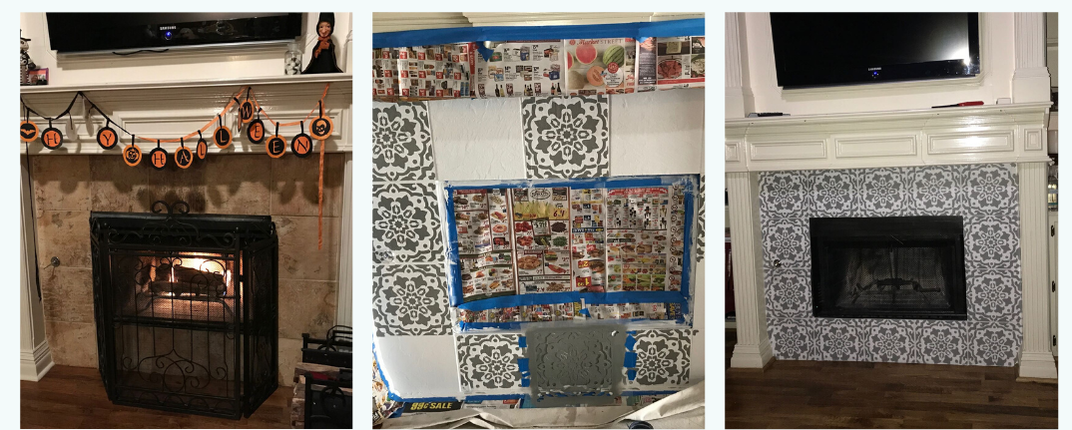
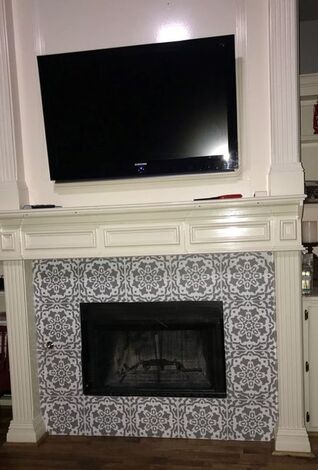
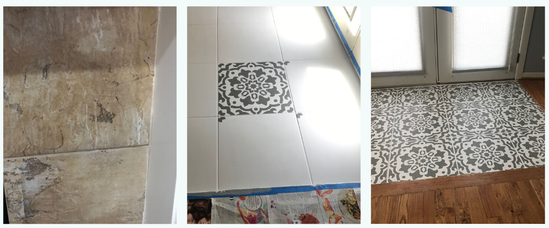
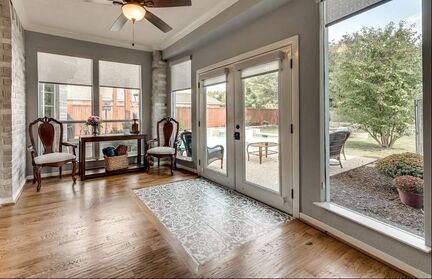
I'm right-brained and my visual surroundings tend to have a strong influence on my mood/emotions. Our fireplace and the tile area in front of our patio door would just hurt my eyes to look at them, They were this ugly orangish builder-grade tile. I thought about replacing the tile entirely but we've got a mile-long list of updates, repairs and renovations that we want to make to our house that total something like $100K... That basically means we have to prioritize our projects and find ways to do some of them inexpensively. When I found a handful of pins on Pinterest that showed how easy it was to stencil & paint tiles instead (for 1% of the cost), I had to try it! I felt pretty confident I could tackle this project on my own after stenciling my laundry room wall pretty well. So I searched through the stencils at cuttingedgestencils.com and found the perfect one, the Amalfi stencil. I emailed their customer service and requested custom sized stencils made-- 11 3/4” square for the fireplace and 17 3/4” square for the patio entryway. They cost a cool $38. Rust-oleum's chalk paint is a bit pricey and I needed to buy most the materials new. In total it cost $250 which is basically nothing compared to removing/replacing tile!! Shout out to Cutting Edge Stencils- they have fantastic tutorial videos that painstakingly illustrate how to use the stencils. I watched a few and felt entirely prepared to get started. One easy weekend project later, I declare our newly painted tiles to be beautiful and a total Pinterest WIN! If you’re considering this for your home, all I can say is don’t be intimidated. It's a shockingly easy project to tackle. This one was more about being fastidious and following the steps closely. I’ll skip to the chase and start out with the before/after photos—the best part of any blog!! 😊 See the project steps/instructions just below the photos: HOW I PAINTED MY UGLY BUILDER GRADE TILE FLOORS:
It’s been 5 months since I painted the tile and it still looks brand new. I’m confident it will hold up for years. They’re a serious statement look. I can’t help telling people I painted them and they’re always blown away. The contractor who renovated our bathroom couldn’t believe it. He took pictures to share with another client who’d just been talking about painting their existing tile. The best part? This cost is about 1% of what tearing the tile out and replacing it with new flooring would’ve cost! This project only cost $250!!! *Disclosure: This post contains affiliate links, meaning that I get a commission if you decide to make a purchase through my links, at no cost to you.
We’re in the process of buying a new house now which has too much tile for my taste, but we don’t have the budget to pull it out. So, I definitely see a lot more tile painting in my future. I’ll add pictures from that project in this blog too so you can see more examples. Thanks for following this blog and please comment with questions or feedback and share with friends!!
3 Comments
|
HomesteadersCooking & home projects galore! My secret inner-designer revealed. Categories
All
Archives
August 2020
|


