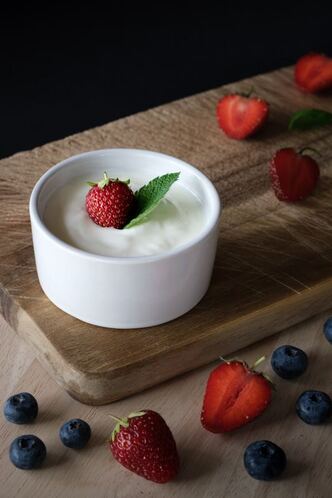
 My husband's grandmother, Marty, always made the most delicious dip with strawberries at all our family gatherings. I was always very impressed with it and probably ate half of it myself. She shared the recipe with me and I'm passing it along in her memory.
This dip is too good. it's only two ingredients and it's not the most healthy (except the strawberries part). But it's insanely delicious and completely binge-worthy. Don't say I didn't warn you! INGREDIENTS
INSTRUCTIONS
That's it! So simple and yet, so mind blowing. You're welcome world.
0 Comments
Buttermilk's pretty pricey and I never seem to have it on hand when I need it. So I just make it! It's so simple- just combine milk & an acidic like milk or lemon juice and voila, buttermilk! Basically the acid slightly curdles the milk- thickening it to the consistency of buttermilk.
INGREDIENTS
DIRECTIONS
Just writing out this recipe has got my mouthwatering. These mussels are so delicious. You've got to pair this with some white wine and crusty bread. You'll be sopping up every last drop of the broth mixture with your bread.
INGREDIENTS
INSTRUCTIONS
I seriously love my San Francisco Sourdough Starter. I keep it in the fridge in a large green mason jar and "feed" it every week or two. It's made up of flour, live wild yeast organisms, and another live organism called a lactobacillus, which is what creates the sour flavor in sourdough and causes the bread to rise.
Live starter is very resilient. If you don't feed it for weeks or months, you can still bring it back. A tell-tale sign that your starter is feeling neglected and hungry is a layer of liquid on top of your starter. That's alcohol, a byproduct of fermentation. If that happens (which it will at some point). To bring it back, you simply "feed it!" To feed your starter, add equal parts old starter + flour + lukewarm water. It will double in size within the next 6-8 hours following a feeding, so make sure the container you're using is less than half full. I usually mix ~4 oz starter +4 oz flour + 4 oz water in a 32 oz mason jar (with the seal cracked to allow for expansion). Beware- I have busted a few mason jars in my time! If your starter is particularly neglected, you may have to "feed" it a few times to bring it back into an actively ripe health. You'll know when it's a healthy white color with bubbles rising and popping like pancake batter on a hot griddle. Caution: if it gets too foamy, that means it's past it's prime and needs to be fed again. The perfect loaf of sourdough bread only needs healthy "well-fed and ripe" starter + water, salt, and flour. INGREDIENTS 1 cup (227g) ripe (fed) sourdough starter THAT'S BEEN FED IN THE LAST 5-7 DAYS 1 1/2 cups (340g) lukewarm water 2 1/2 teaspoons salt 5 cups (602g) King Arthur Unbleached All-Purpose Flour DIRECTIONS
Store the bread for a few days at room temperature, wrapped loosely in plastic; freeze for longer storage. After watching documentaries like Food, Inc., Supersize Me, and Forks over Knives, we wanted to significantly reduce our family's intake of meat and animal products. A few months ago we starting making primarily vegetarian meals and slowly weaned the family from cow's milk moving to almond milk. I starting making plain almond milk with almonds and water only... but I've got two young kids and they were not having it. So I added some dates and vanilla and voila - they love it! This is so easy and cost effective. I just buy a bunch of almonds from the bulk bin and make this anytime we run low.
INGREDIENTS
DIRECTIONS
I like to make a roast chicken (it's so cheap and easy!!) and make a big batch of chicken stock from the leftover skin & bones. Then I can use both the chicken and the chicken broth in this recipe, with enough chicken left over for a second meal the next night.
Those times when I'm short on time I just pick up a cooked rotisserie chicken and boxed organic chicken stock from the grocery store instead. Though, I still make sure to throw the chicken bones/skin in the crock pot overnight to have chicken stock for next time (see bone broth recipe HERE). INGREDIENTS
DIRECTIONS
I signed up to host my daughter's first class social last week and had to come up with an idea for something for 10 kids to do... I was chatting with some co-workers about it, looking for ideas, and one particularly clever woman suggested Halloween sugar cookie decorating. What a perfect idea! Even though, normally I'm not the biggest fan of feeding kids sugary treats - but the cooking/decorating part was so fun it over-ruled my angst about that. I tell myself that the organic/whole grain version makes it slightly nutritious at least. The kids had a fantastic time! Here's my recipe (adapted from my fave woman Martha Stewart!): Sugar Cookie Recipe:
Lemon Icing Recipe:
Directions: Preheat oven to 325 degrees. Mix the dry ingredients together. In a separate bowl mix the wet ingredients and then combine both bowls. Sprinkle flour on the counter, roll the dough out. Using Halloween cookie cutters let the kids cut out the cookies. Bake for 12-16 min (until edges are brown). Let cool completely before icing. For the icing you just whisk the confectioners sugar with the milk until it's smooth. Add any spooky colors like orange and black (I use all-natural, vegan, non-GMO food coloring). Spread over cookies with a small spoon and add any of the sprinkles/decorations if you chose to. Icing will harden in ~20 min. 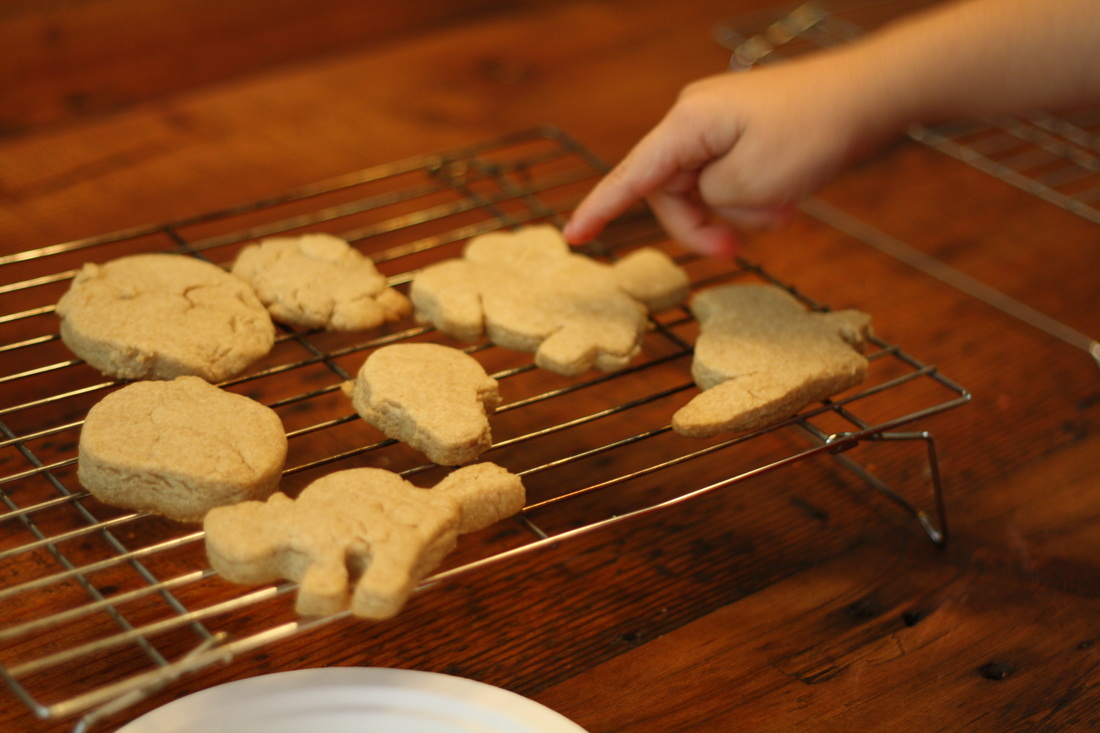 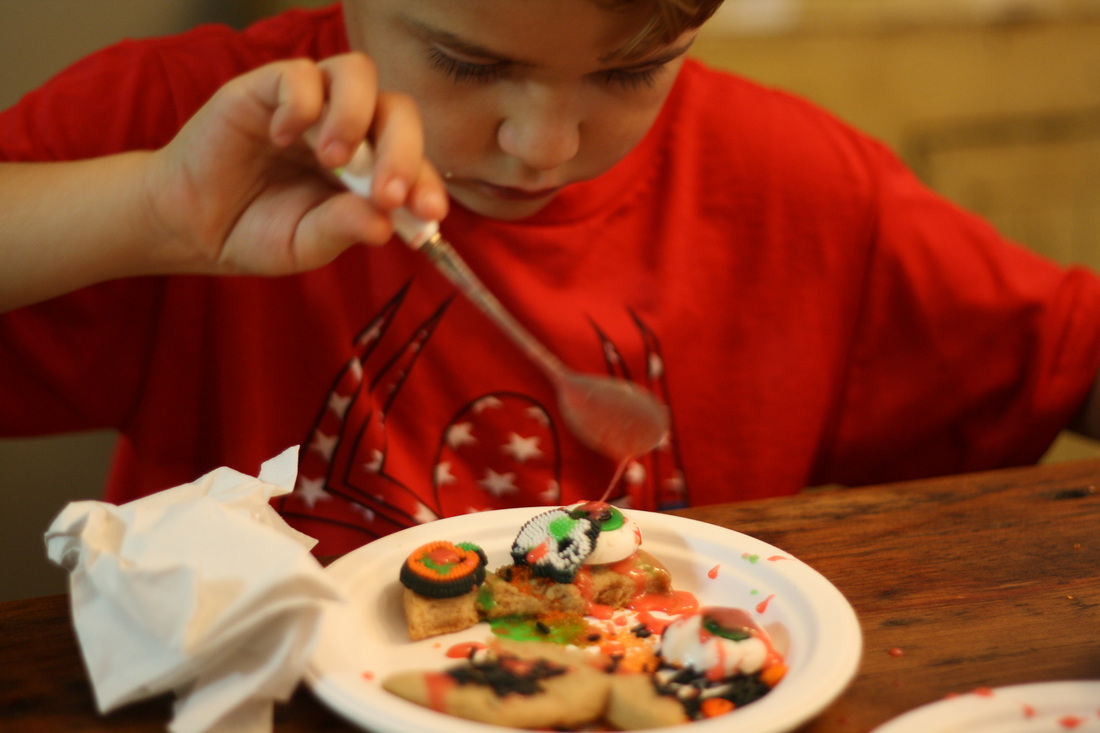 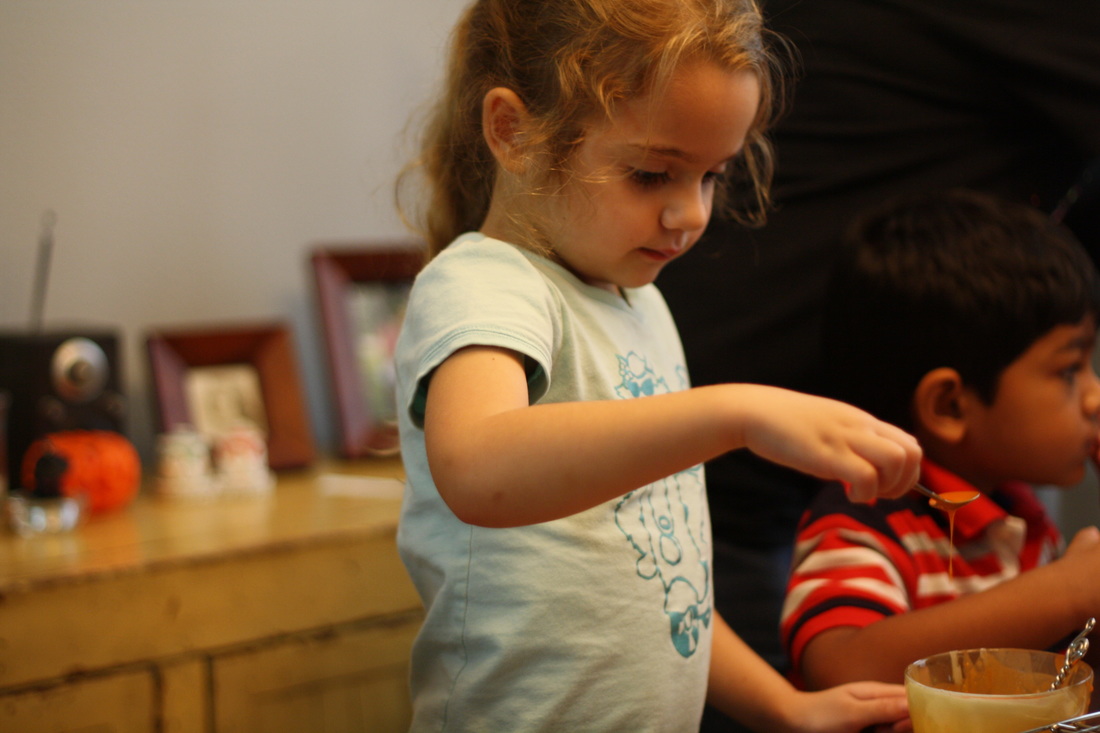 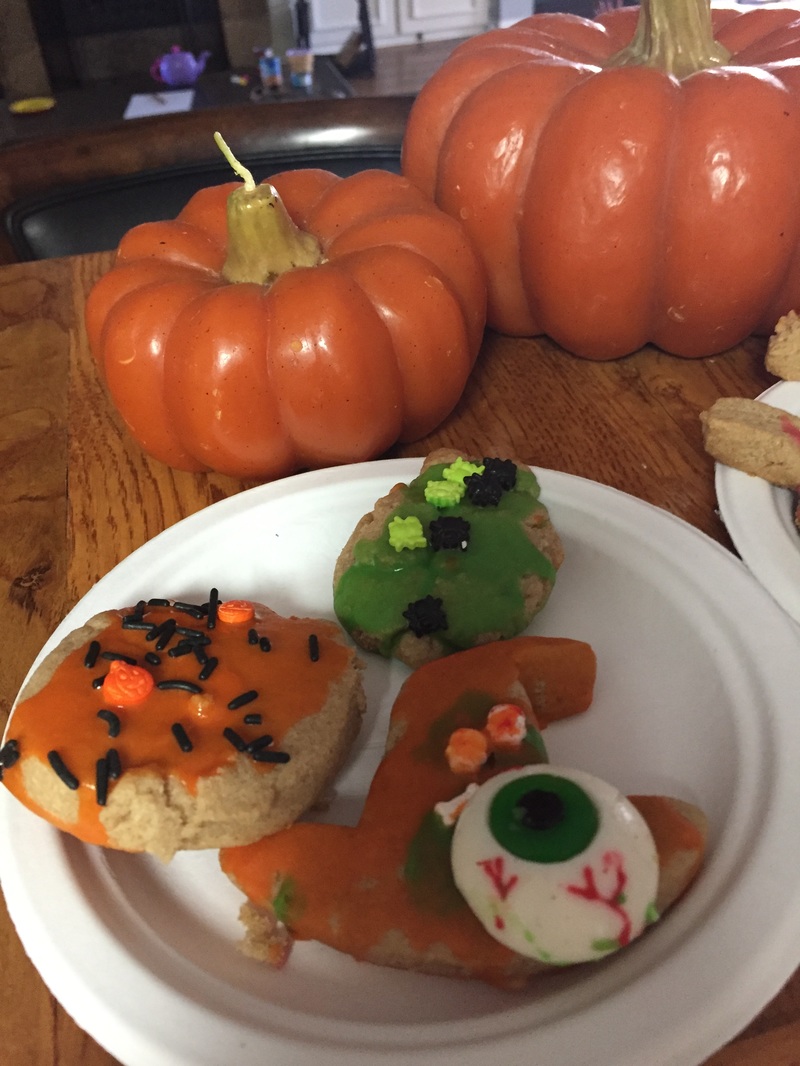 Products used in this project:
*Disclosure: This post contains affiliate links, meaning that I get a commission if you decide to make a purchase through my links, at no cost to you. Making your own sausage is actually a pretty easy to do. Get yourself the meat grinder attachment for your KitchenAid Mixer. If you don't have a KitchenAid Mixer... go out and get that too! You deserve it.
On your way home, stop by the grocery store and pick up the following ingredients. Homemade Italian Sausage Ingredients (using essential oils):
Directions: It's pretty simple really. You combine all the above ingredients and mix the herbs in thoroughly. One thing I'd note is doing get too diligent about cutting the fat out of the pork. I spent forever cutting all the fat out and then the sausage was a bit too dry. A little fat is a good thing. Products in this post: *Disclosure: This post contains affiliate links, meaning that I get a commission if you decide to make a purchase through my links, at no cost to you.
I was born and raised in a small town in Maine. My family's lived in New England since the mid-1700's. I would've been the 4th generation to work at the town paper mill if I hadn't up and joined the Navy right out of high school. I was still just 17 when I shipped off for a life of travel and adventure. A whirlwind of foreign lands, new cultures, and lots of hard work sped by as I served my six years. All the while, I'd occasionally feel the pang of homesickness. One of my remedies to assauge those feelings? My Grammy's Whoopie Pies!!! Now, you might not know what whoopie pies are if you're not from Maine. They're our official state treat.. and that's an understatement. They're at the register of every gas station, five and dime, or grocery store in the whole darn state.  Over the years I've made a few modifications. I don't use Crisco as a rule (the main ingredient being partially hydrogenated vegetable oil is listed as a food additive to avoid by the center for Science. in the Public Interest). I've added whole wheat. Anyway, I'll stop gassing on and give you the recipe already! WHOOPIE PIE CAKES RECIPE - 2 cups Organic Whole Wheat White Flour (I use King Arthur's) - 1 1/2 cup Organic Whole Wheat Flour - I prefer to mill my own from a soft white wheat grain like spelt) - 1 tsp Himalayan pink salt. I use Himalayan pink salt because it's loaded with tons of essential minerals. It hasn't been refined and processed like white table salt that's so common in America and completely lacking in any health benefits. - 1 1/2 cups of unsweetened organic cocoa powder. Choose a brand like Frontier that is Fair Trade and organic because most commercial cocoa powders contain high quantities of Cadmium, a metal linked to kidney damage and bone softening. - 1 cup (2 sticks) of organic butter at room temp - 2 cups organic sugar - 2 large organic, cage free eggs NOTE: you can tell how "free" the chickens were by the variations in the eggs. If they range in size, color, and markings that is proof that the chickens diets varied from each other depending on what they ate out in the yard. If they're raised in a factory farm you get eggs that are all exactly the same because there's no natural variation in diet/exercise. - 2 cups organic buttermilk. Buttermilk's pretty pricey and I never seem to have it on hand. So I just make it. Combine 1 cup of milk with 1 Tbl vinegar or lemon juice (double that for this recipe obviously) and let it sit 5 minutes. Voila - buttermilk. - 2 Tsp organic vanilla (see blog post to make your own organic homemade vanilla HERE) WHOOPIE PIE FILLING RECIPE - 1 cup (2 sticks) of organic butter at room temp - 2 cups confectioners powder sugar - 7 1/2 oz. jar Fluff (there's nothing organic/healthy about this particular ingredient - but it's so delicious I make a personal exception) - 2 Tsp organic vanilla (see blog post to make your own organic homemade vanilla HERE) DIRECTIONS
By Amber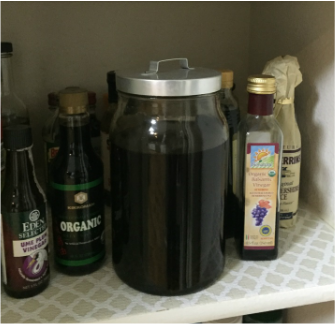 I've been buying RIDICULOUSLY expensive Organic Fairtrade Madagascar Vanilla Extract from Whole Foods for... like $18 for a tiny little 4 oz. bottle. It basically would kill me every single time to buy the darned thing; but I swear it makes a huge difference in baked goods. I'd put it in the cart all quick-like and buy it with the rest of my groceries; refusing to allow myself to re-consider. I'd never really paused to think about what vanilla is or how it's made. Up until I switched to organic ~7 years ago I would buy the cheap "imitation" vanilla. I definitely don't know what's in that and honestly don't want to know. So anyway, we go on a family trip to visit our old Navy buddies and my girlfriend Adrian gave me a bottle of vanilla that she'd made herself. She packaged it up all cute and had given it to friends/family over the holidays. I was very impressed and so excited to use it in my next recipe! She told me how she did it- you just buy vanilla beans and soak them in alcohol for a few months and that's it! My mind was totally blown. So I took it home and gave it a shot.... drum roll.... It was fantastic! Awesome! Just as good as the expensive stuff; except even better because it was made with looove. :) So, I was HOOKED! I went through the bottle pretty quickly and wanted to refill my next supply myself. So I decided to get started on my own home-brewed batch. First things first, I went to Costco and bought a big jug of the cheapest vodka Costco has. I felt a little embarrassed since I'm over the age of 23 and I'm pretty sure they thought my next stop would be the Jello Mix Aisle or to buy ping pong balls or something. Note on the alcohol: I thought about using Grey Goose and making it all fancy, but I read up on it and apparently the quality of vodka really doesn't make a difference. Then I went on amazon and ordered myself some Madagascar Bourbon Vanilla Beans. Once the vanilla beans arrived I sliced them in half without finishing the cut so that it looked like a chicken bone. I read that this step isn't really necessary, but it makes the vanilla beans look cute in the bottle so I went for it. I'm assuming the point is to allow the vanilla escape and permeate the vodka a little faster. The rule of thumb is that for every 8 oz of vodka, you add 3-4 whole beans. So you can scale the recipe to as much as you want. I bought a huge package of beans so I could make a big 36 oz batch of vanilla. 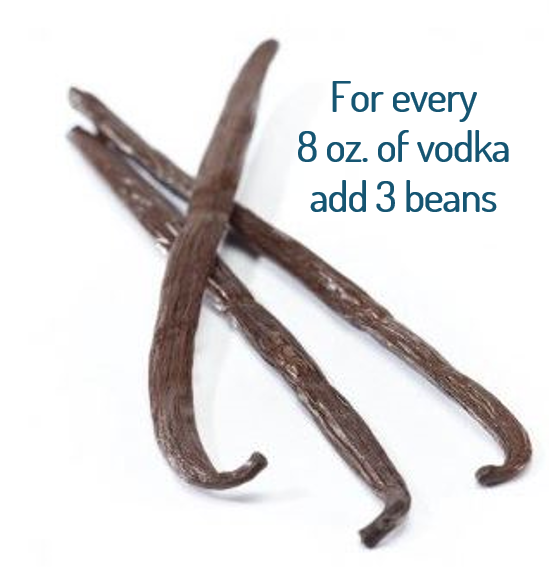 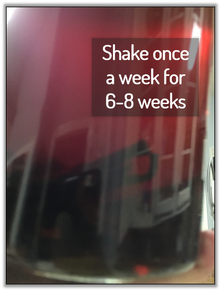 Rummage through your kitchen and find a large glass bottle with a tight fitting lid. A mason jar works or something like THIS. Make sure the vanilla beans are completely covered in vodka; cut them in half if you need to make them shorter. And that's it. You store it somewhere cool/dark - so basically just don't put it on the window sill. Once a week you need to shake it up for a second until it's "done" (6-8 weeks). The longer you let it brew, the stronger the vanilla. When you're ready to bottle it you just pour it through a typical mesh strainer to remove the pieces and any large sediment. Pour the vanilla through a funnel into glass bottles like these that I ordered on Amazon.  To finish the project off I made super labels for my vanilla bottles following the instructions on happymoneysaver.com. I wouldn't really recommend though. The labels printed all skewed, the burlap unravels, and the glue didn't work well at all. It did still end up pretty cute though...
I leave it to you to label your bottle - you can be as simple or crafty with labeling as you'd like. Use burlap, ribbon, twine, a label maker- go cray cray. Hope you enjoy! Products mentioned in this post: |
