|
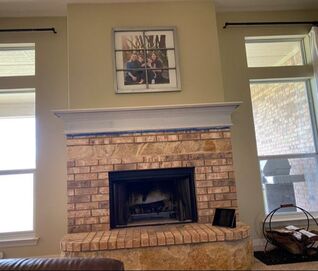
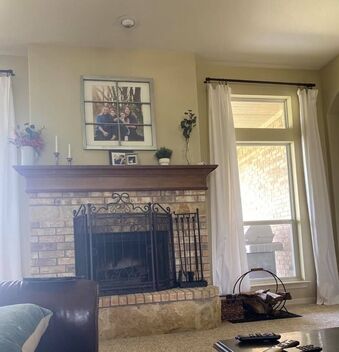
I've got an open concept layout and after updating our kitchen, the adjacent living room fireplace stuck out terribly. The mantle was the same color as the old kitchen cabinets (brown oak). My neighbor, Lesley Lockhart, is the owner and creative designer at Artfully TLC. She turned me onto Miss Lillian's NO WAX Chock Paint. I was inspired by her fireplace update (see HERE) and how quick/easy it was. So, I decided to just go ahead and paint our mantle place. STEPS:
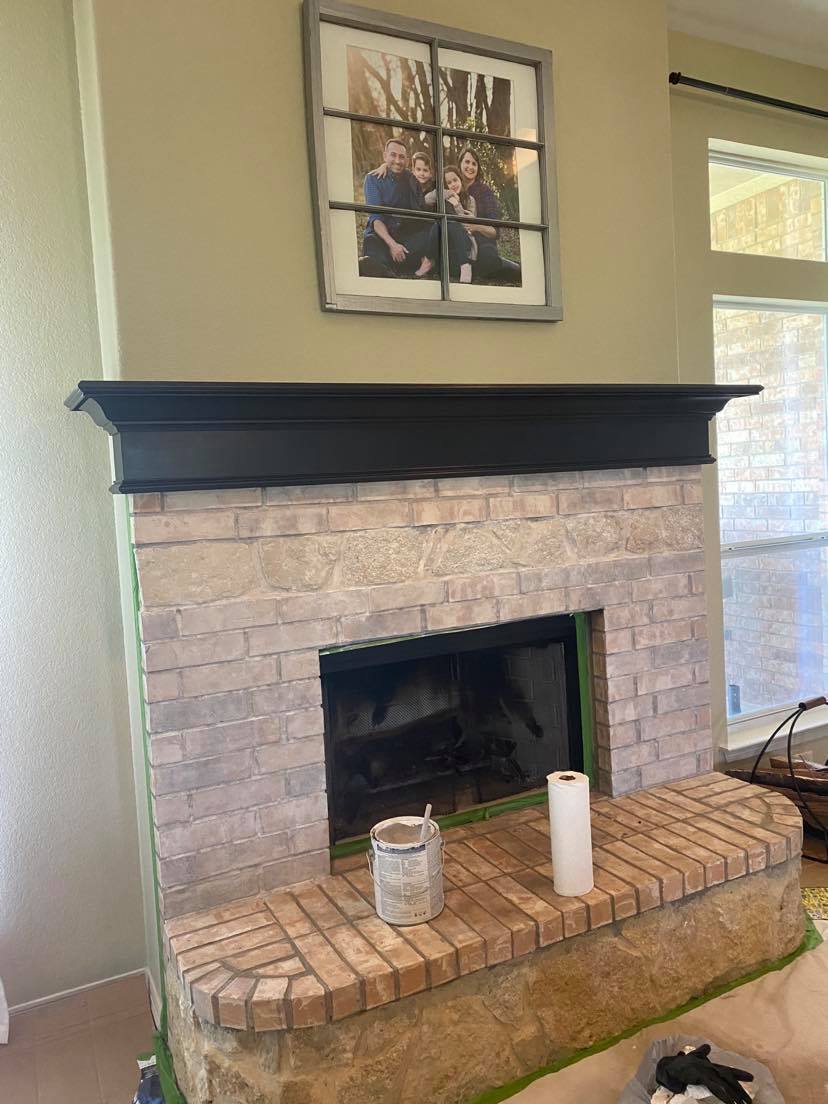
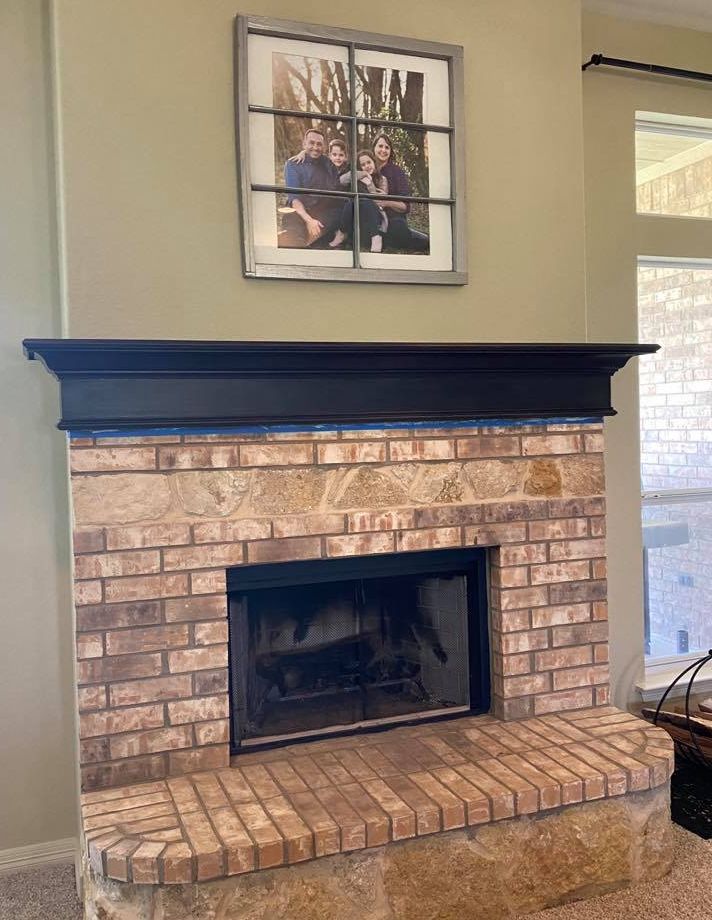 Next I painted the mantle with Miss Lillian's Industrial Chock Paint. I loved the color, but I wasn't yet satisfied. It didn't feel done. It just wasn't enough! I've never been a fan of the color of this brick so after thinking it over I decided to whitewash it. The following steps are... 1. I started by cleaning the fireplace bricks using Rust-Oleum's cleaner and degreaser before taping it off and putting a tarp on the floor. 2. To make the whitewash, I used the same white as our kitchen cabinets, Benjamin Moore Chantilly Lace OC-65. It's an oil-based paint, so I added mineral spirits to thin it for the whitewashing (50/50 mix). 3. Whitewashing was pretty darn easy. I just applied the paint on using a paint brush, being careful not to drop. I started with a thin layer, wasn't satisfied with the pinkish color (see picture on the left) and applied a second thin coat (see picture on the right). It was nice and looked a little better, and yet... still not complete or good enough. I wasn't satisfied. I wasn't done yet.
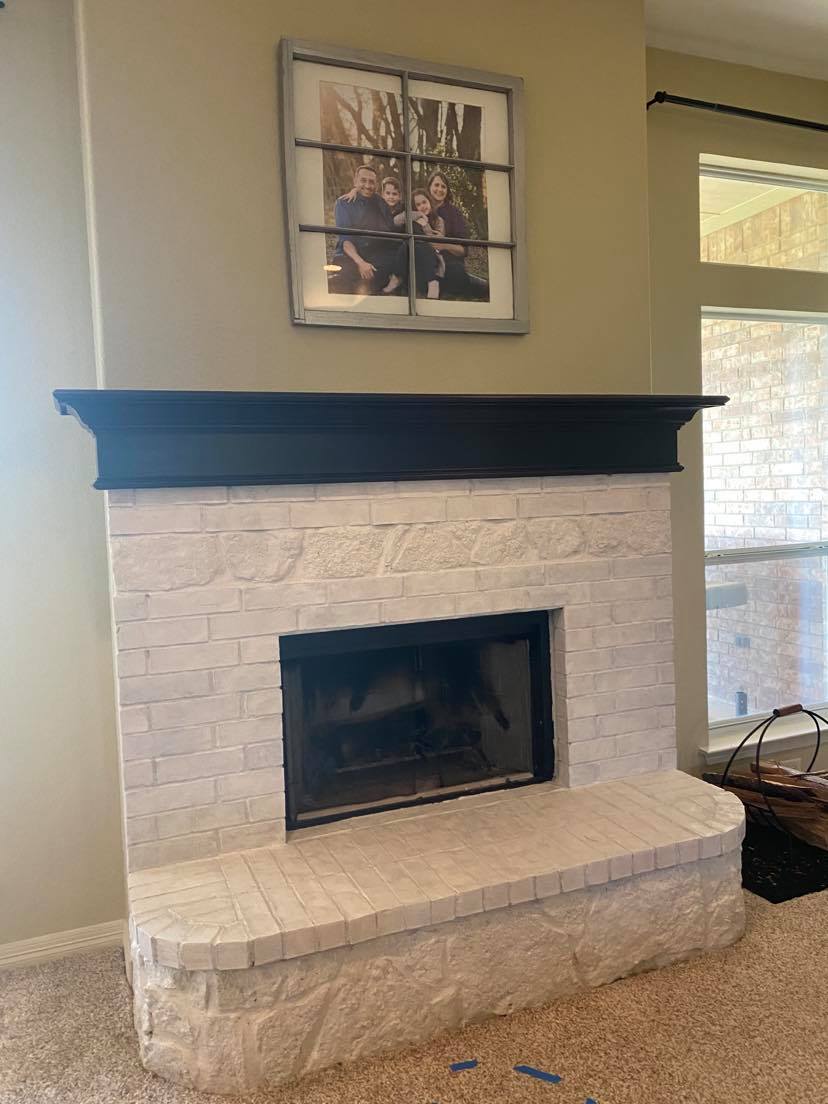
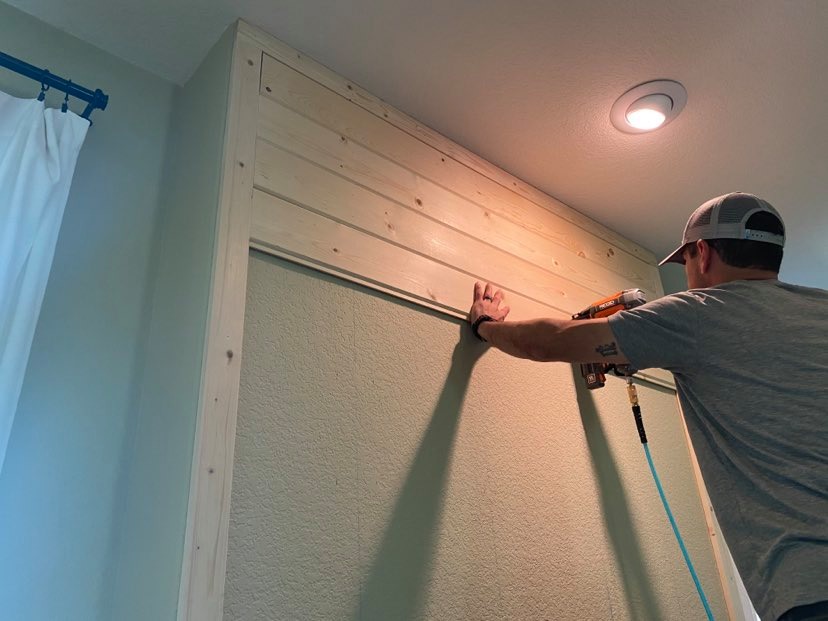
We've been in this house 6 months and we haven't gotten around to painting the walls yet. I'm not a fan of the beigy/taupe color. I think it really hurt the look of this fireplace with white on the bottom and brown on top. It took a few days, but I talked the husband into putting a wall of shiplap above the fireplace! If you'd like to do something similar, rest assured this was only about a half day project. We went to home depot and bought five 1" x 6" x 12' Barn Wood Shiplap Pine Boards for $8 each ($40 total) and two 1" x 2" x 12' pieces of trim for the frame ($8). My husband cut all the pieces to the width of the fireplace wall. Then, he used his laser stud finder and line chalk to mark where the studs are (very important and helpful step when securing the boards!). Starting with the outside frame, he applied construction adhesive before putting them in place on the wall and using his air compressor and nail gun to secure to the wall. We filled the nail holes with wood filler and sanded lightly.
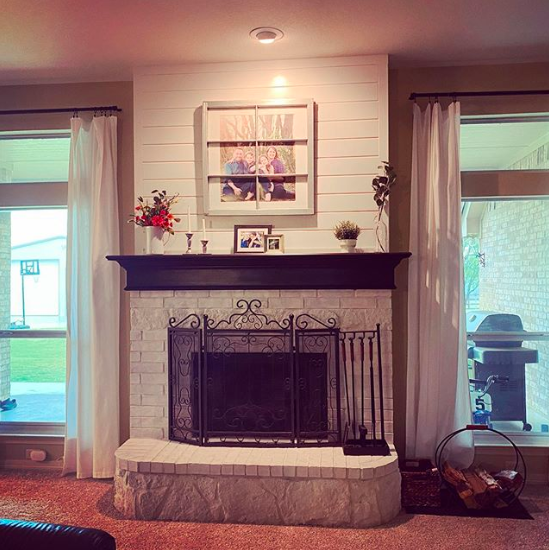
Now we're getting somewhere... 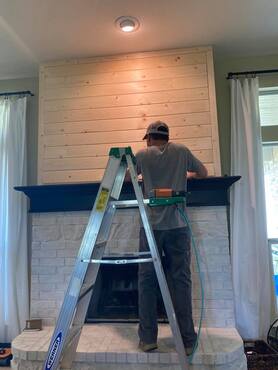 The very last and easiest step was to paint the shiplap in the same white as the fireplace brick and kitchen cabinets (not the whitewashed mixture with mineral spirits, but solid Benjamin Moore Chantilly Lace OC-65). I let it all dry and cure for a few days before styling it and... pure statement piece wonder!!!!  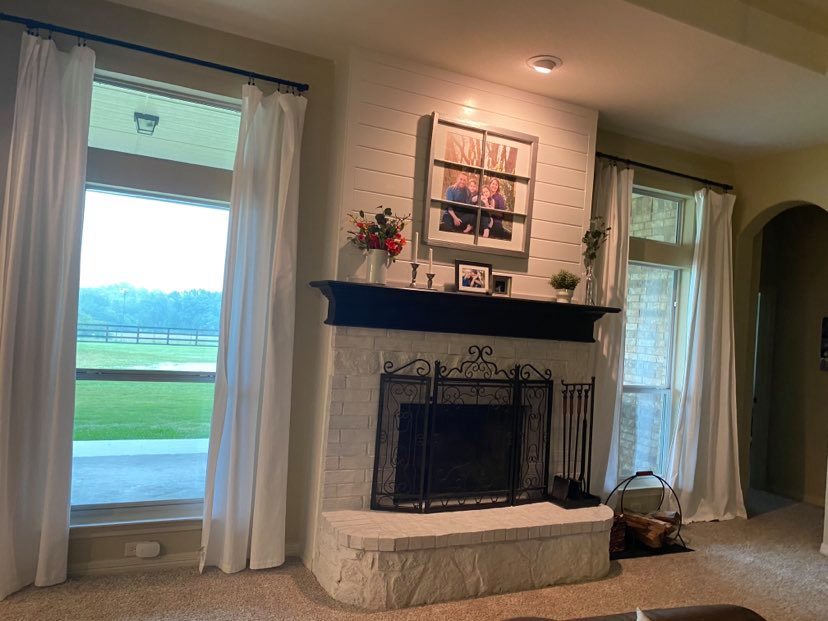 When you enter our house, the fireplace is in direct line of sight. I'm thrilled with the resulting grandeur and sophistication this brings to the living room and our entryway.
4 Comments
Sara
5/24/2020 09:00:48 pm
You timing is uncanny. I was literally just searching for a fireplace idea. Mine is similar to yours, just a little bigger and uglier. I'm gonna do this!!!!
Trent
6/1/2020 10:26:46 pm
Yes, yes, yes. Absolutely doing this step by step. Thank you for this.
Elijah
8/6/2020 06:14:09 pm
Queeeen!! Hell YES 7/9/2021 06:56:32 am
Hi! I love how informative and great your articles are. Can you recommend a <a href="https://fandbrecipes.com/citrus-fruits-and-vegetables/">List of Citrus Fruits</a> or blogs that go over the same topics? Thanks a lot! Leave a Reply. |