|
I'm a Yankee living in the South. There were a few cultural adjustments I had to get used to living in Texas; like people are always nice. What is that about. The politics... the driving (like seriously- you've never seen rain before?). But what I can definitely get on board with is biscuits and gravy!!! Where have you been all my life? I make this on the regular. Try it once and I guarantee you will too:
INGREDIENTS
INSTRUCTIONS
0 Comments
INGREDIENTS
INSTRUCTIONS
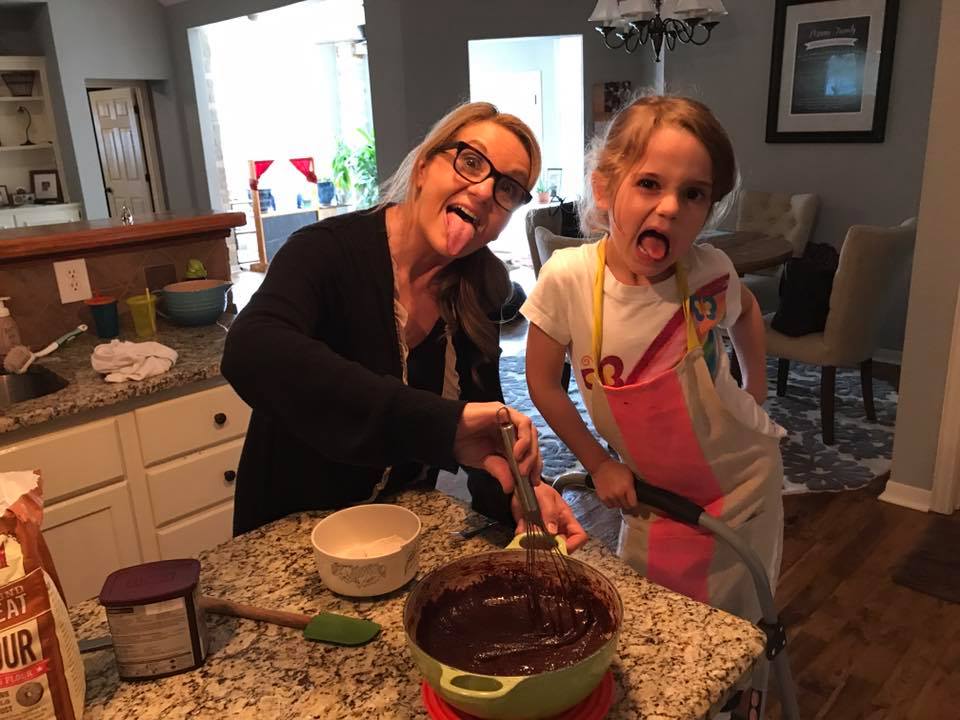
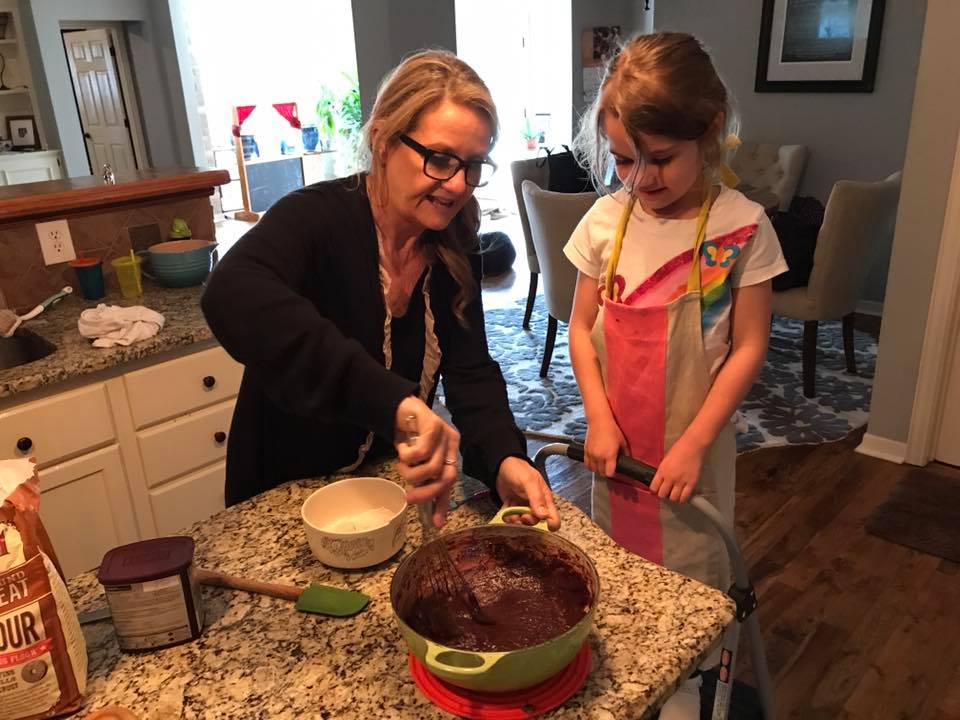
Grandma's getting in on the action- Some QT with her granddaughter!
 My husband's grandmother, Marty, always made the most delicious dip with strawberries at all our family gatherings. I was always very impressed with it and probably ate half of it myself. She shared the recipe with me and I'm passing it along in her memory.
This dip is too good. it's only two ingredients and it's not the most healthy (except the strawberries part). But it's insanely delicious and completely binge-worthy. Don't say I didn't warn you! INGREDIENTS
INSTRUCTIONS
That's it! So simple and yet, so mind blowing. You're welcome world. Buttermilk's pretty pricey and I never seem to have it on hand when I need it. So I just make it! It's so simple- just combine milk & an acidic like milk or lemon juice and voila, buttermilk! Basically the acid slightly curdles the milk- thickening it to the consistency of buttermilk.
INGREDIENTS
DIRECTIONS
Just writing out this recipe has got my mouthwatering. These mussels are so delicious. You've got to pair this with some white wine and crusty bread. You'll be sopping up every last drop of the broth mixture with your bread.
INGREDIENTS
INSTRUCTIONS
I seriously love my San Francisco Sourdough Starter. I keep it in the fridge in a large green mason jar and "feed" it every week or two. It's made up of flour, live wild yeast organisms, and another live organism called a lactobacillus, which is what creates the sour flavor in sourdough and causes the bread to rise.
Live starter is very resilient. If you don't feed it for weeks or months, you can still bring it back. A tell-tale sign that your starter is feeling neglected and hungry is a layer of liquid on top of your starter. That's alcohol, a byproduct of fermentation. If that happens (which it will at some point). To bring it back, you simply "feed it!" To feed your starter, add equal parts old starter + flour + lukewarm water. It will double in size within the next 6-8 hours following a feeding, so make sure the container you're using is less than half full. I usually mix ~4 oz starter +4 oz flour + 4 oz water in a 32 oz mason jar (with the seal cracked to allow for expansion). Beware- I have busted a few mason jars in my time! If your starter is particularly neglected, you may have to "feed" it a few times to bring it back into an actively ripe health. You'll know when it's a healthy white color with bubbles rising and popping like pancake batter on a hot griddle. Caution: if it gets too foamy, that means it's past it's prime and needs to be fed again. The perfect loaf of sourdough bread only needs healthy "well-fed and ripe" starter + water, salt, and flour. INGREDIENTS 1 cup (227g) ripe (fed) sourdough starter THAT'S BEEN FED IN THE LAST 5-7 DAYS 1 1/2 cups (340g) lukewarm water 2 1/2 teaspoons salt 5 cups (602g) King Arthur Unbleached All-Purpose Flour DIRECTIONS
Store the bread for a few days at room temperature, wrapped loosely in plastic; freeze for longer storage. After watching documentaries like Food, Inc., Supersize Me, and Forks over Knives, we wanted to significantly reduce our family's intake of meat and animal products. A few months ago we starting making primarily vegetarian meals and slowly weaned the family from cow's milk moving to almond milk. I starting making plain almond milk with almonds and water only... but I've got two young kids and they were not having it. So I added some dates and vanilla and voila - they love it! This is so easy and cost effective. I just buy a bunch of almonds from the bulk bin and make this anytime we run low.
INGREDIENTS
DIRECTIONS
I like to make a roast chicken (it's so cheap and easy!!) and make a big batch of chicken stock from the leftover skin & bones. Then I can use both the chicken and the chicken broth in this recipe, with enough chicken left over for a second meal the next night.
Those times when I'm short on time I just pick up a cooked rotisserie chicken and boxed organic chicken stock from the grocery store instead. Though, I still make sure to throw the chicken bones/skin in the crock pot overnight to have chicken stock for next time (see bone broth recipe HERE). INGREDIENTS
DIRECTIONS
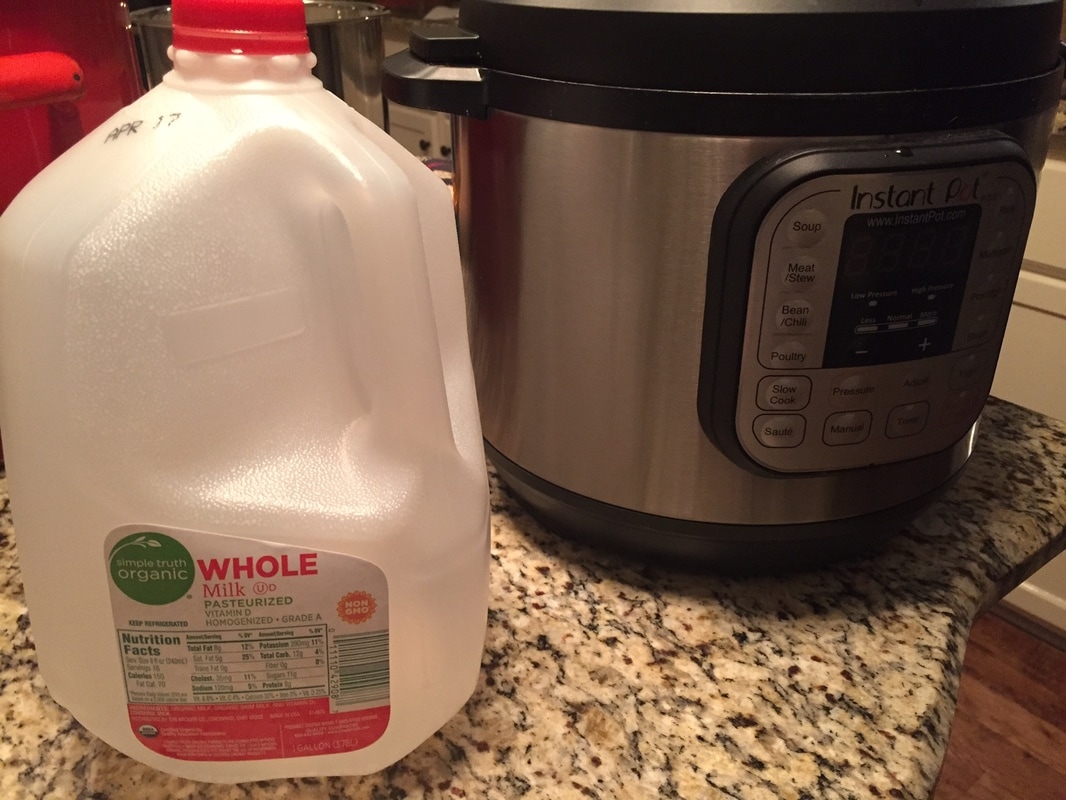
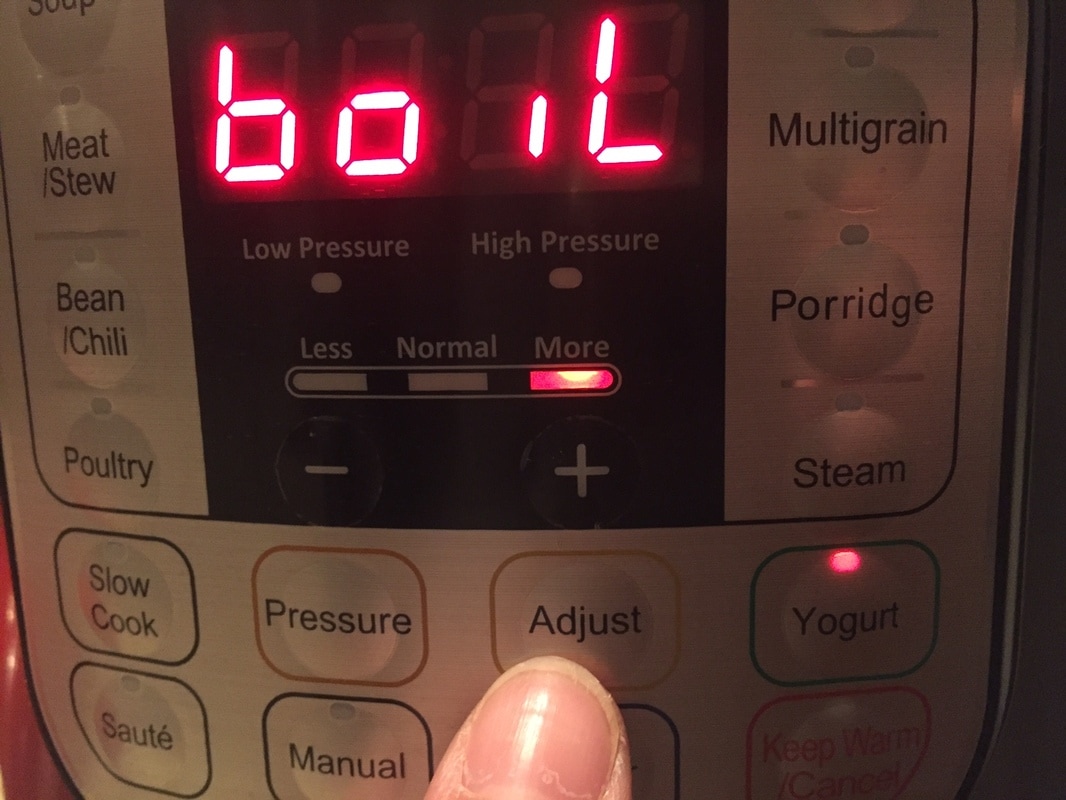
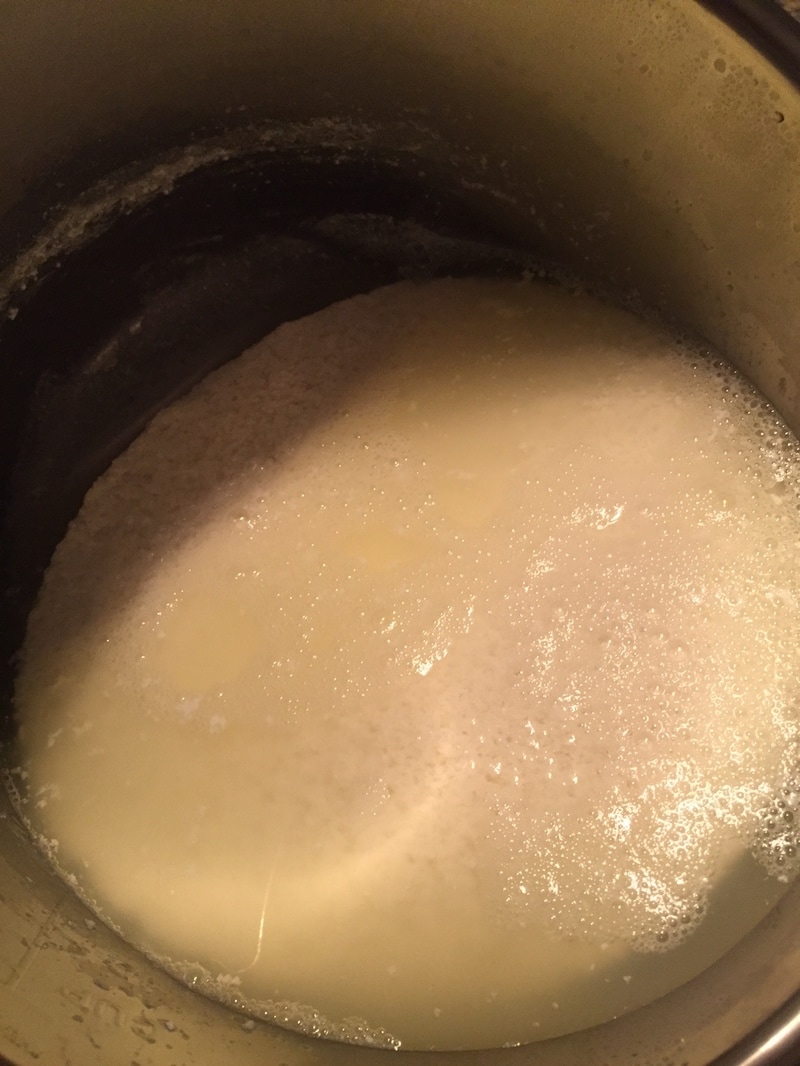
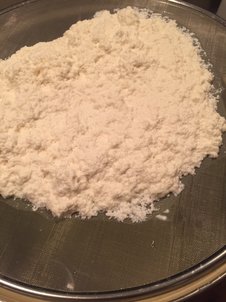
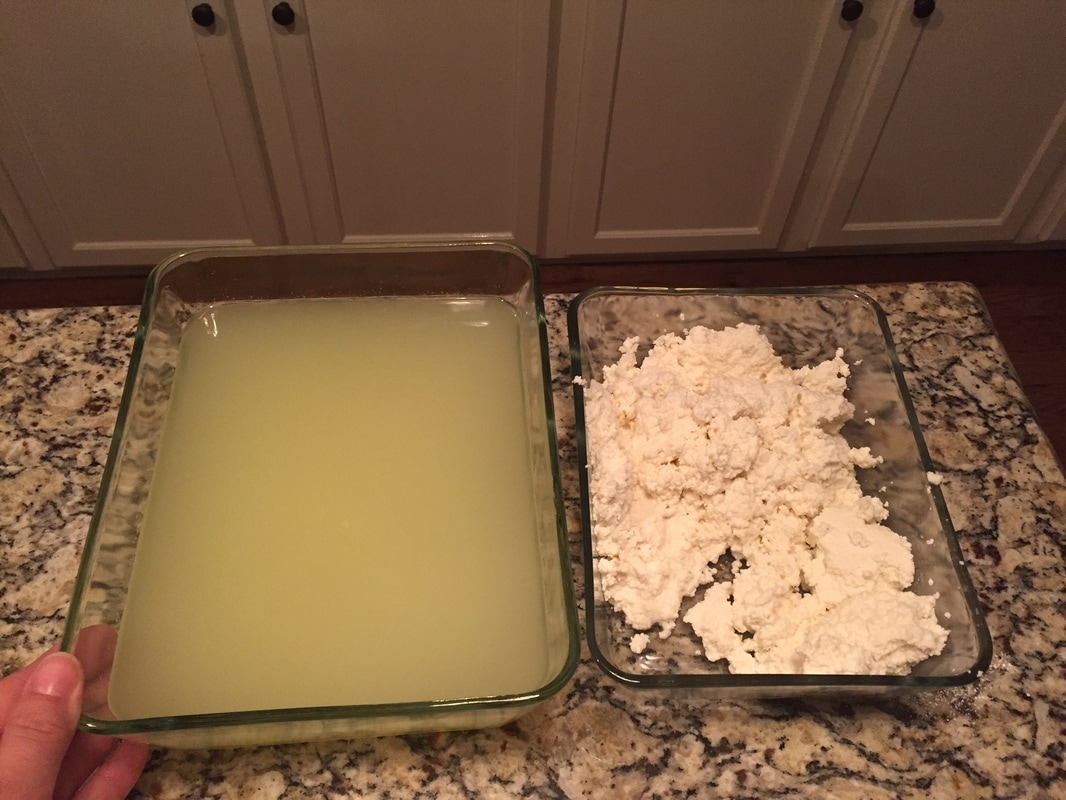
My sister-in-law’s wedding is coming up and I wanted to prepare for the family flying in and staying with us by cooking lots of delicious food ahead of time, freezing it, and popping it in the oven each night. This was my mom’s brilliant idea earlier today and I started planning my week’s worth of recipes straight away. Now, the obvious one - I’ve gotta make my favorite lasagna! I've got all the ingredients but Ricotta! And I’m feeling lazy tonight- I'm already in my PJs, the kids are settled in watching a movie, and I really don’t want to run to the store. So I call my mom back again because she’d mentioned before how she’d made her own ricotta from scratch using whole milk and her Instant pot. Below is the recipe she shared with me, but she doesn’t remember where she got it from originally so the source is unfortunately unknown. My mom and I both however can vouch for its greatness (and easiness)!! Follow these instructions and you’re in the ricotta:
You’re done! The cheese curd left over is the beautiful fresh homemade organic ricotta! Keep it in an airtight container in the refrigerator for up to 5 days. Ingredients:
Products used in this project:
*Disclosure: This post contains affiliate links, meaning that I get a commission if you decide to make a purchase through my links, at no cost to you. I used to love wrapping presents. I worked at Restoration Hardware during college (terrible idea btw - I shopped more than I worked and ended each shift in the negative $$). I learned the fancy retail way of gift wrapping using sharp edges, double sided tape, and folds along the edges. I spent hours wrapping a handful of beautiful gifts for my boyfriend/fiance/husband back in my roaring 20's. Now we've got two kids and what seems like thousands of thousands of gifts to wrap each Christmas. This situation led to me dreading Christmas gift wrapping time. I'd put it off, get all stressed about it, it was no good. I was so grateful when I got a few of the ugly blue Amazon cloth gift bags - I reused those over and over. It got me thinking. I could sew these bags in cute Christmas fabrics - spend 2-3 hours sewing them and then re-use them every year; saving myself hours of effort and stress every Christmas. I downloaded a Jo-Ann's Fabrics coupon and bought a yard of fabric in practically every Christmas fabric they had. It did take an initial investment of about $100 I think (but over the years I'll save $$ by hardly ever buying gift wrap again!). I did a mix of vintagey older looking fabrics and cartoon/disney fabrics for the kids. Look how great these came out! I adore the vintage old-timey look and feel of these under the tree. Let's not forget all the landfill fodder and poor sad trees that are wasted in every house as wrapping paper is ripped, wasted, and trashed every Christmas. Scroll below the pics for a link to the tutorial (it's so easy, it's basically sewing a pillow case with a ribbon added):   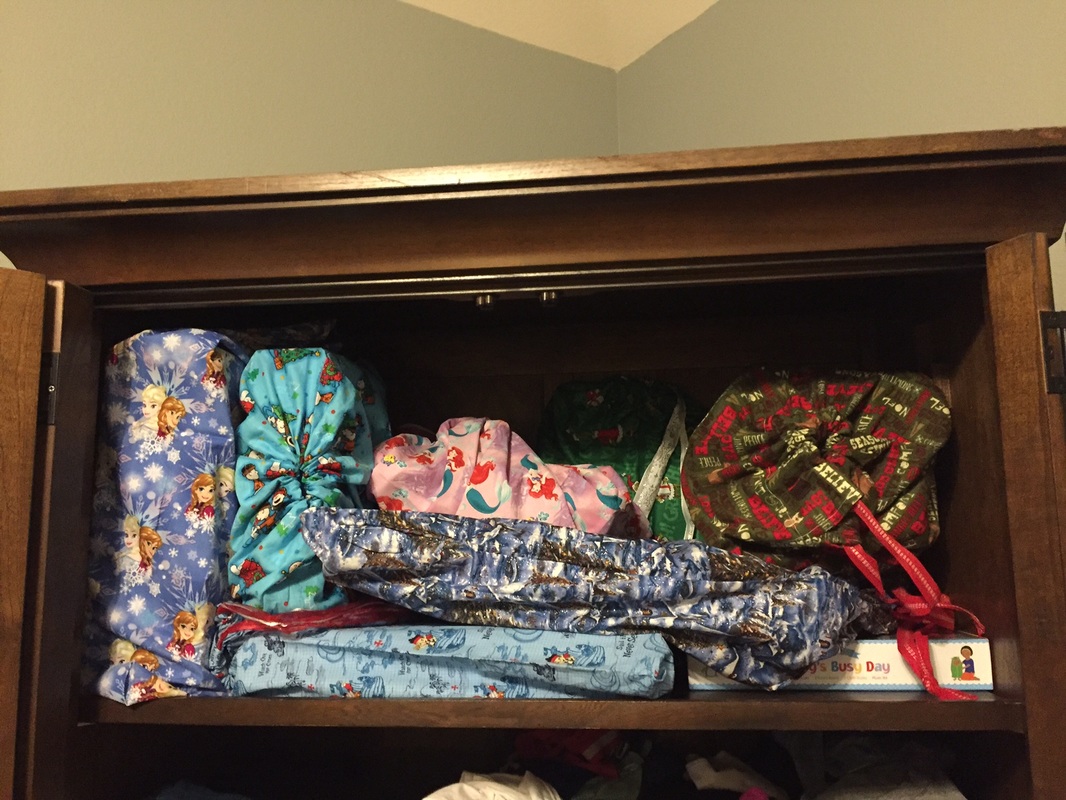  *Disclosure: This post contains affiliate links, meaning that I get a commission if you decide to make a purchase through my links, at no cost to you.
Materials: - Buy as much fabric as you'd like bags. I did about half a yard of fabric per a pattern which gave me 1-3 bags depending on how large or small I made them. I didn't really measure anything out because I wanted a million different size bags. - about 30” of ribbon per bag (a little more or a little less depending on bag size obviously) - Janome sewing machine - Thread of different colors - Fabric sewing scissors - Sewing pin set (with tape measure and pin cushion- all the basics) TUTORIAL: I'm not going to try and tell you how I did the sewing. Mainly because when I tried writing out I found it incredibly boring to try and originally re-write a blog that I followed for help on this. Spool of Thread's tutorial is better than anything I could put together. Very detailed. The only thing I'd add is not to sweat perfection. I left raw edges on the inside to save myself a few minutes effort (gasp) and I don't regret it for a minute! |