|
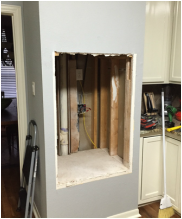
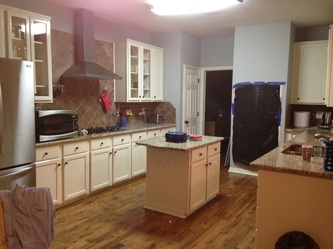
The very first project we did in our house after we bought it two years ago was to finish the kitchen renovation that the previous owners had left incomplete. The kitchen has nice cabinets with glass doors, granite counter tops, and all new stainless steel appliances... except for the microwave and oven! They were the original white appliances circa 1994 when the house was built; filled with rust inside. 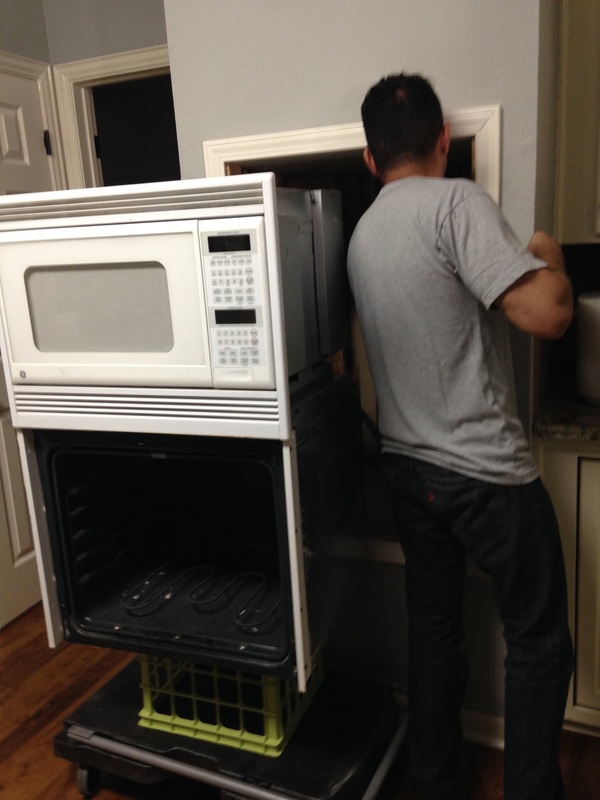 Now we'd spent a good amount buying and renovating the house before we'd moved in so we were a little gun shy to spend thousands more on a fancy new oven. I love cooking, so I was pretty passionate that I needed a nice model. Somehow I've never had a double oven before and I desperately wanted one. I'd coveted my mother-in-law's for years! Hers is a GE Single-Double Convection Wall Oven (PT925SNSS). It's the only double oven out there that is small enough to fit in the space of a single oven. We were pulling out a single oven so my dreams of a double oven were limited to this particular model. And it cost $3,000 two years ago! I looked in all the classic stores: Sears, Rodenbaugh's (at least in Allen it's a classic), Lowes, Home Depot, etc. but they all had the same price! Finally I turned to Craigslist, Typed in the model #, and held my breath, drum roll................................... Score! Someone really had recently purchased the exact PT925SNSS double oven I wanted in stainless steel!! The sellers were renovating their kitchen. when half way through they changed direction and it had been too long since purchase to be allowed to return it to the store. They sold it to me for HALF the price! I mean it was full-on still wrapped in plastic and in the shipping box - brand brand new. 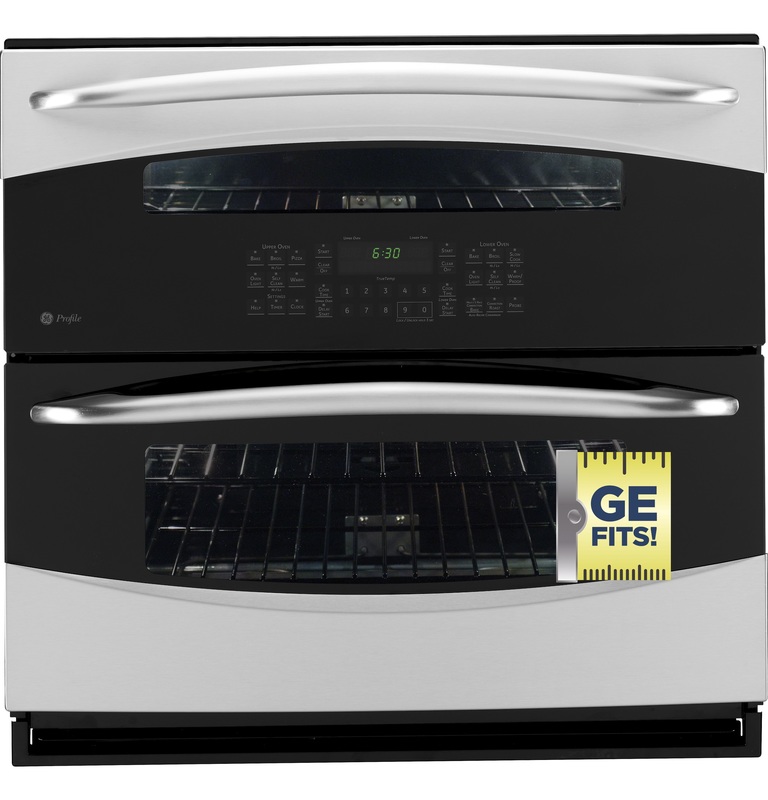 We snatched it up and brought it home in the back of our truck. The next step was to find the matching microwave. The old microwave we were pulling out was a built in above the oven; it would have to fit into the wall. I found the matching microwave, the PEB1590SM2SS, but come to find out - it was discontinued 2 years ago! No one carried it anymore! Which was a huge bummer, because this thing was a dual microwave oven/convection oven!! Seriously - you can pull out the glass rotating plate, put in the metal shelf and poof - it's a third oven!!! Mind blown right!! A THIRD oven! But none of that matters... because it's discontinued. Gone. Unavailable. What's a girl to do? 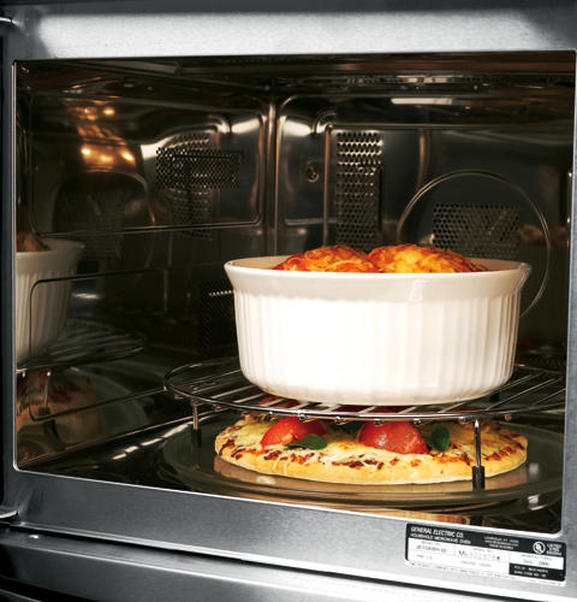 Not give up! That's what! So again I turned to Craigslist and searched for my microwave. It took a while but I really did find it on Craiglist! It was.for sale at a consignment shop about an hour away. So we made the drive and purchased it for pennies on the dollar- well for $200 anyway (and it was over $1K new). It was another huge score. Not quite perfect this time though - the front door had a good amount of scratches on it. I called GE Appliances and I was able to order a replacement door for like $50; so still a steal! We also had to buy the built-in trim kit in order to install the microwave into the wall for $264 which brought the total price to $500. Still a bona fide steal and a huge stroke of luck to find the one matching microwave left. INSTALL TIME! Pulling the old oven and microwave out was the easy part.
The hard part ended up being that the previous owner hadn't hardwired the microwave in, and we had to install a higher voltage outlet. Or I should say, we had to hire an electrician to add a higher voltage outlet within the wall space. That cost $150, but it was totally worth it (and necessary). Next,  Now came time to finally install our fancy (but cheap) triple oven!! Challie still ended up having to use a saw to widen the hole. He then built a shelf to hold the microwave because it was a different fit/size than the last one. 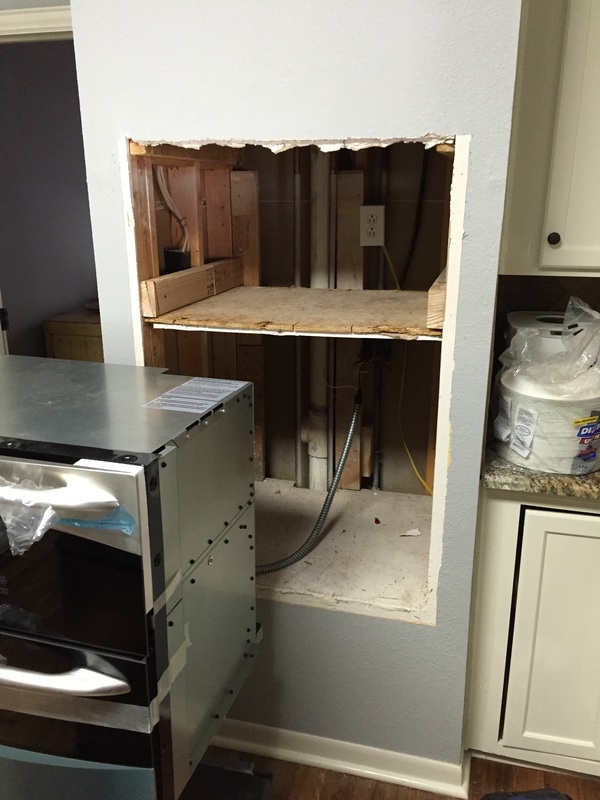 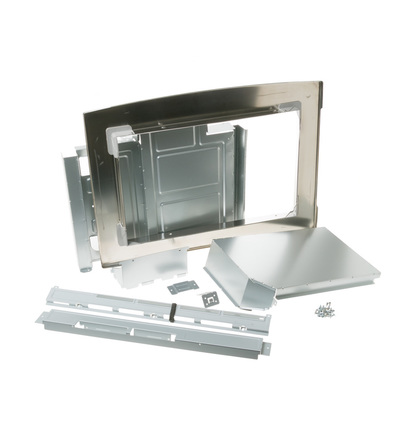 Using the built-in trim kit Challie was able to mount the microwave/convection oven into the wall above our double oven. The oven slid in pretty easily. The hardest part was the final framing. It wasn't a perfect fit so we had to hide some a gap at the bottom and bridge the new gap between the oven and microwave. 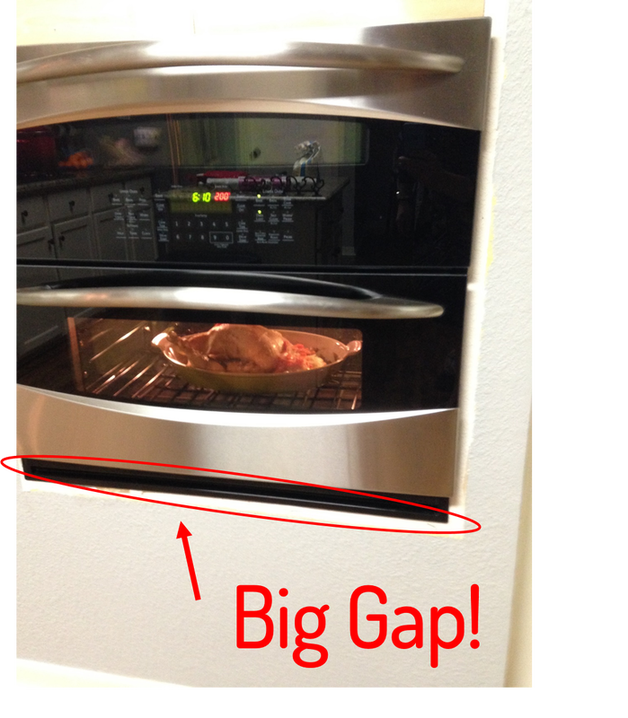 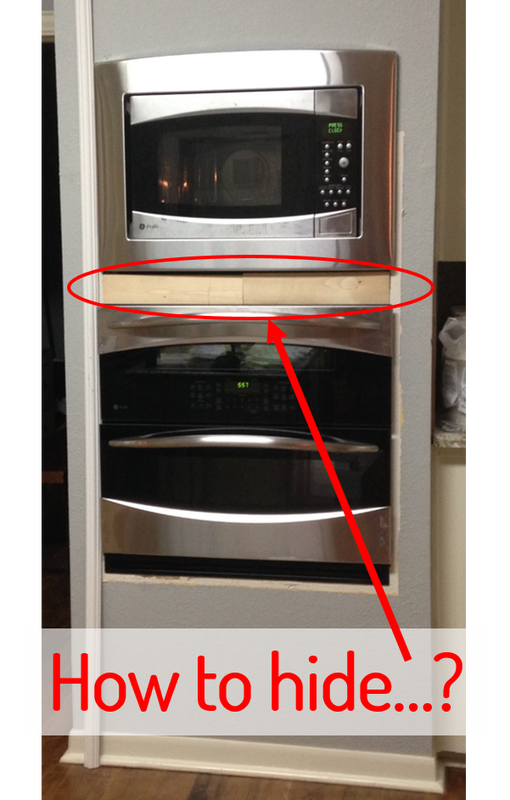 We cut out a strip of wainscoting beadboard and added a picture frame around the whole thing. We used wood filler to perfect any imperfections. All that was left was to slap some ivory paint on there and had a P.A..R...T....Y!!! Challie deserves all the credit on this one. 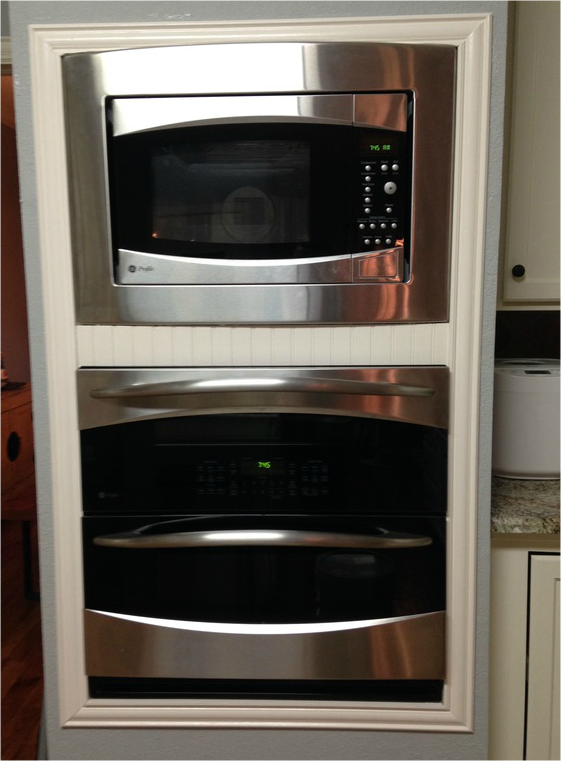 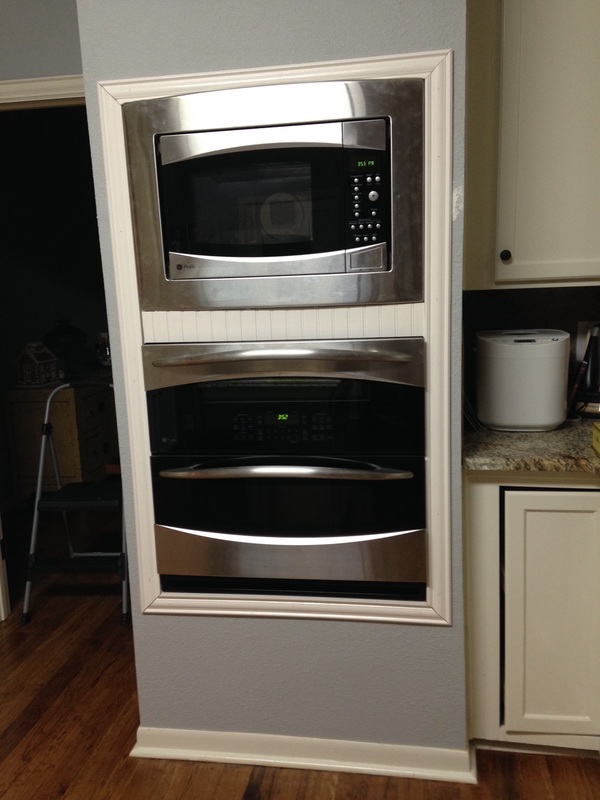 Now for anyone wondering, the ovens all work AWESOME. I've cooked a huge turkey in the bottom oven that came out perfectly. I've run all three ovens at the same time and cooked dinner in NO TIME. Holidays are fun using these appliances. I use the smaller middle oven the most- anything that goes on a baking sheet. It heats up in no time and uses half the energy of a full sized oven.
It's been two years and I still love love love my triple oven. I do want to make a final note to say that I'm actually planning on stopping the use of microwaves in my family. Standby for an update on weaning ourselves off radiation heating which destroys the nutrition in our food. Challie will have a hard time with that one... but I'll get him to come around.
0 Comments
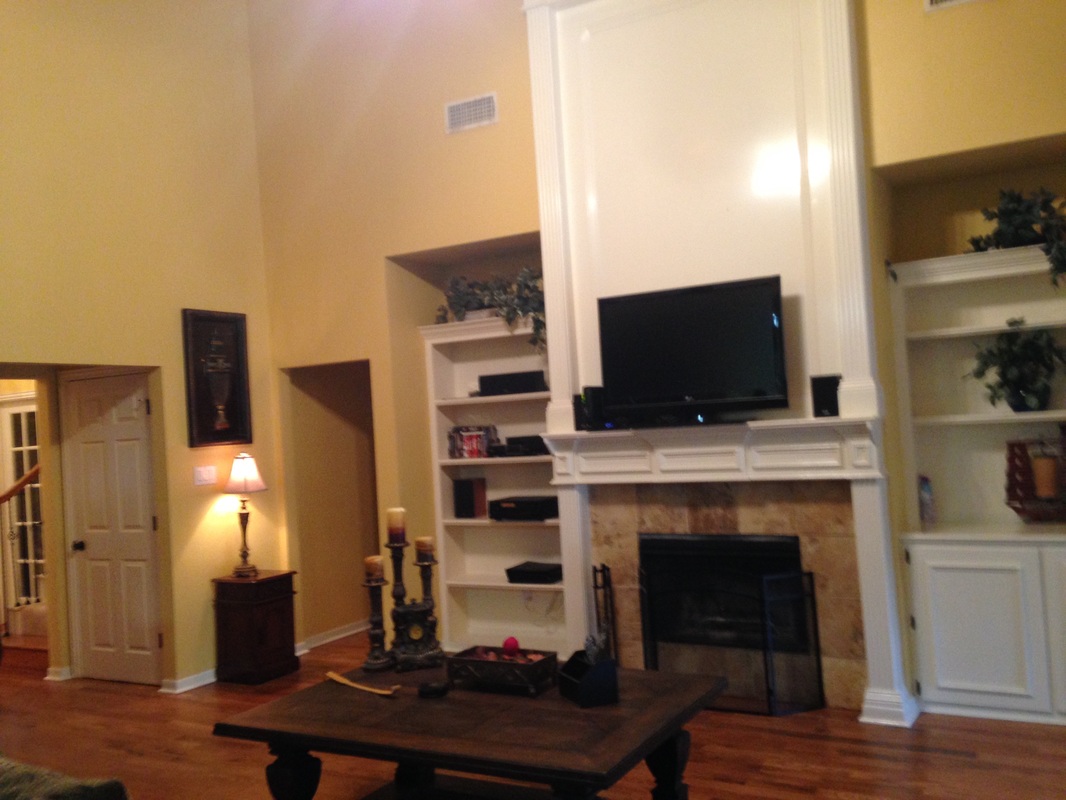
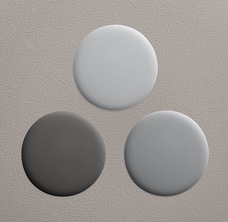
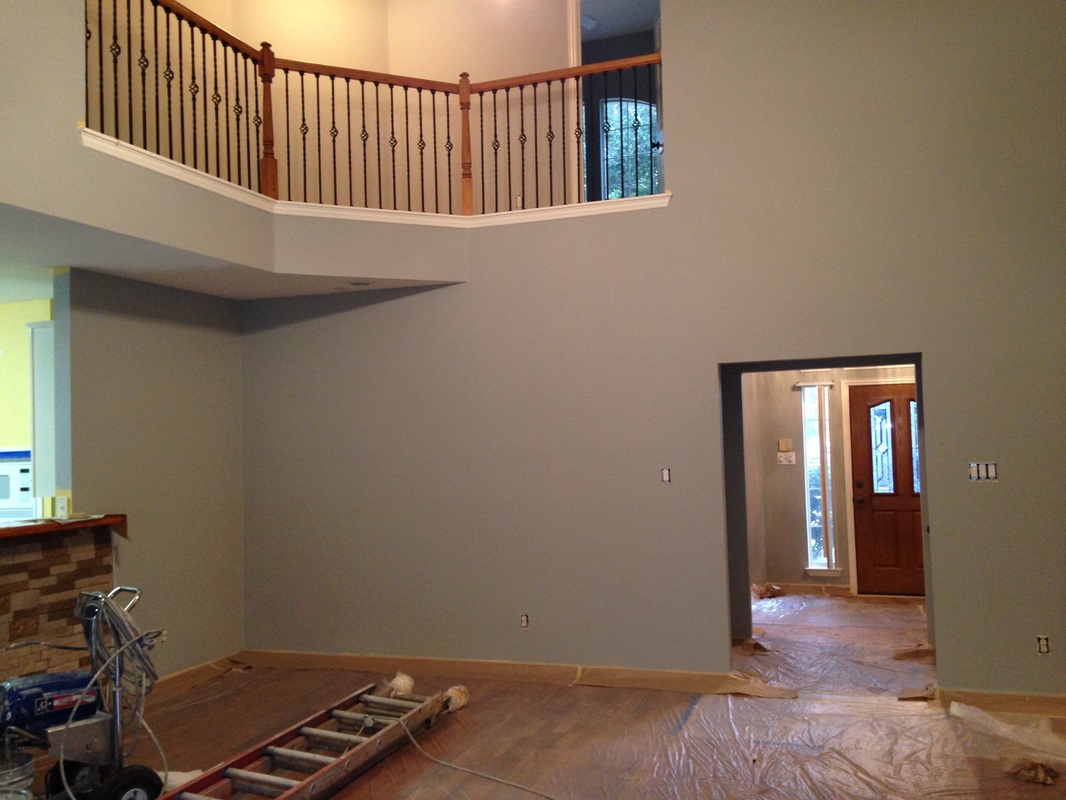
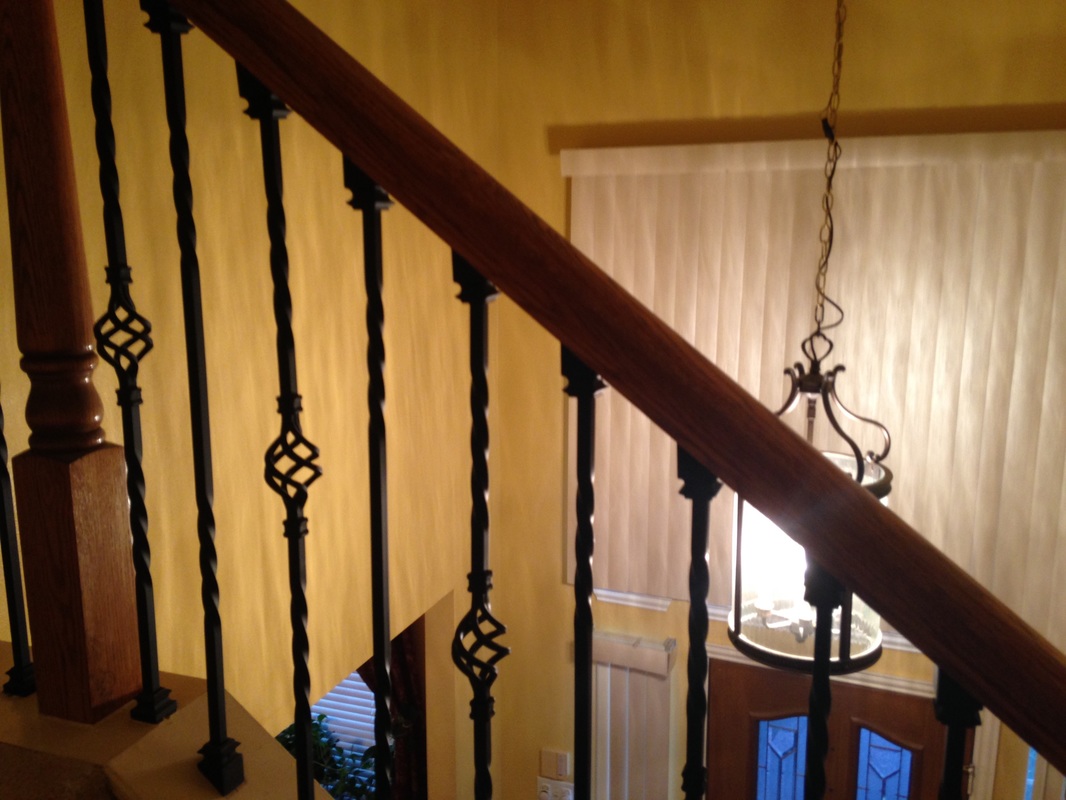
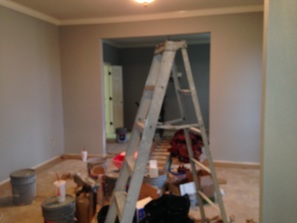
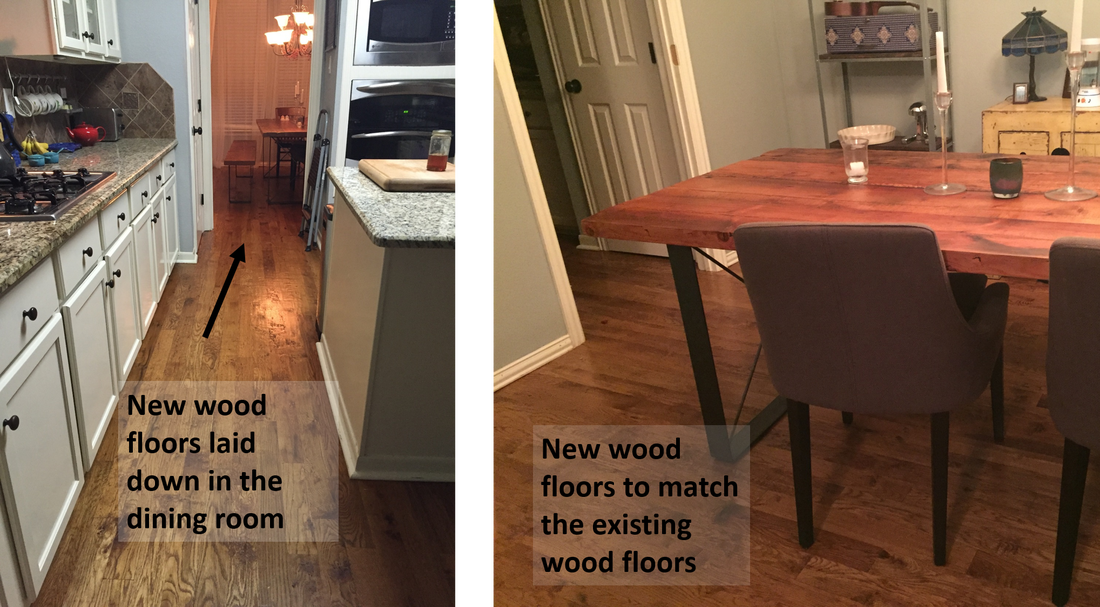
We moved into our house two years ago. We were looking for a home with a great layout that comes with a pool and a bigger backyard; preferably one that backs up to a greenbelt. Unfortunately, real estate in Allen is tough to come by – homes are selling the first day they’re on the market; site-unseen in some cases. Luckily, we found a home that had everything we were looking but even luckier – it was UGLY so we had a shot at buying it at a decent price. I posted some good before/after photos in my blog post HERE when it was a mustard yellow with dirty carpets. Anyway, this house had the bones we wanted but needed a million cosmetic updates to really reflect our personal style and preference. We have plans for the front of the house: Painting the whole brick house in gray or white, adding shutters, and painting the front door. We don’t have the time or $$ for most of that yet (one step at a time!) so we’re tackling each piece one at a time. First task – let’s update our boring white door. The front of our house is quite washed out and is in need of some contrast color. A statement piece. 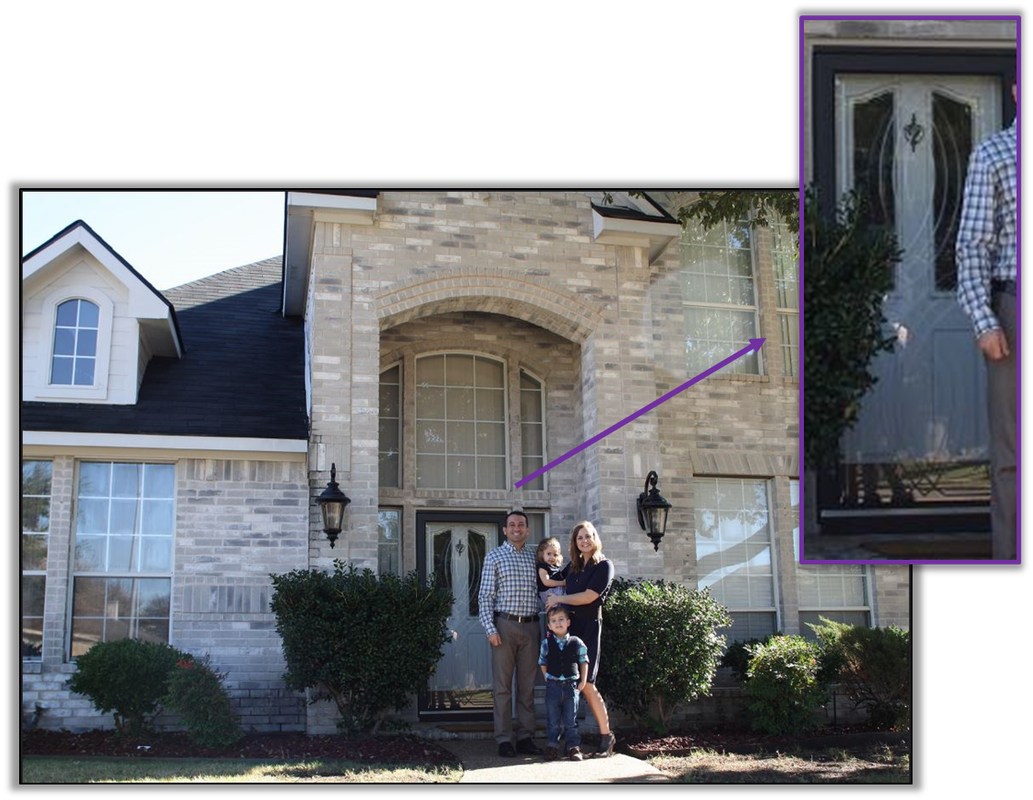 So I went looking for ideas on Pinterest. I found the perfect front door color at Miria Killam, # 5 in Sherwin Williams color “Dignified” (6538). 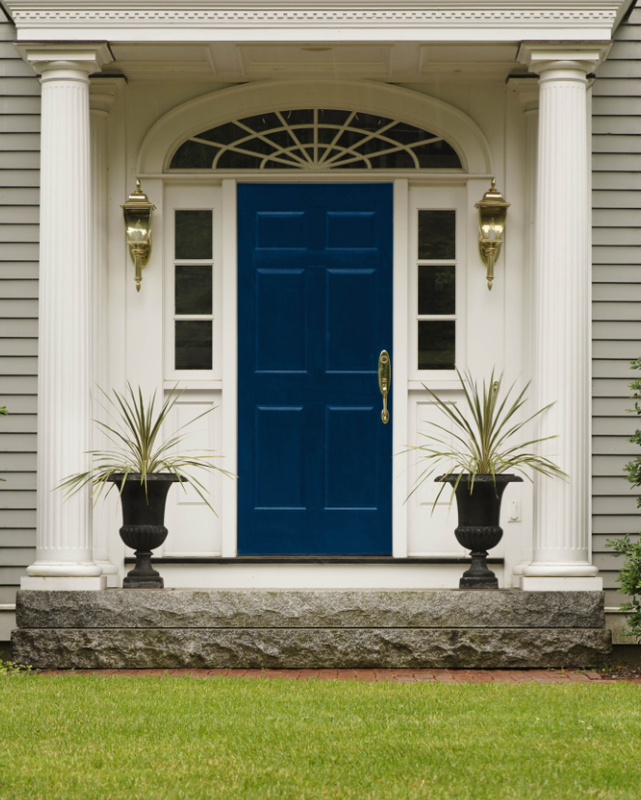 When I picked it up from the store, the dob they put on the top of the paint can looked a little too purple for me. The picture in the blog looks different from the color on the website. So I was a bit nervous... I was looking for character/statement color; but not too far out there. 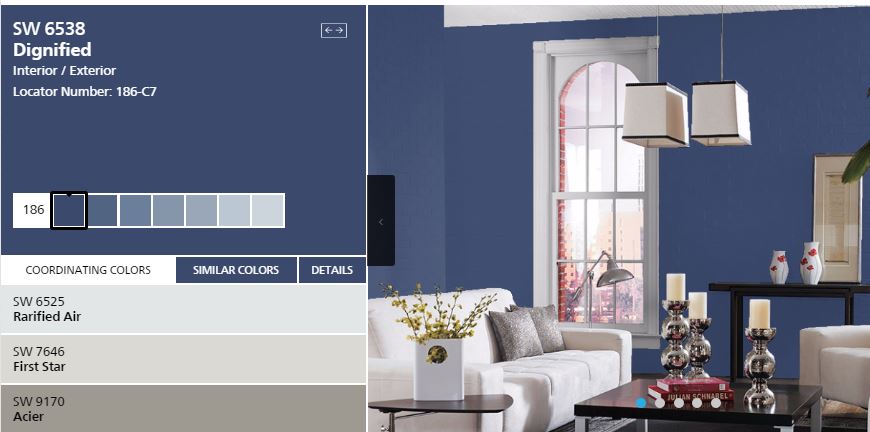 Painting a front door is pretty darn easy. My husband took the door off its hinges, we put it up across two sawhorses in the back driveway and sanded her down. I had to run to Lowes half way through because our fine grit sand paper was taking way too long. I bought a medium course grit of 60 and that did the job much faster (that and my husband’s taking over helped). We have a little Palm Sander that’s fantastic for smaller projects, but I wouldn't recommend it on a surface the size of our front door or larger. Note: Make sure you wear a dust mask. Safety!  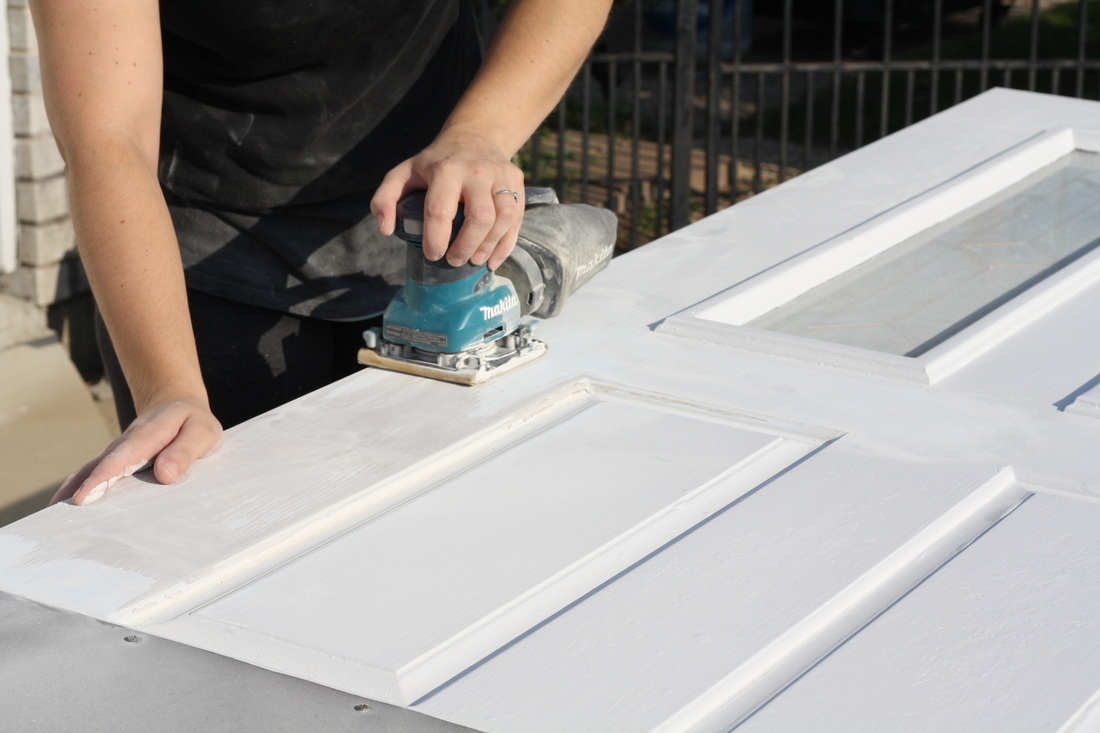 We didn't sand it down 100% to unfinished wood. It was more about removing a layer of two of paint and scuffing it up enough to ensure the new coat would "stick." We put the sanded down door back on it's hinges so I could paint both sides in one go. Make sure you 1) Dust it off 2) wipe it down with a wet rag 3) tape off all hardware and the floor below. 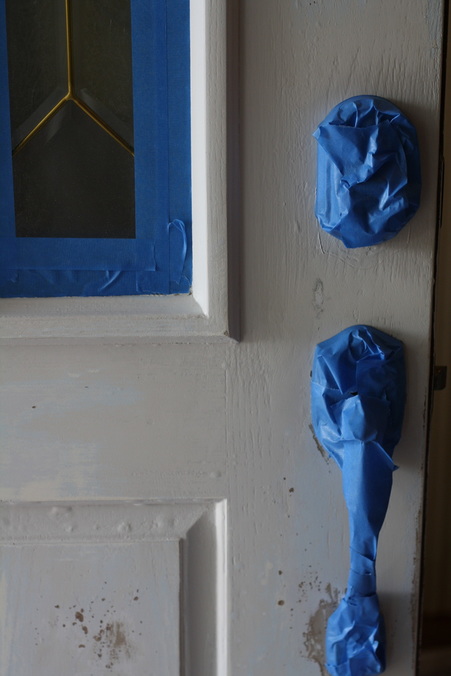 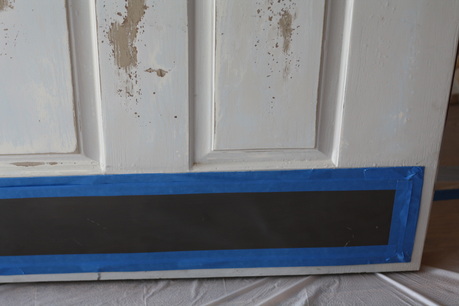 Now it's time to grab your tablet, put on some Netflix (I was zoning out to some Murder She Wrote) and get to painting. It took two coats. Here's my little key of what direction to paint: 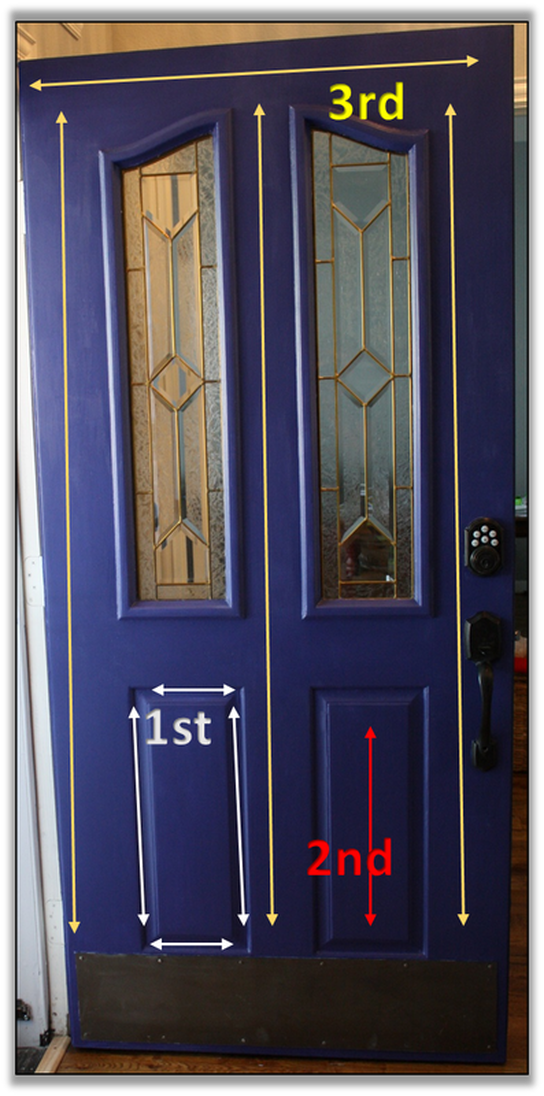 Next I let the paint set over night. I pulled the tape off. There were a few white edges peeping through the corners or that got pulled off with the tape. It took me about an hour to clean up the paint with a fine tipped brush (I'm a bit of a perfectionist with paint). And that's it. A great new update to the house done in one weekend; probably ~6 hours of work at most. Check it out! 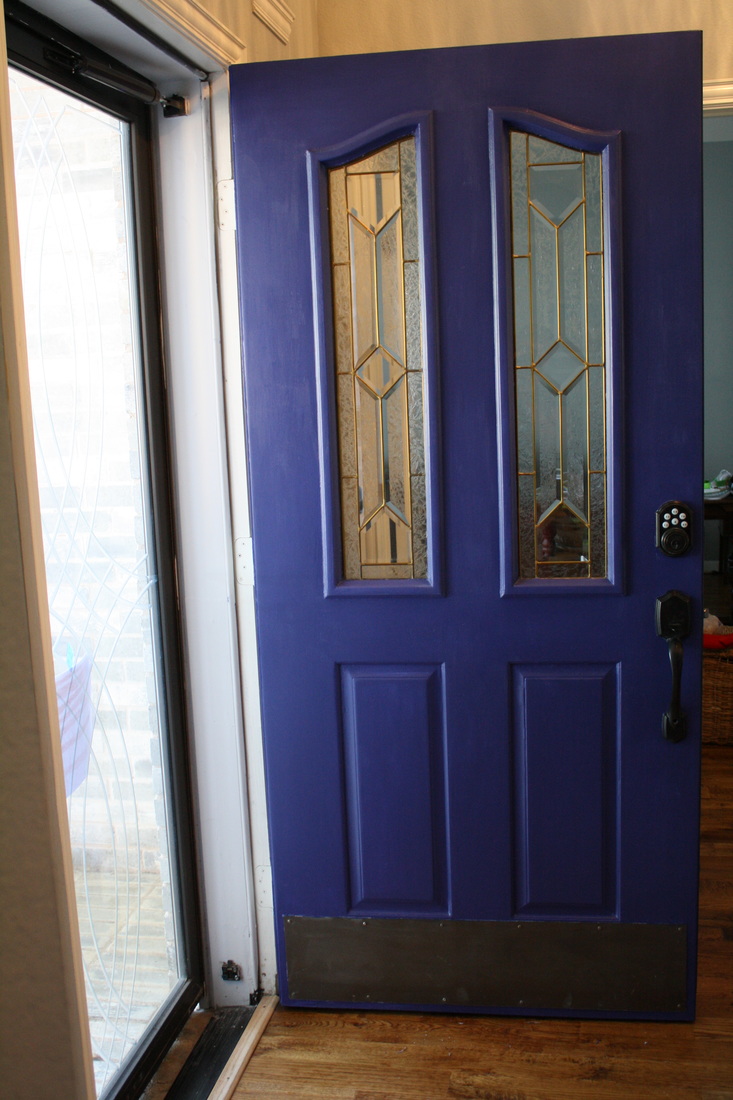 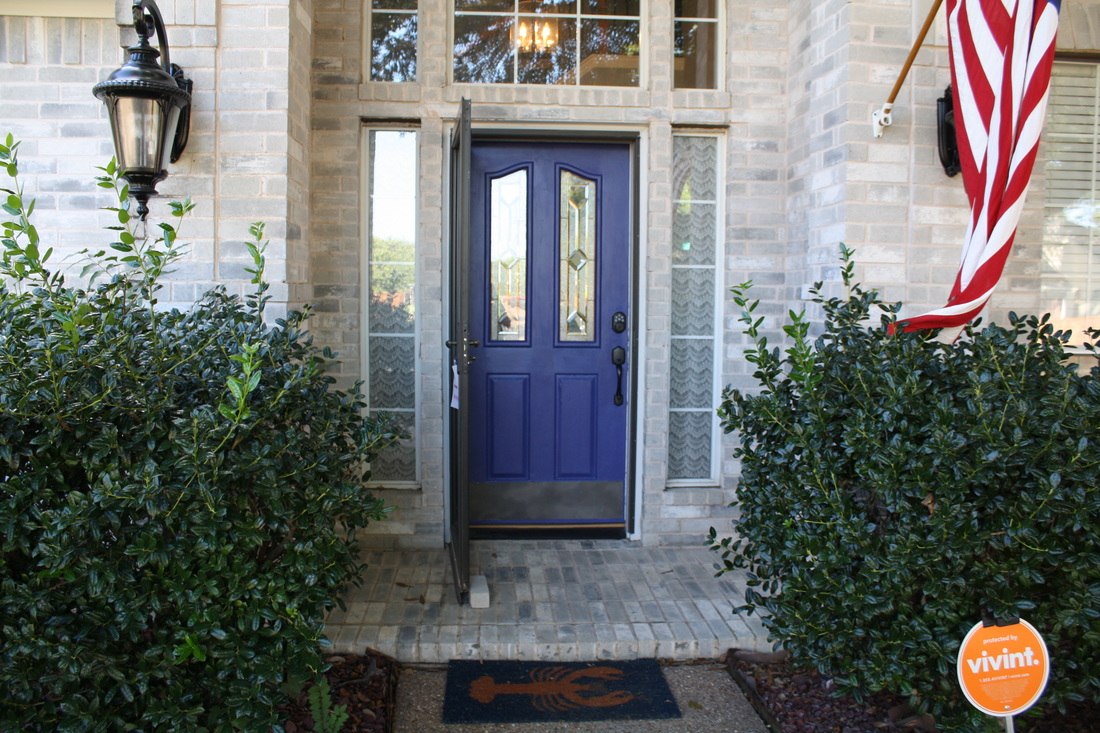  I've got one question that I need help with... Challie and I are debating whether or not to remove the storm door; what do you think? I'm not a big fan of it. It blocks the street view of any seasonal wreaths that I like to put up and it hides my pretty new paint color. See what I mean (What do you think?): 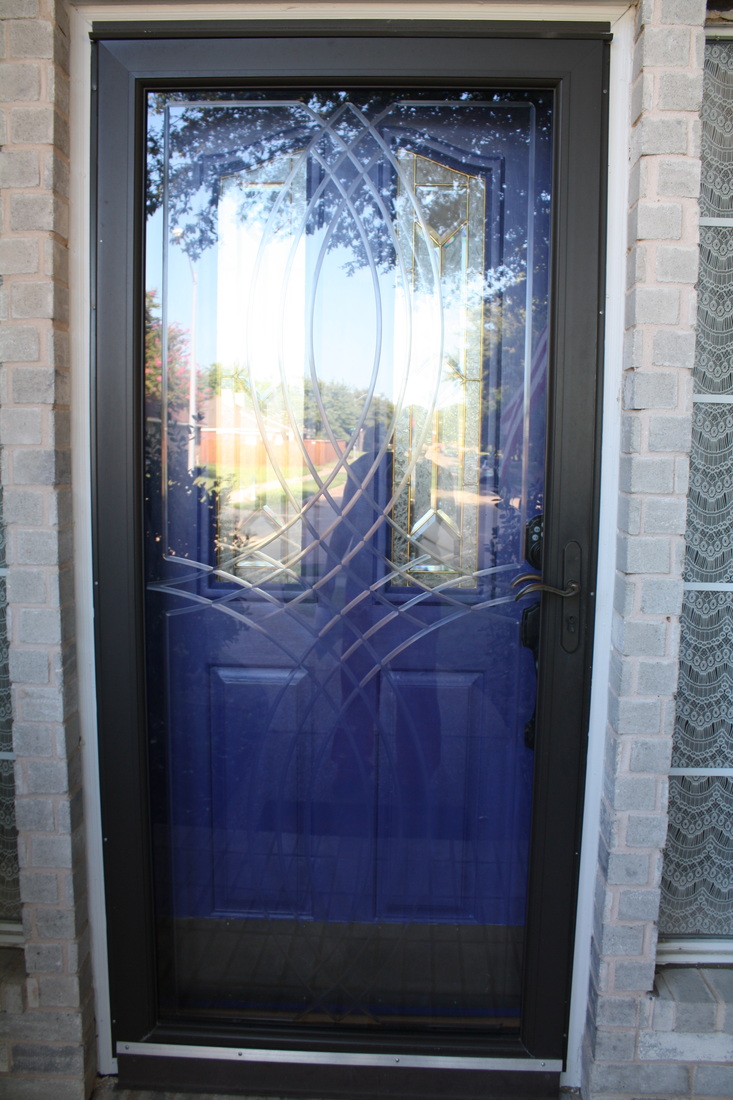 We moved into our new-to-us house in Oct 2014 and began work on the laundry list of projects we wanted to do to make this place our home. First things first, make it functional and convenient. When you walk in the house we’ve got a small entry area in front that’s perfect as a mini-mudroom at our entryway. I started searching for benches, coat racks, entryway storage units etc. and found that they’re one of those items that’s over-priced (in my opinion); at least the ones I like. This Pottery Barn Wade entryway bench set was my favorite at $1600 (not even counting tax & shipping)! Even just the wood and wired cubbies piece was $300! So we put our DIY-caps back on and got to thinking. I’ve seen tons of pins on Pinterest using crates as furniture like these on Amazon or check your local Micheals. Their $14 price tag made it an appealing option. My favorite concept was from Elsie Larson’s blog “Elsie’s Mudroom Organization” on A Beautiful Mess. We made a few tweaks in our plan to customize to our space and style. So I bought 4 crates and stained them a walnut brown with some wood stain I had laying around. I used a stain sponge and it took maybe two hours to do two coats. Very easy- although the little slats were a little annoying to make sure they were covered entirely. Once that was done I had my husband cut down a piece of wood we had laying around. I sanded the edges and rounded the corners so it would look a little more polished. Stained the board with the same walnut brown stain as the crates. We bought four Liberty Hooks which are extremely well priced at $3 each. We screwed them into the board and mounted on our wall using some heavy duty wall anchors. We load those hooks up with coats during the winter and it can get pretty weighty. Then I went through our most recent photos and picked out one for each of our family members to put above their respective hooks. I printed them out via walgreens online photo shop and hung them up above the hooks with push pins. Added a galvanized bucket and oval mirror from Restoration Hardware (purchased while I worked there during college circa 2005). Some baskets for shoes overflow helps keep our entryway tidy. So instead of spending $1600 on PB’s fancy entryway set, we made our own for under $100! We’ve been using it for almost two years now and it’s incredibly functional. It holds tons of kids shoes and coats; so it’s functional and I love its unique look. I’m personally pretty proud of this very easy-to-do project. 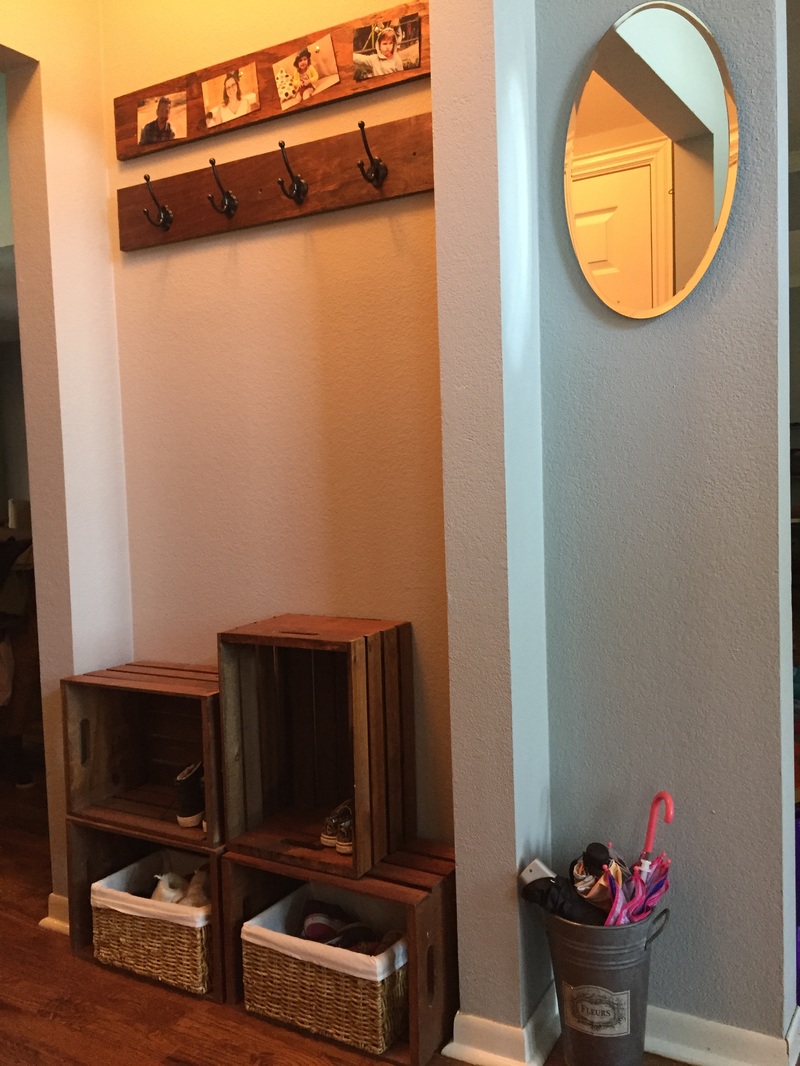 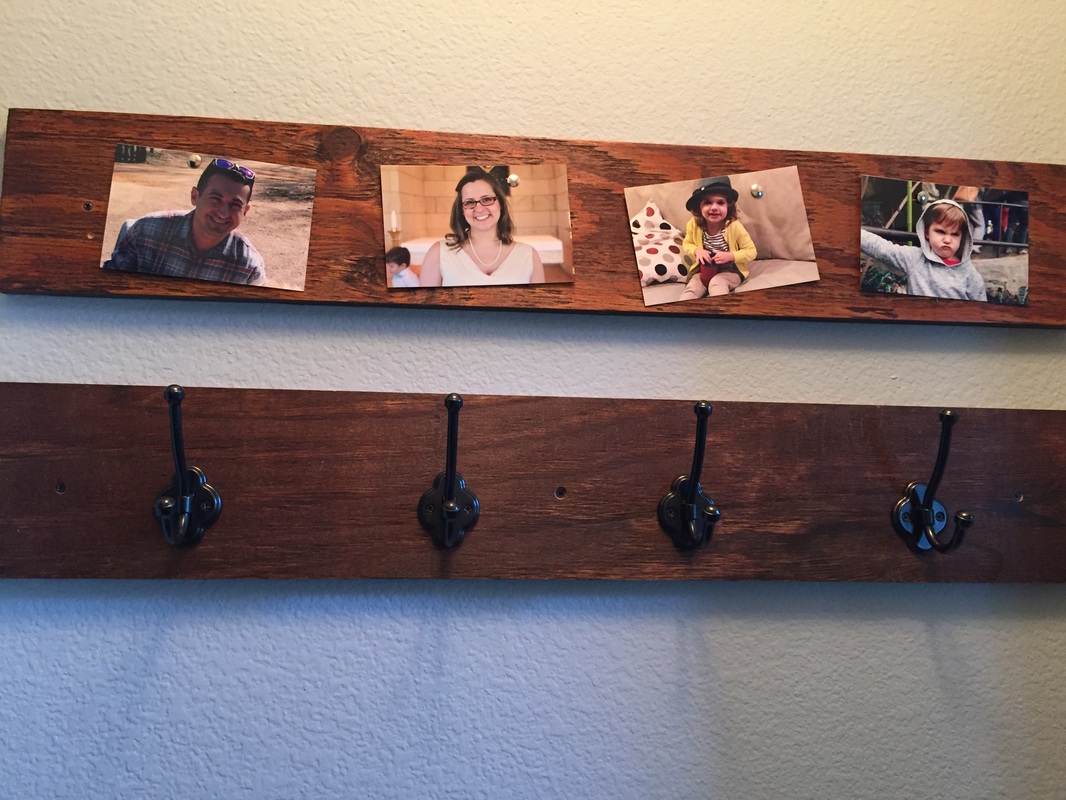 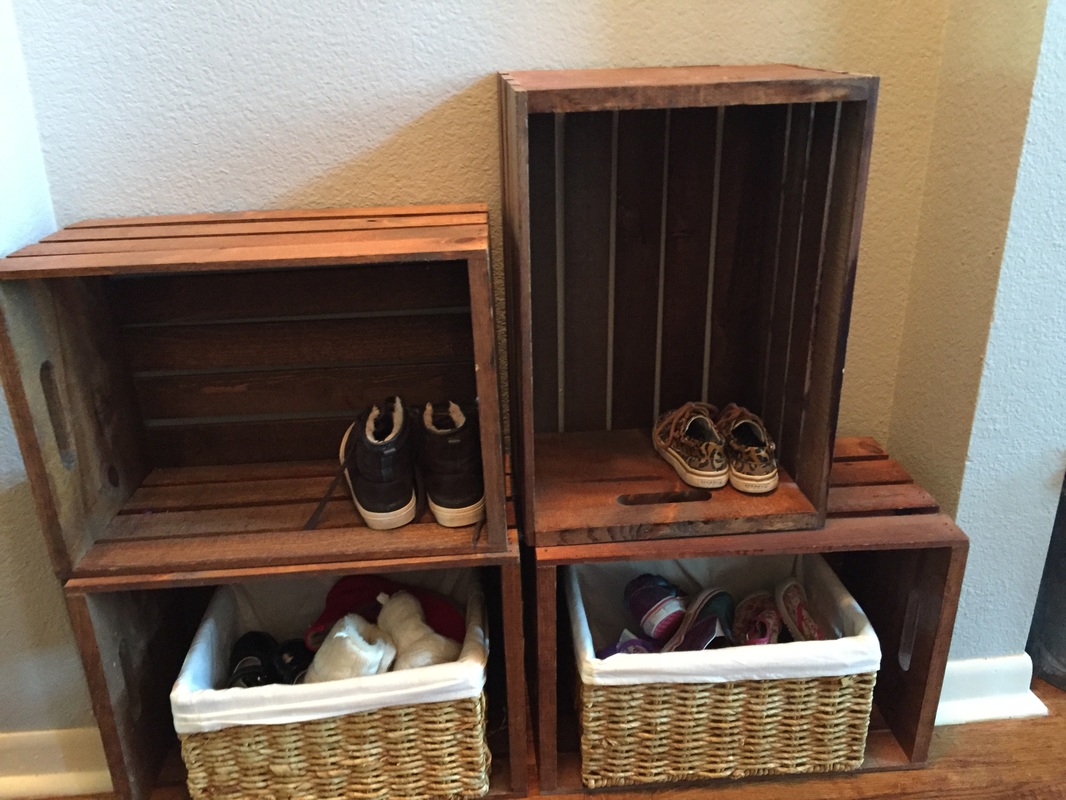 We bought the house we’re living in now back in Oct 2014. It was an awful mustard orange color, had the original “builders grade” carpets from the 1990s, and a room addition off the living room whose woods floors didn’t match with the rest of the floor. For the first time ever, we didn’t DIY all these issues. We were in a rush to move in and there was no way we could do everything that needed to be done in time; plus it was an extraordinary amount of work we simply didn't have the time for. I know that this blog isn't DIY within a DIY blog. But I can't talk about the other projects we've done in our house without mentioning the first and biggest one we did, despite the fact that we turned to help. So while we were in Seattle at my brother-in-laws wedding (shout out Zac & Rach!) we had some renovations going. First they painted the whole house- I wanted Restoration Hardware's paint color Flint. The painter insisted he could match the color in a cheaper brand and since we were stressed about the cost of all this we went against our better judgement and said okay. We were in Seattle when they painted and they painted the entire 3,000 ft2 house in a blue/gray that looks nothing like Restoration Hardware's Flint. I ended up still really liking the color, but at first I was pretty damn annoyed. We went a shade darker in the bedrooms and two shades darker in the media room.
Then they pulled up all the carpeting and replaced it. The random patch of carpet in the dining room (surrounded by hardwood in entire rest of the bottom floor) was replaced with matching hardwood and the entire downstairs we had lightly hand-scraped and re-stained so the woods all matched and you couldn’t tell two sections had been added at two different times. Word to the wise – deep hardwood scraping and dark stain color is on its way out according to HGTV.
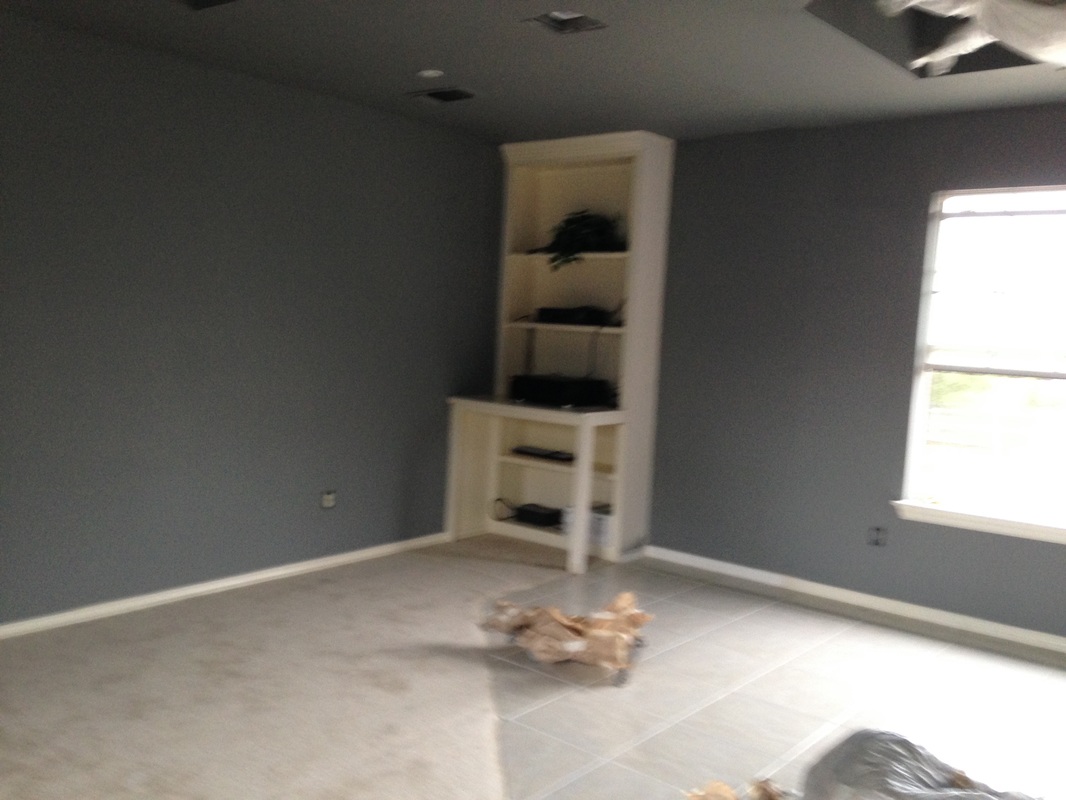
  And here's the new carpet. I was worried about two shades of blue/gray competing or being too much. But I think it worked out well. We did a patterned carpet going up the stairs only. I love the pattern and think it's pretty timeless. It definitely classed up the joint. 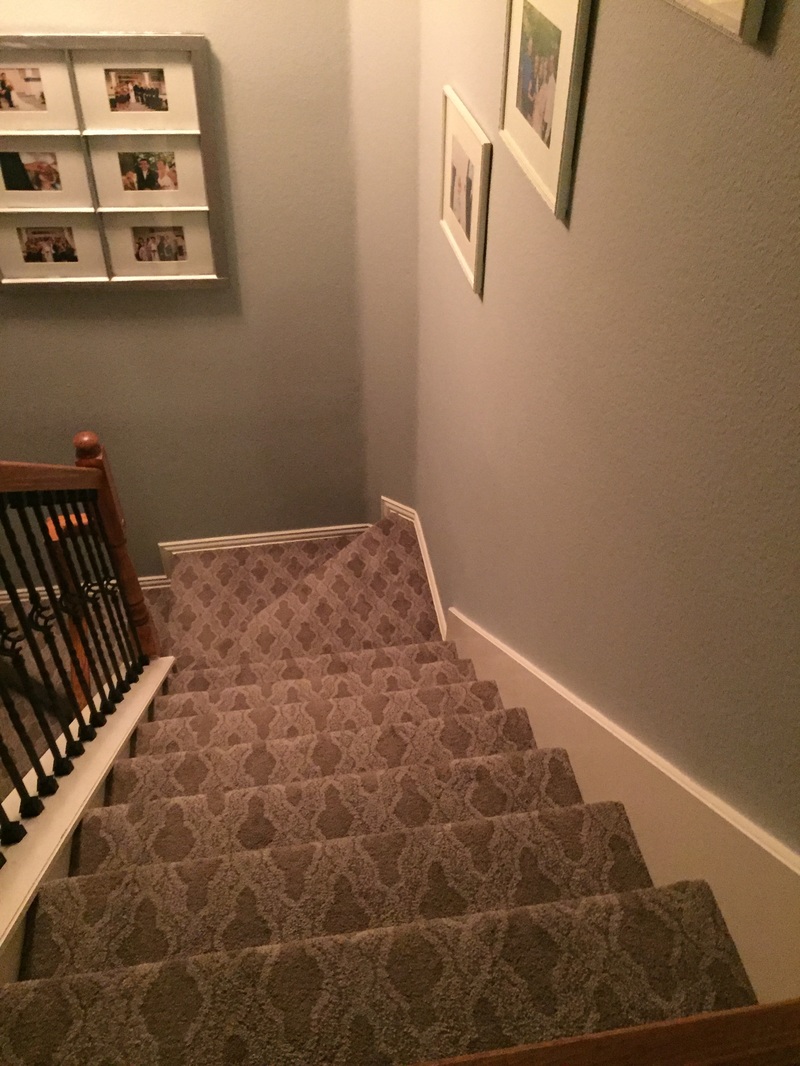  The most random and ugly thing we changed was to have the tile floor that was on 1/2 the media room floor removed and carpet put down across the entire media room. The previous owner told us he put the tile in because him and his buddies would spill food/drinks while watching the game and he didn't want to deal with stained carpets. Hahaha what!? Sooo much better now! 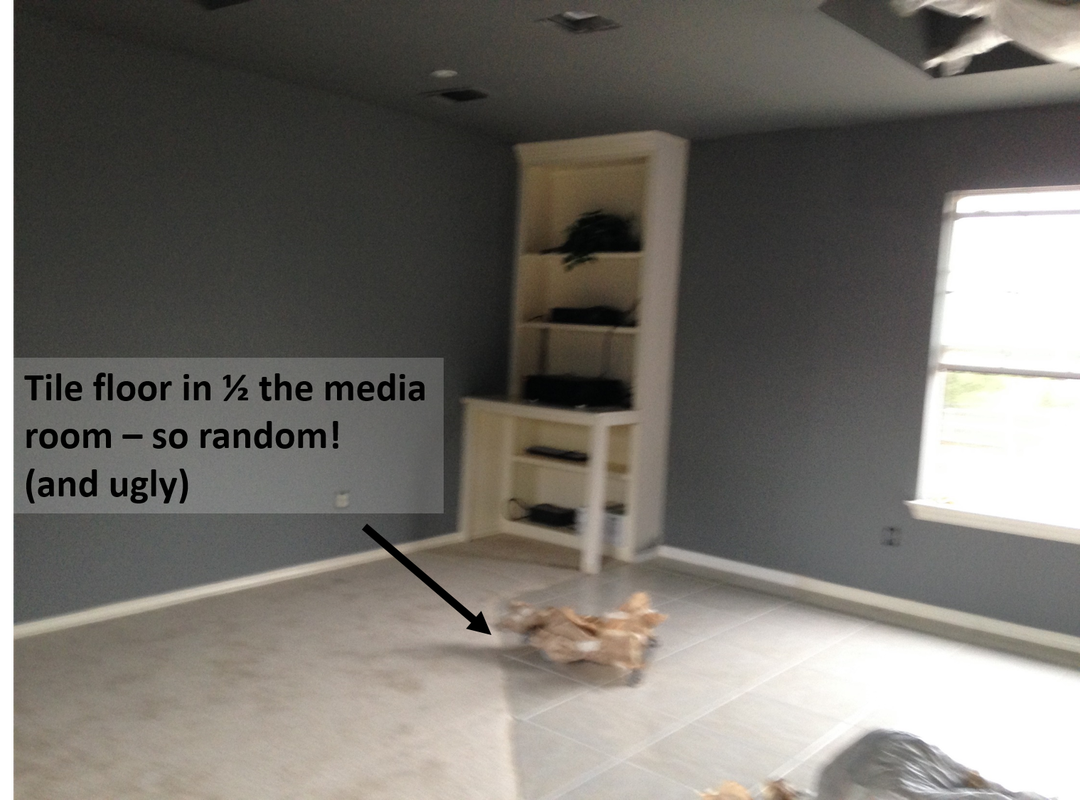 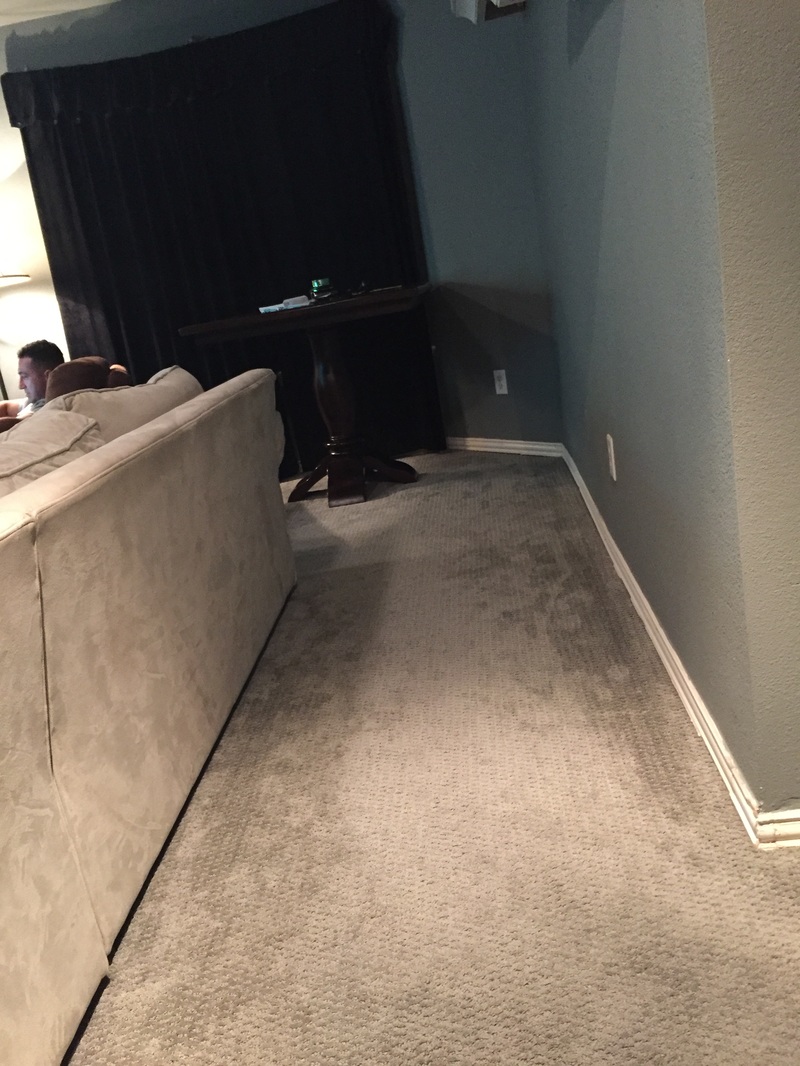 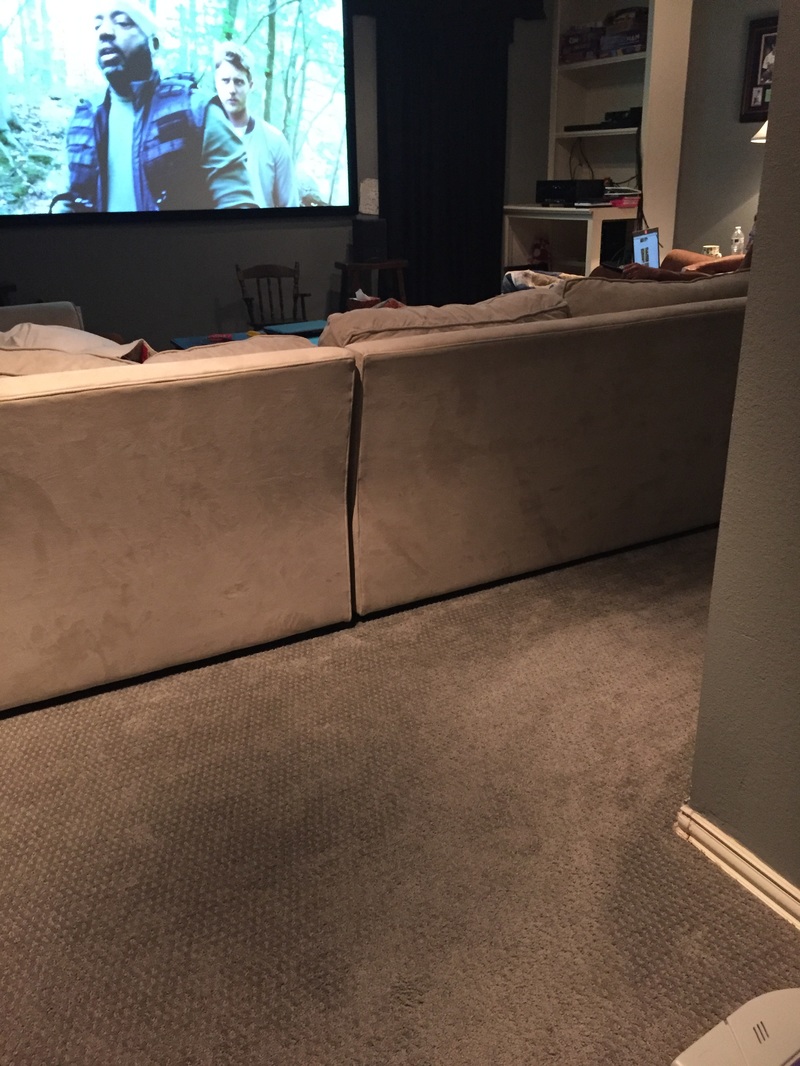 If I remember, or care enough, I'll update the picture with the carpet once it's been vacuumed and the place has been picked up. Anyway - that's it! New paint, tile pulled out, new carpets, and new/refinished wood floors in one week's time. We moved in and starting the remaining 100+ list of projects we have to truly make this place our own. Follow me and see!
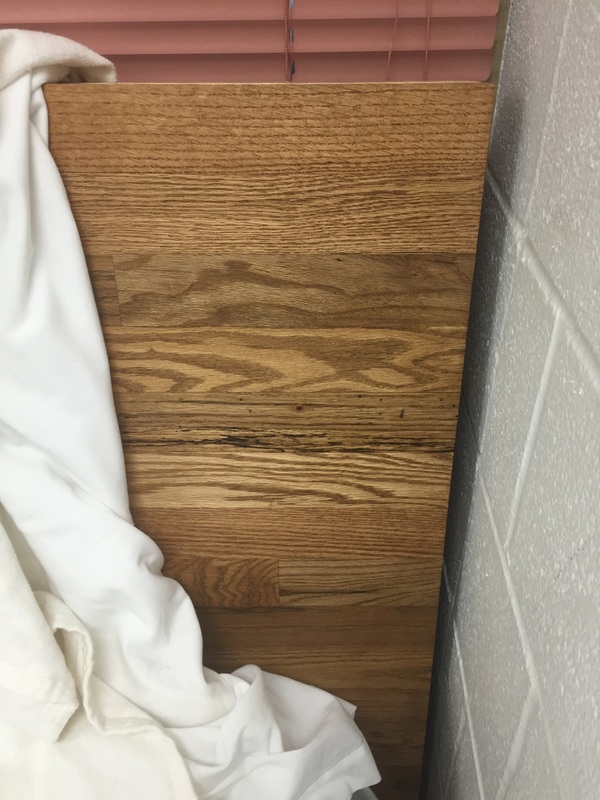
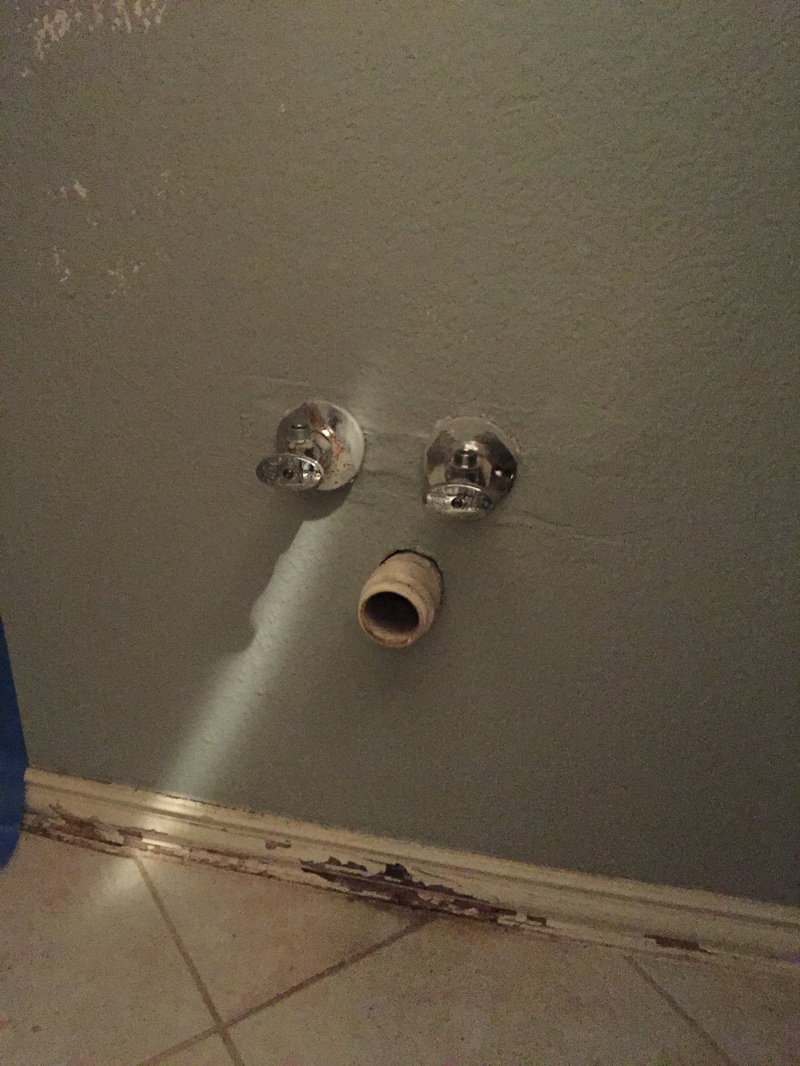
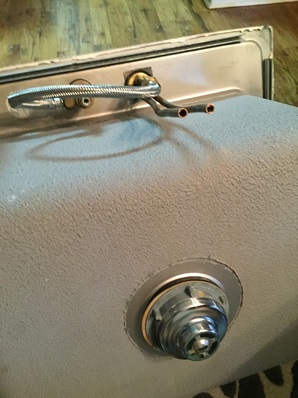
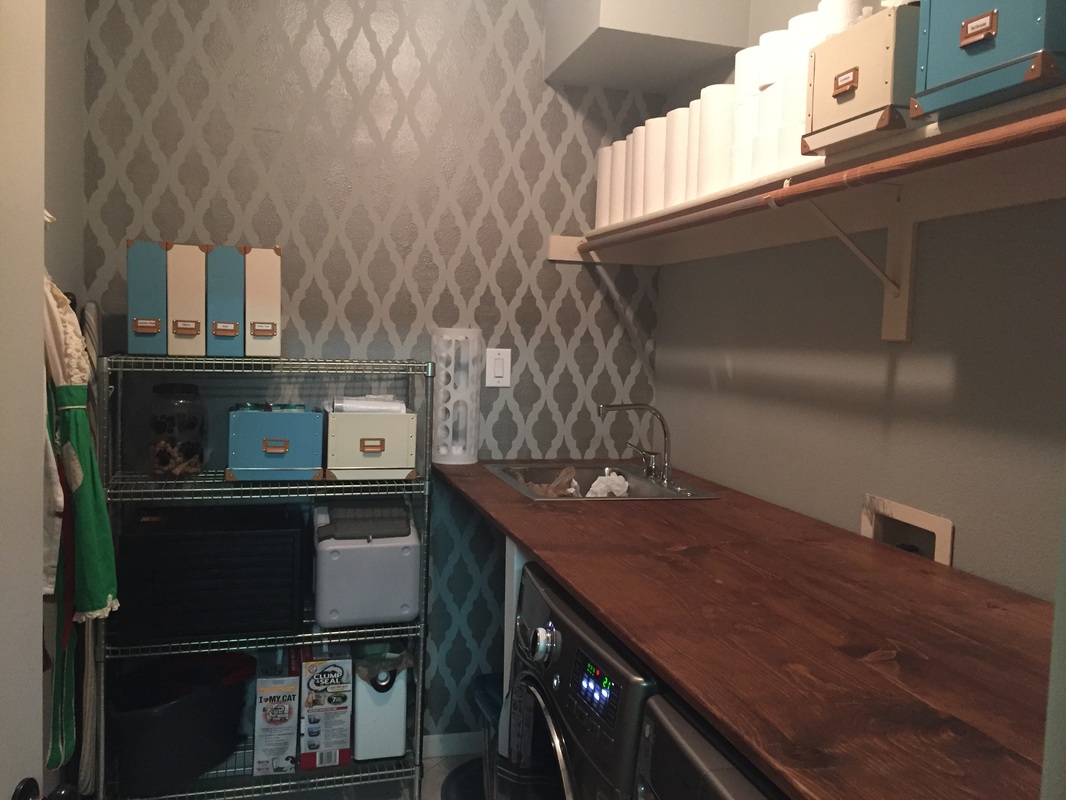
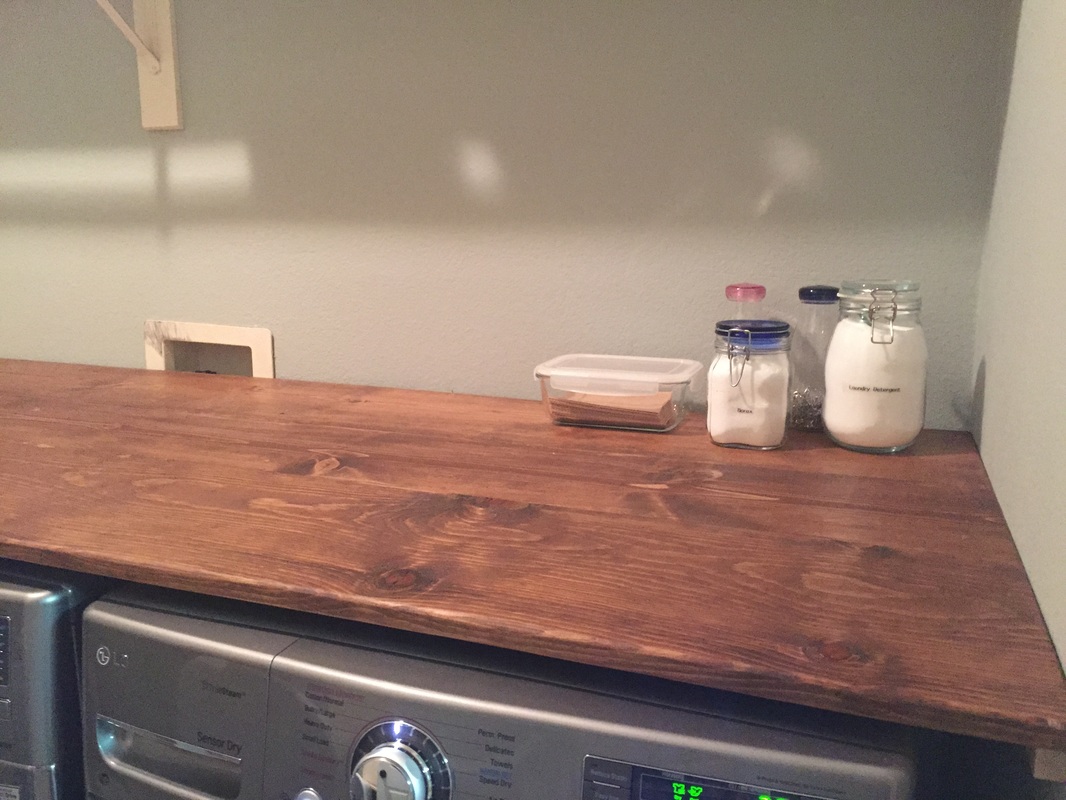
My husband and I bought our first washer and dryer set back in 2005. We were moving into our first house, I was in college, and we could afford only the cheapest bottom-of-the-line set available. We kept that W&D set for 11 years, through 1,000’s of washes and 2 babies (which = 10X the laundry). Finally last year, we couldn’t ignore the growing amount of rust inside the washer or that clothes were coming out with more holes and stains than when they went in. We patiently waited a few weeks for Black Friday and finally bought ourselves a fancy new GE front loading washer and dryer set. I didn't think I was an adult when I served in the Navy, not really when I got married, maybe when I had two kids... But the day we brought home those gleaming new W&D... Finally it was certain, I was officially an adult- Because I was so bloody excited over a W&D!! However, there was a catch to the excitement. Having these gorgeous new appliances shined a light on how neglected and truly ugly our laundry room was. We decided that “nobody puts baby in the corner” – those fancy new gadgets could not live in the hovel we were calling a laundry room! I mean... look at this! Awful. 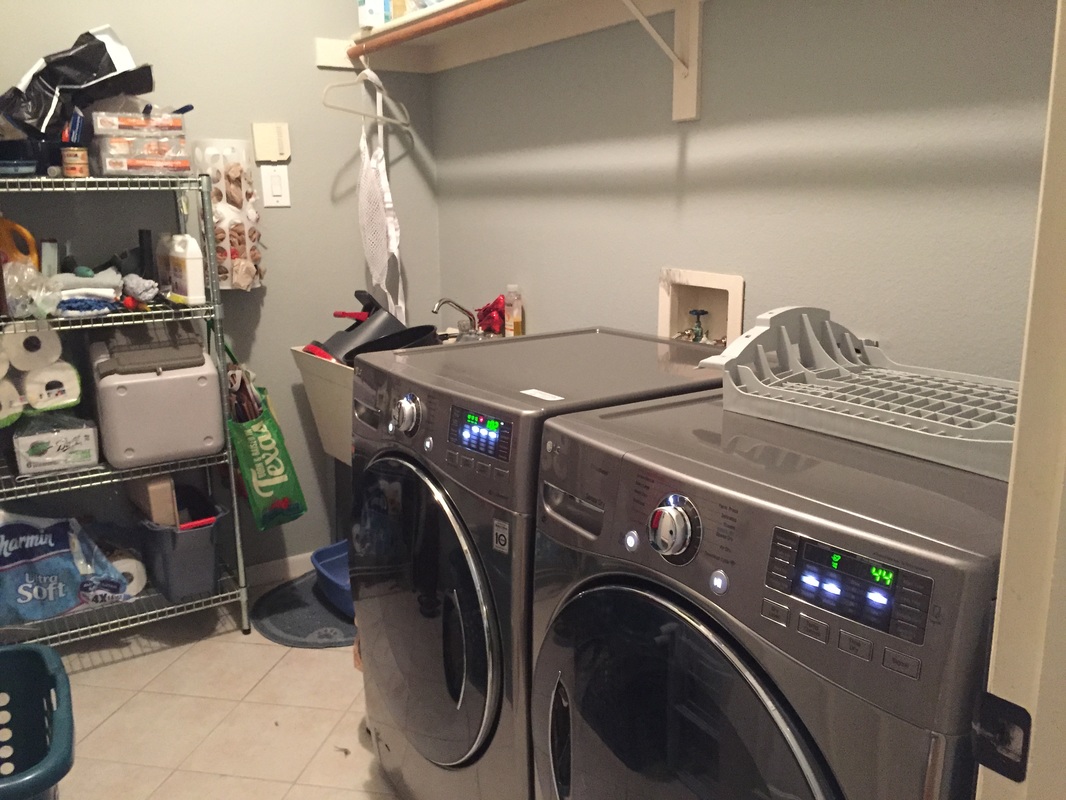 So we decided to fix 'er up! First we cleaned the laundry room out and pulled out the extremely abused faculty cleaning closet utility sink we’d inherited from the previous home owner. I painted the laundry room walls the same gray/blue as the rest of the house, which immediately made a drastic difference. I decided to give it a-go with my first stenciling project. I searched and searched through Etsy and found my now favorite stencil shop Cutting Edge Stencils with countless patterns, helpful tutorial videos, and materials you need to get started. I bought the Taj Mahal Allover stencil and the Stencils Essentials Kit and watched their video tutorial a few times over. I spent half a Saturday painting the stencil on the main wall in the laundry room. A clip on stencil level kept it straight the whole way through. It’s a methodical slow business, overlapping each top layer of the stencil from the top of the wall to the bottom. I won’t even try to explain it as well as their video does, so I’ll just share that! I did my laundry room wall in a silver paint. I probably used a bit too much paint on my roller because I had a good amount of bleeding. By the time I was done the stencil was pretty wrecked. But I didn’t plan on using it anywhere else in the house and trashed it. I gave the paint a day to dry and I spent the better part of Sunday going over the stencil by hand with the gray wall paint, touching up the messy blotches. I got pretty meticulous with it – but I’m really glad I did. Because if there was one blotch somewhere on that wall, I’d look at it every time I went into the laundry room for the rest of my life! 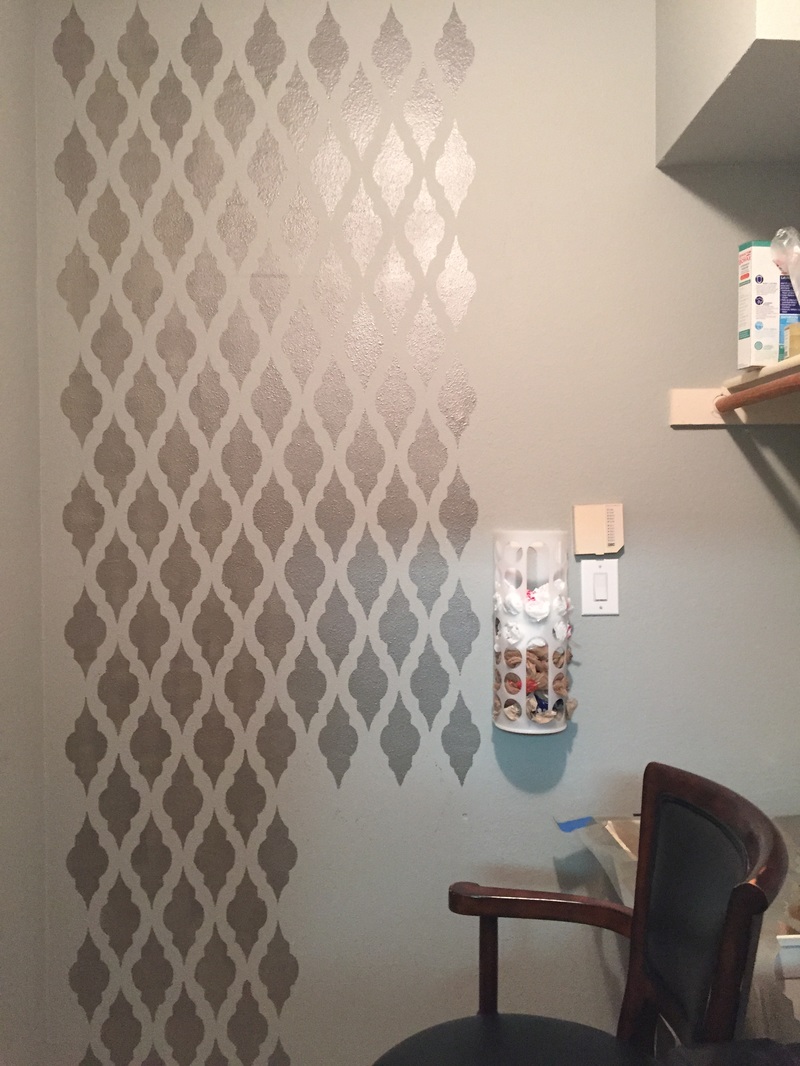 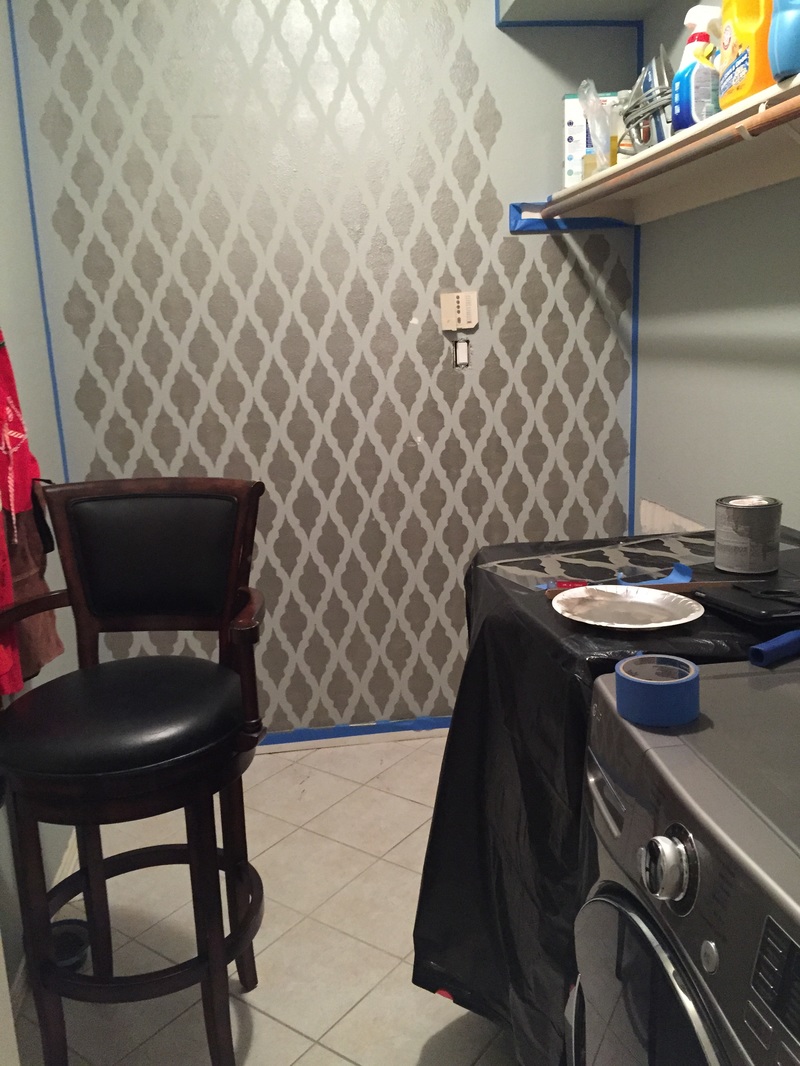 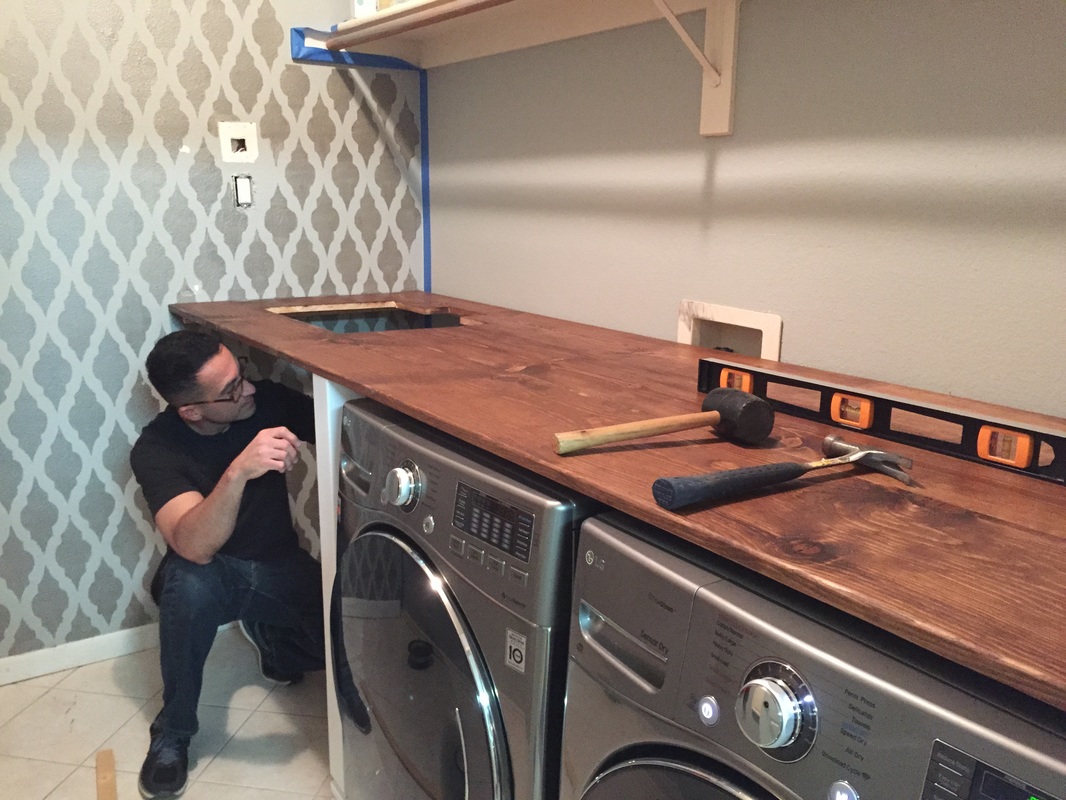 I don’t have to worry about the boards separating and I know that the joints are secure and hidden. I used the Kreg on the support legs that I bought at Home Depot as well and everything came out perfect. Most of the time when I decide to tackle a project like this it takes double the time as an ordinary human because problems always seem to arise that were totally unexpected. Not this time, everything went smoothly and the end result was beautiful! After some sanding, staining, and sealing, we ended up with a counter top that we couldn’t purchase anywhere, for half the price of something smaller. Winning! Back to Amber: I’d found a big utility-sized sink on craigslist for a STEAL of $25! (This thing goes for hundreds $$ in the stores). Challie cut a hole in the counter top and set it in using a silicone sealant. Connected the water pipes and drain and it worked on the first shot.
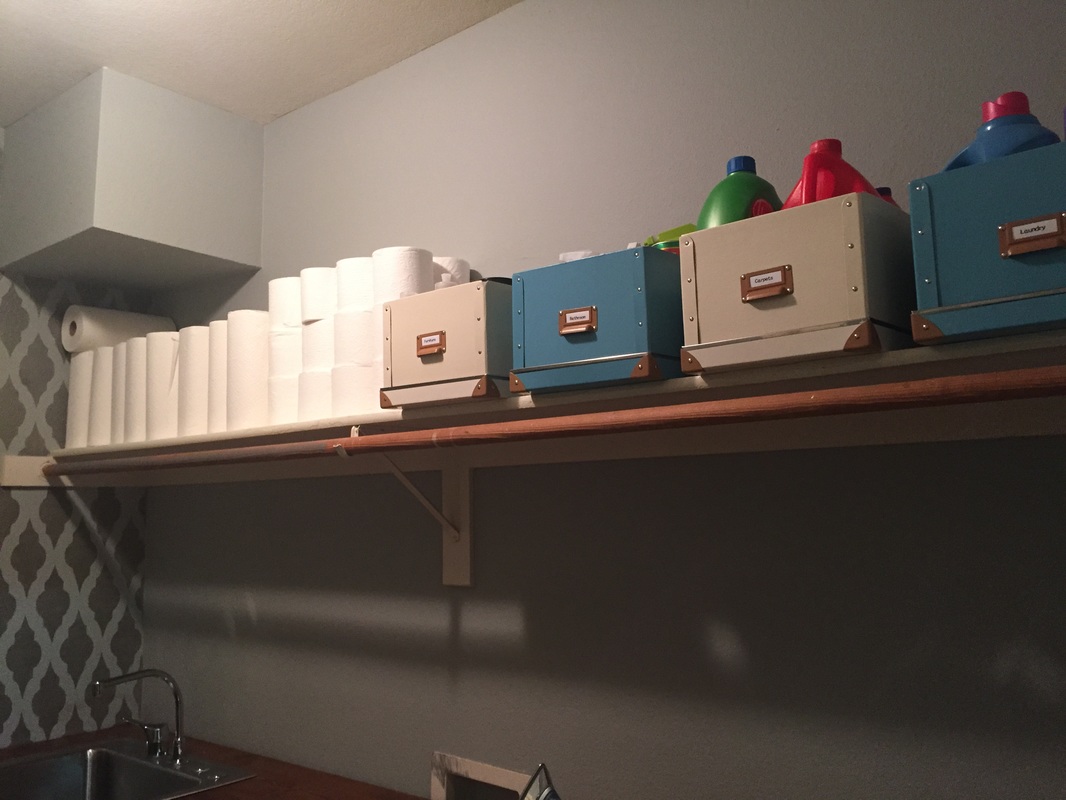
All I had left to do with some organization of the junk that had accumulated in the laundry room (storage) closet. So I hit up Ikea and bought some of their adorable and inexpensive FJÄLLA boxes and magazine files in blue. I busted out my Epson Label Maker and got down with some ridiculous organization labeling. I can get pretty into the details and I never regret it. I scavenged my kitchen for some empty glass containers to hold laundry detergent and dryer sheets. Everything now has its place and every time I open the laundry room door I appreciate the beautiful view. We added our metal bakers rack that we’ve had for 15+ years. It’s served as kitchen storage, garage storage rack, and now laundry room storage rack. I sewed two curtains with a silver/blue sateen fabric from Joann Fabric. I loosely followed this blog tutorial on the Wicker House Blog. The curtain to the left of the washer and dryer hides the cats litter box. Not only does it keep it out of site, but it had the unintended happy consequence of cutting down on kitty litter that falls on the floor and keeping the occasional unpleasant odor contained. 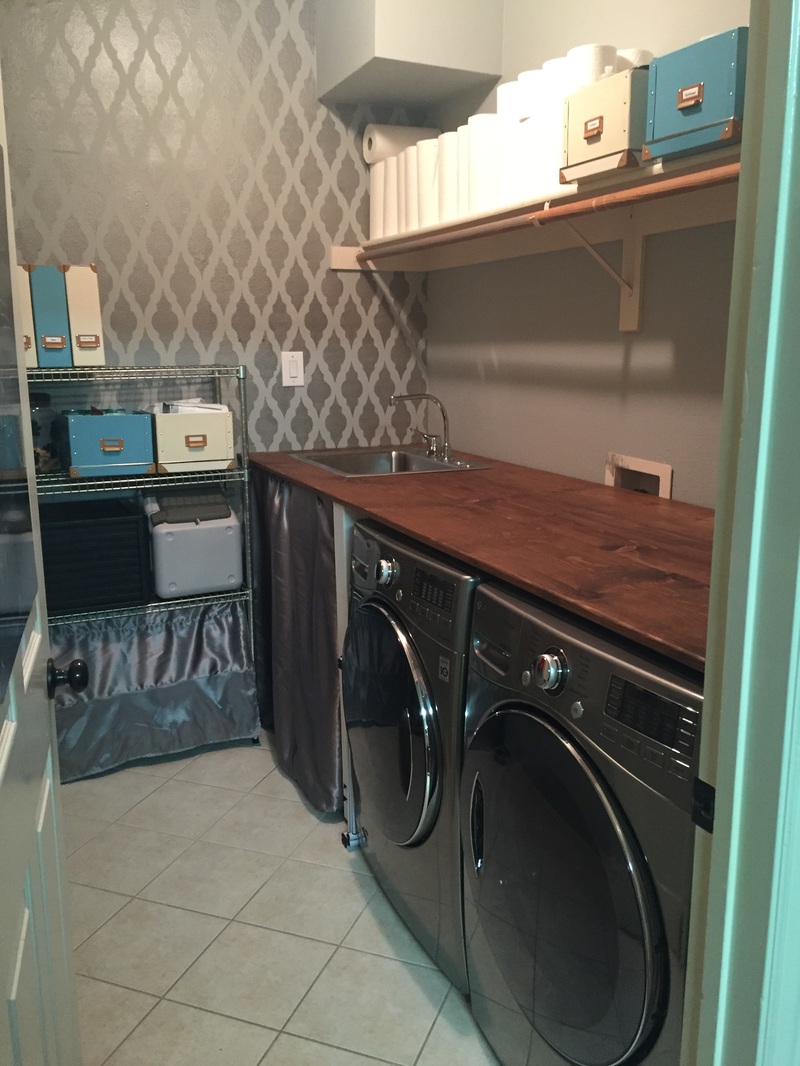 Our finishing touch was to add a cat door to the laundry room so the dogs would stop stalking our cat’s (Handsome Rob) private space and eating his food (or worse his p@@p- UGH sooo gross). Not only that, but the bristles on the cat door brushes his coat every time he goes through it and keeps dander allergens down. It was a pretty big project that took quite a few weeks from start to finish (we’ve got kids and full-time jobs, so nothing is done in one weekend anymore). But it’s definitely one of my top favorite result of all time that I force guests to oooh and ahhh over whenever they stop by for the first time (what, I’m proud!). It’s just so pretty- that room is now my happy place. I seriously love doing laundry now. I’ll shut the door, put Netflix on my iPad, and take my sweet time folding every piece of clothing our family owns. Peace and Joy can be bought for just a few hundred dollars in materials after all! Total Cost of Project: $225
Products mentioned in this blog:
Hi, my name is Amber, and I'm a Craigslist junkie. I spend many nights sifting through pages and pages of ugly fake chipboard veneered furniture. But every so often I find a gem that I love to snatch up. Back in 2006 I found the Pottery Barn Apothecary Coffee Table on Craigslist for $50. I don't know what they'd done to it, but the paint was peeling off 75% of the surface area. It looked ready for the junk yard. But I knew I could restore it! I'd loved that coffee table since it was featured in the Friends episode in 2000. First things first, I applied chemical paint stripper to the coffee table in a thick coat with a paint brush. I wore heavy-duty rubber gloves. I let it sit for ~10 minutes until all the paint was raising up and bubbling. I used a plastic scraper to peel the melting paint off. It only took me about an hour or so to do a thorough job of it. I was in the garage with the door open. Make sure if you're doing something like this you have a well ventilated space because those chemicals are toxic! Once the paint was removed I sanded it down so it was plain wood. I also cleaned up all the hardware using a wire brush attachment. I gave it a day to dry and then I set to priming and painting! I picked black paint and crystal knobs off of Amazon. And here's my... $65 coffee table (after cost of materials). This coffee table was like $800 new (if anyone knows the cost of what the Apothecary Coffee Table went for please post in the comments- that's my best guess). :This table still goes for ~$500 on Craigslist today if you can find it. The paint job has held, here it is 10 years later in my living room just a few months ago. I got a new coffee table off Craigslist just last month so it's been moved upstairs in the movie room. I will never get rid of this beauty, even if Pheobe walks in and is horrified! 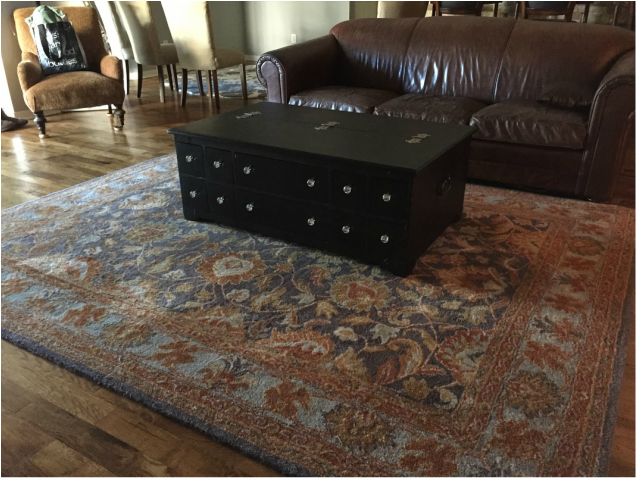 I want to start my first blog post on my exciting new website (that I've been toying with starting for... at least five years now) with our first DIY project. It was a really big one to attempt on our first go. But we were in our early 20's- nothing daunted us! I was in college and my husband (fiance at the time) Challie was (and still is) a Fire Fighter- which means we both had a good amount of time on our hands. We had just bought our first house. Built in the 1950's, it was 1,500 sq ft, and a perfect first home. It came with the obligatory 50's dated pink bathroom and pea green kitchen. So we rolled up our sleeves and got to work! We gave ourselves a budget of $2,000. This is the before: The first thing we did was to pull up the dated linoleum tile floor and lay down nice clean tile (the best we could afford). 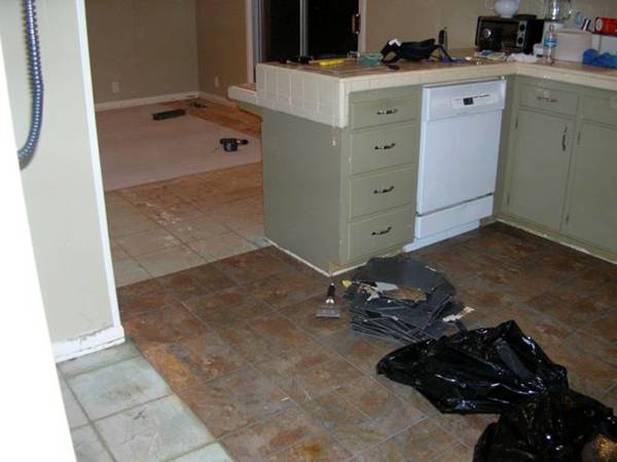 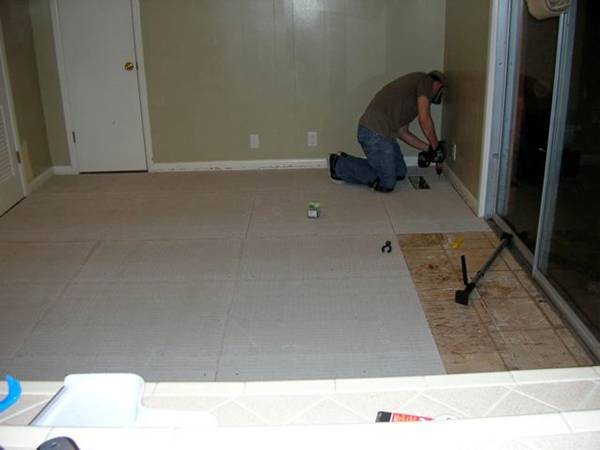  That's our dog Zoe! Awww she was so young there! Note the muddy feet - she loved digging in that big backyard. Next we demo'd the kitchen. Actually this is the one part that we paid some construction workers to do and were grateful we did. It looked hard! They tore out all the old tile. We went to Seconds and Surplus in Dallas and bought some gorgeous granite tile (much cheaper than a large slap of granite and close-to-the-beautiful effect). 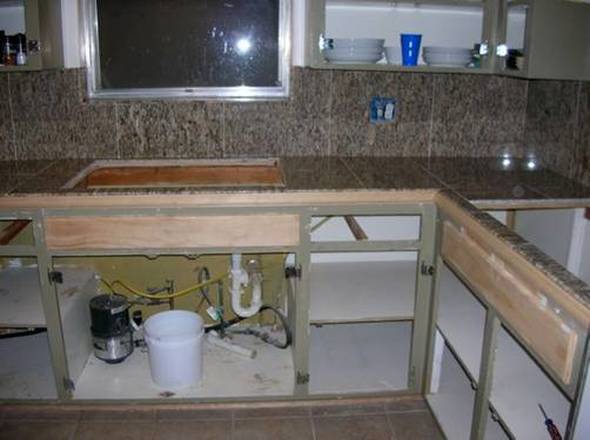 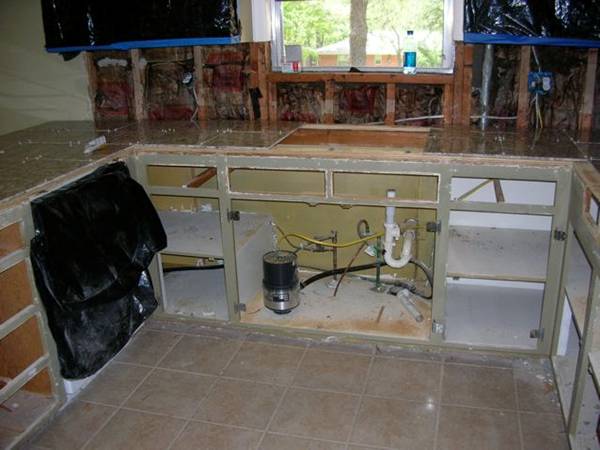 While Challie worked on the counters and backsplash, I was in the garage refinishing the cabinet fronts. I'm particularly proud of this part (and keep in mind this is pre-Pinterest!). I used a jig saw to cut pieces of beadboard about 2" smaller all the way around and glued it on with wood glue. Then I took small wood trim and cut it like a picture frame and glued that on too. I kept the drawers plain/flat. I filled any gaps with wood filler. Sanded, primed and painted them a glossy white and added new pulls and knobs. We painted the walls a gorgeous blue paint from Restoration Hardware (my favorite line of paint)- courtesy of our friend Jeff Bahrenburg who started his own painting company in the DFW area "Signature Painting." The last steps was to go shopping at Ikea: we purchased and installed a deep farm house kitchen sink, faucet, pendant light, chandelier and... VOILA! 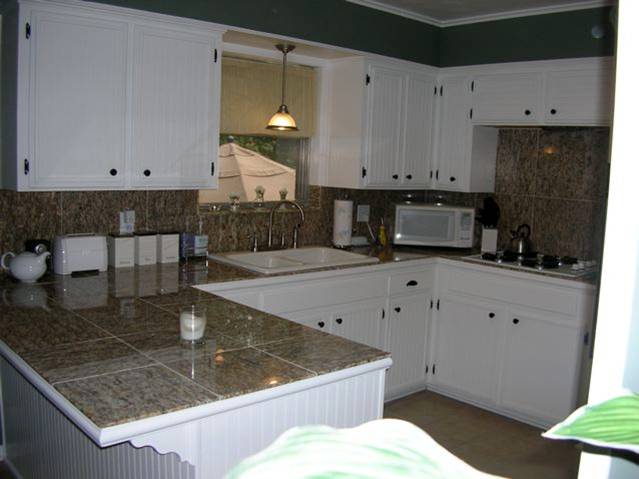 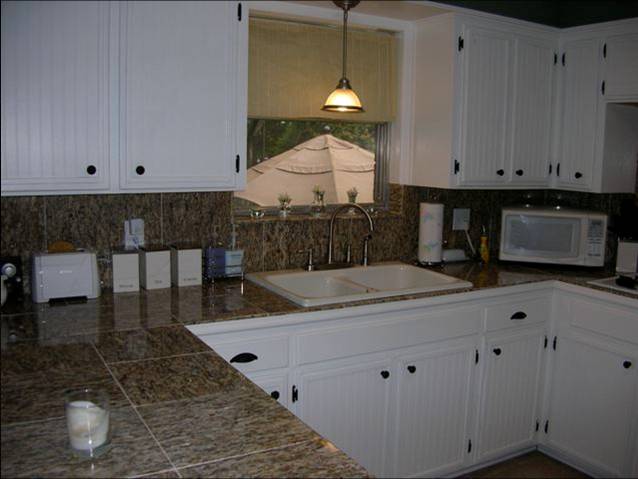 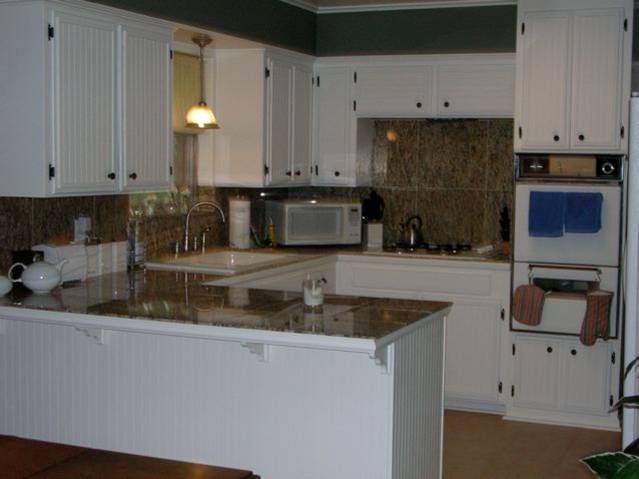 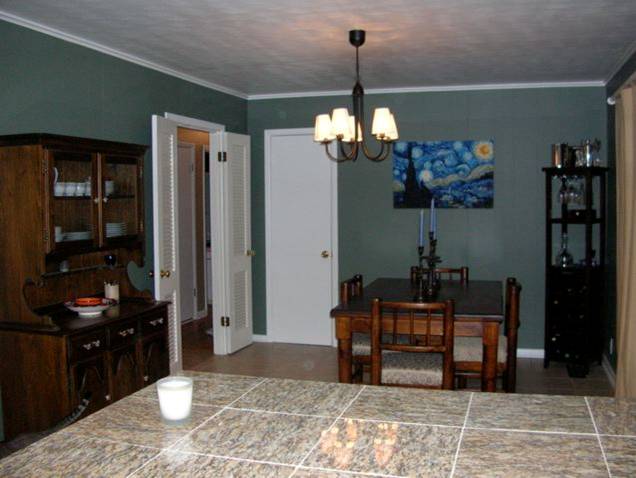 We ended up selling our house almost immediately after we finished this project and turned a tidy profit, in large part due to our renovations I'm sure!
|