by ChallieOne Saturday, during the hottest part of the Texas summer, a guy knocked on our door. This guy was a salesman from Solar City. He promptly began to inform me that I could save a lot of money if I were to install solar panels on my house. His timing was pretty much perfect. I had just received a letter from my current electric provider telling me that my contract was about to expire and the rate that I had gotten a year ago was about to go up. Shopping for an electrical provider is not my idea of a good time or even time I want to be spending comparing these companies. As most of my fellow Texans know, when a electric provider gives you a quote for electricity they will tell you give you the price per kWh. When you first see this rate, you think, wow, $0.08 per kWh is pretty good!! So you sign your year contract and forget about it for a month. Then you get your first bill…. Look down at the fees, taxes, and charges that add up and soon you’re paying $0.14 per kWh!!! OH the trickery!!! So when Solar City showed up, I was in the right mood to hear the man out. He showed me some examples on how this company has different ways you can get panels without having to pay the $20,000-30,000 price tag (we don’t exactly have that much laying around to throw down on some solar panels). They offer a few options such as renting the panels for 20 years, paying Solar City a set price for 20 years, or just buying the panels outright. I’m sure there are other options that I’m not remembering, but we decided we were going to rent the panels for the next 20 years. With the design that Solar City came up with, we would be able to offset 40% of our electricity usage with Solar!! That’s pretty awesome!!! Now, Solar City gives you a design that will put the most panels they can fit on your roof. You have the option to reduce that number as you see fit. It seems that people are concerned with how the panels will look from the street. What if the panels are ugly? What if the panels are so ugly no one wants to buy my house if I decide to move? To be completely honest, those were questions we had at first. It wasn’t until actually sitting down and doing some research that I realized the concern about how they'd look was insignificant compared to the positive impact they'd have on the environment. 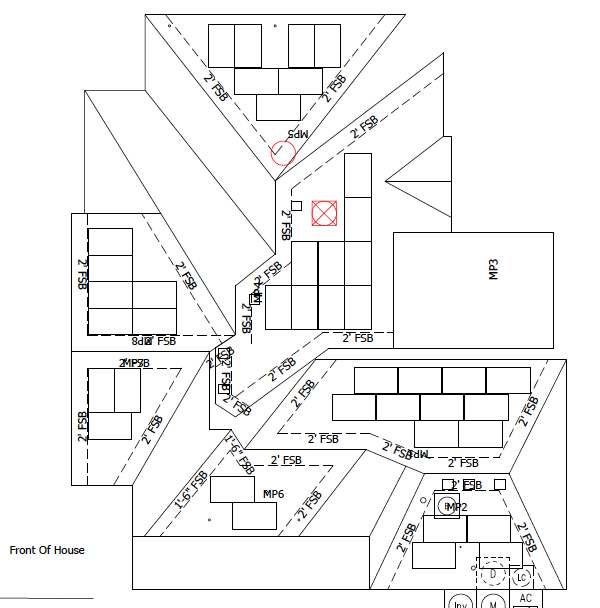 I am a big proponent of personal responsibility. I take responsibility for my actions, for my life, and for my family. Having said that, I believe that I am personally responsible for the energy that my family consumes and for any amount of carbon we are emitting. Once I began reading about all the benefits of using solar energy it hit me like a mac truck! How could I even consider if the panel would be too ugly for me to put on my house! Seriously!! Our system has the potential of saving 3-4 tons of carbon from being released into the atmosphere. This is like plating 100 trees a year!! I don’t know about you, but I don’t think I can plant 100 trees every year. The electric grid in Texas can have some serious demands placed on it during the summer months and every bit of relief we can provide just goes to helping our fellow Texans!
When it comes down to it, we can have a significant impact on our energy consumption by utilizing solar panels. My wife and I developed our own family mission statement and one of the tenets that we live by is to be mindful of our use of the earth's natural resources and our impact on the environment. We do this in hopes to hand down a planet to our children that is better than we found it. Just our house going solar isn’t going to change any weather patterns, but it’s a step in the right direction. My only hope is that more people can come to the same realization that we have. When we signed up to Solar City they gave us a friends/family referral code that gives them their first month's electricity for free- if you're interested use the following link: Share SolarCity. More to come when installation begins!
0 Comments
Once we'd equipped ourselves with the basic chicken equipment (feeder, water bucket, and chicken coop) and it was time to find our chickens! You need to decide both what breed(s) you want and also what age: do you want baby chicks that you can buy for ~$1 each? Do you want 3 month old teenage pullets who have made it through infancy and are a few months away from laying eggs? Or do you want an adult egg laying chicken who's just hit her prime (6 months - 2 years old. Chickens stop producing eggs around 3 years of age on average: which of course can vary dramatically depending on breed, living conditions, chance...). We liked the idea of baby chicks because the kids could really see their whole life cycle. Plus they're so stinking adorable! And cheap. We had a friend who owns a brooder so we could've borrowed that and not had the main "big expense" that comes with baby chicks. But... honestly we just didn't want to wait 6 months longer to start getting eggs! The thing is, we wanted chickens young enough that we got to watch them grow up a little bit at least and really "bond" with our family. I got an email from my favorite feed store in Plano, Wells Brothers, that they were having chickens for sale one weekend coming up. The owner's daughter, Becca, runs a farm called RBG Ranch and they raise & sell chickens. So she came out to her father's store for a weekend expo. I loaded up the kids and headed on over. I spent a good hour chatting with Becca while the kids hung out with Becca's daughter and the chickens (she's a wealth of knowledge!) about what kind of chickens we wanted and what age. She recommended we get pullets (teenagers). They've made it past the tenuous baby-stage (where you're likely to lose a few, and have to explain that to the kids...) but they're still young enough that you have the experience of raising them from young to adult lives. 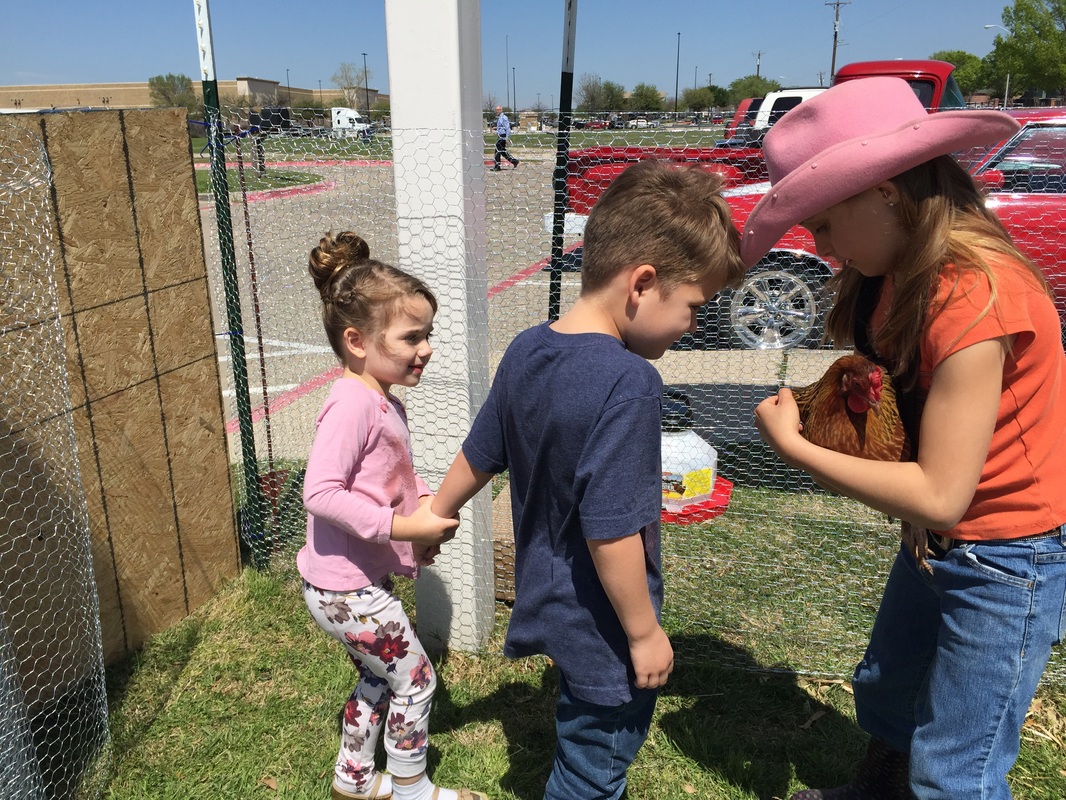 That sealed the deal! I took Becca's information and promised to call when we were ready to buy some pullets. Next we started to research what breeds we wanted. Becca had been raising Australorps and Rhode Island Reds because she knew them to be good backyards chickens. I looked them up first and found them to be perfectly suited to us! Rhode Island Reds are pretty smart as far as birds go, They're curious, but they're very gentle sweet birds. Pulling from my favorite website when looking for breed information, www.backyardshickens.com they get a 94% positive rating from their community of backyard chicken farmers, Australorps (the black ones) are sweet tempered, great with other birds, very human friends, and great long term layers. The community gives them a 95% positive review. Our family loves "Red." She's definitely got the most personality and is the little ring-leader of mischief. But she's also the move "pet-like." She follows up around the back yard and bumps into our legs for attention sometimes. She was the first to allow us to pick her up and to pet her. She's the family favorite. The black Australorps are great chickens. No complaints. Maybe it's because we have three of them (previously five), but they just have a little less personality. But we really enjoy them all the same. 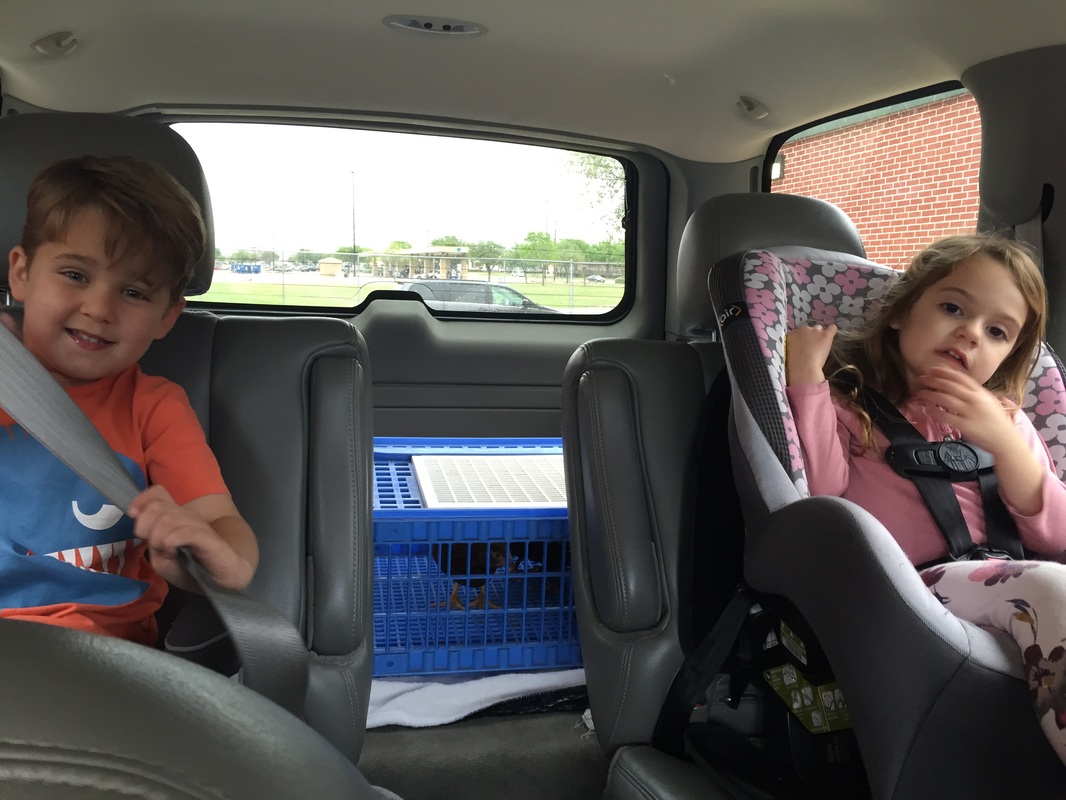 Products mentioned in this blog:
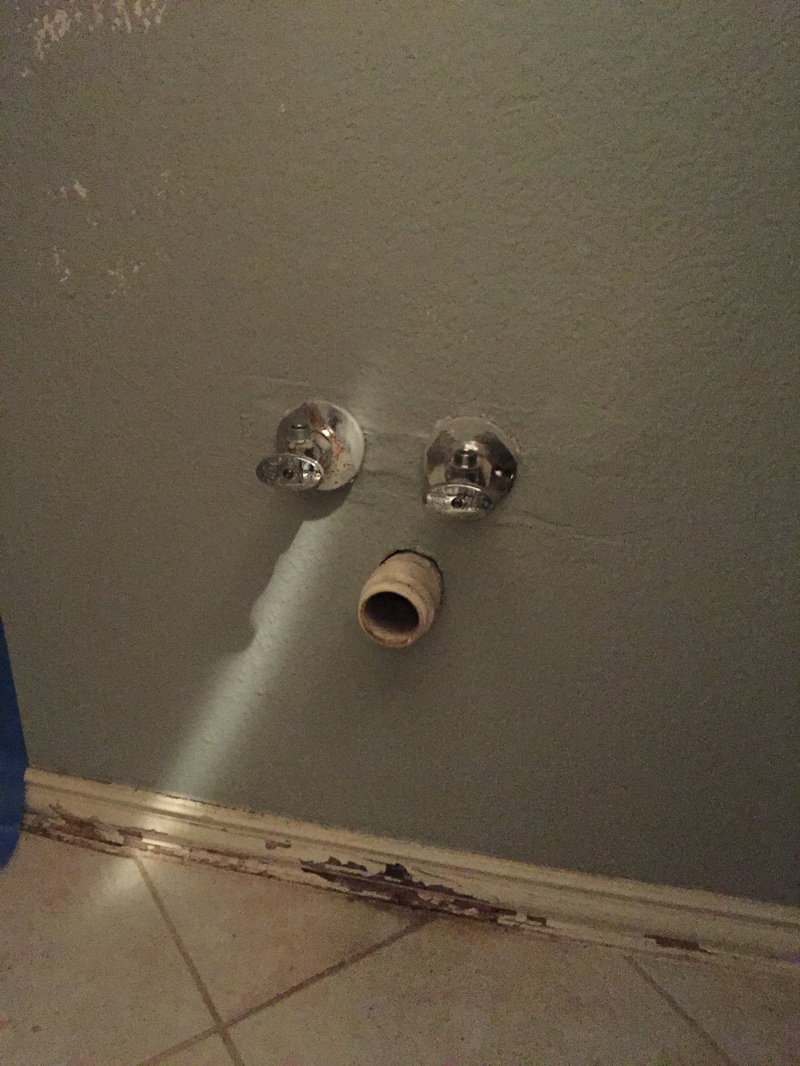
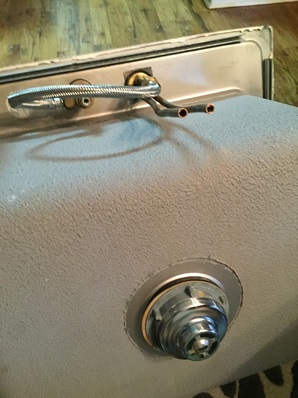
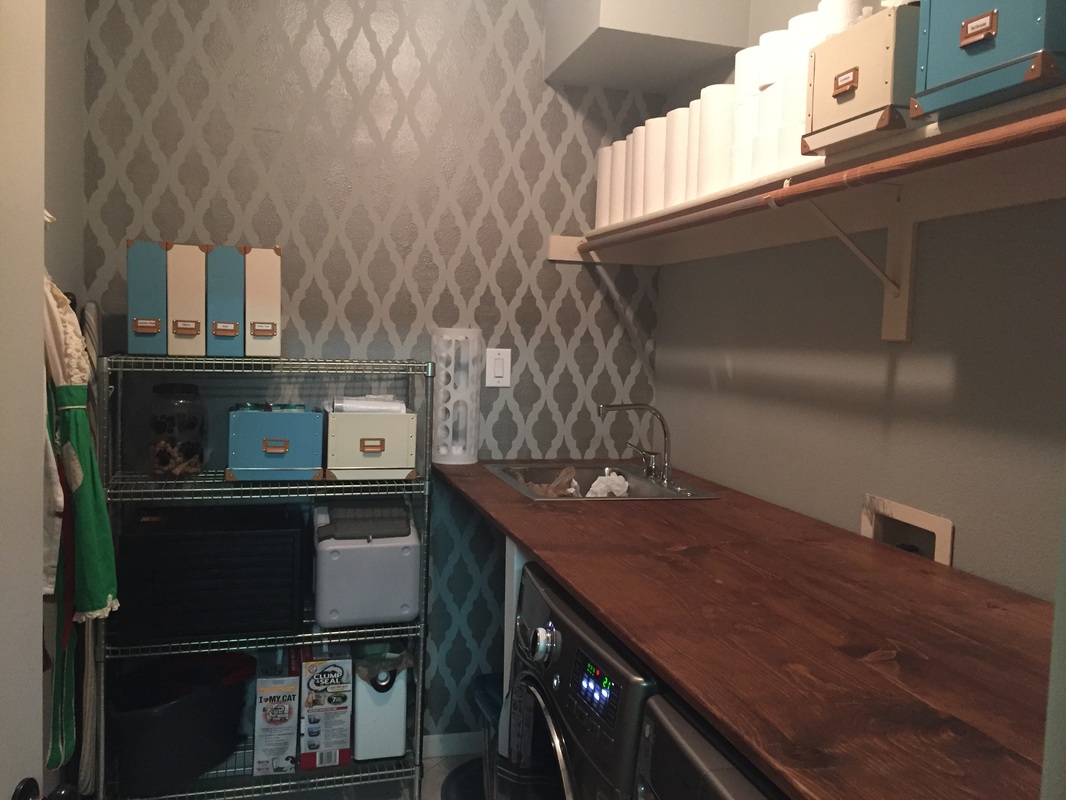
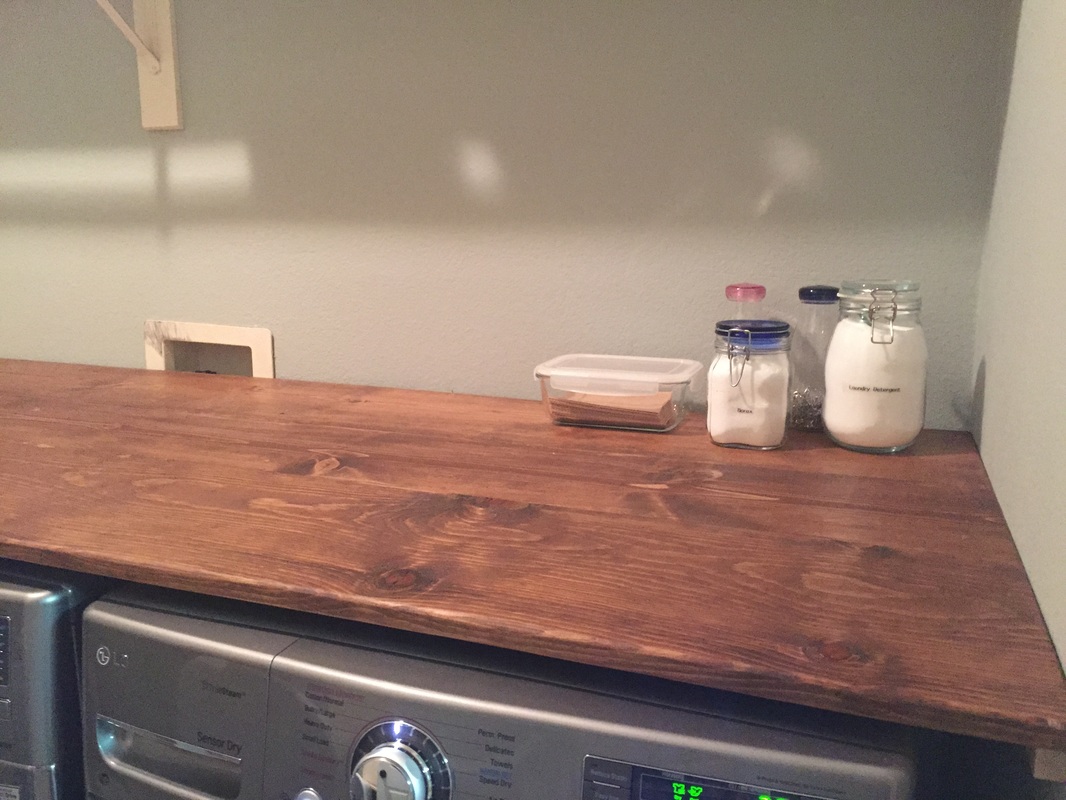
While we were waging a campaign to the city to allow us our backyard chickens, we started planning what we'd do when we won! First things first, we needed the equipment necessary for chicken keeping (water bucket and feeder) and our sweet hens would need a home. We started with an internet search. Pinterest has a ton of awesome chicken coop ideas and tons of downloadable free coop plans. One of my favorite websites www.backyardchickens.com has a whole community of chicken keepers who have shared their homemade coop plans. We kicked around the idea of building our own coop for a while, but when you looked at the cost of lumber and the amount of time it would take - we didn't feel it was worth it to us. Maybe if we had a bunch of spare wood or materials laying around that made it a cheaper option... but we really didn't. We'd have had to buy everything which would cost as much, if not more, as just buying an already made coop.. So we looked at buying a coop. We went to our local Tractor and Feed store which had a few coops in a box (a very big box). Their cost was between $250-600 for coops that would fit 6+ birds. We knew from research that we wanted 6 birds - that's the minimum I'd recommend for a family of four if you want to have enough eggs for your cooking needs (and have enough left to share with family, friends, and neighbors periodically). We're down to four chickens right now and we're having to buy from the store every so often because we don't have enough eggs for our family (which also doesn't leave us any to share which is kind of a bummer). Anyway, for $250 the coop seemed extremely basic/cheap and those lower cost ones typically had a good amount of negative reviews. We looked at other websites like Hayneedle.com, anthropologie, and Williams Sonoma even. Beautiful coops, but very expensive! So we turned to our reliable friend Craigslist and spent some time searching. Eventually we found the PERFECT coop for $200. It was only a 20 minute drive into the country - someone had a bona fide farm with goats, horses, dogs, and chickens all wandering around. It was really cool visit. They had bought a bigger coop and were selling their smaller one - it was a little weathered from the Texas sun, but with a little TLC we knew it would be perfect! It is adorable. Fits up to 12 birds, which is perfect because we didn't know for sure how many birds we'd end up wanting/getting. Who knew if 4 was enough, 6, 8? So that left us the ability to grow our flock. We knew we'd never want 12 or more - we're not looking to make this a business, just a fun hobby. 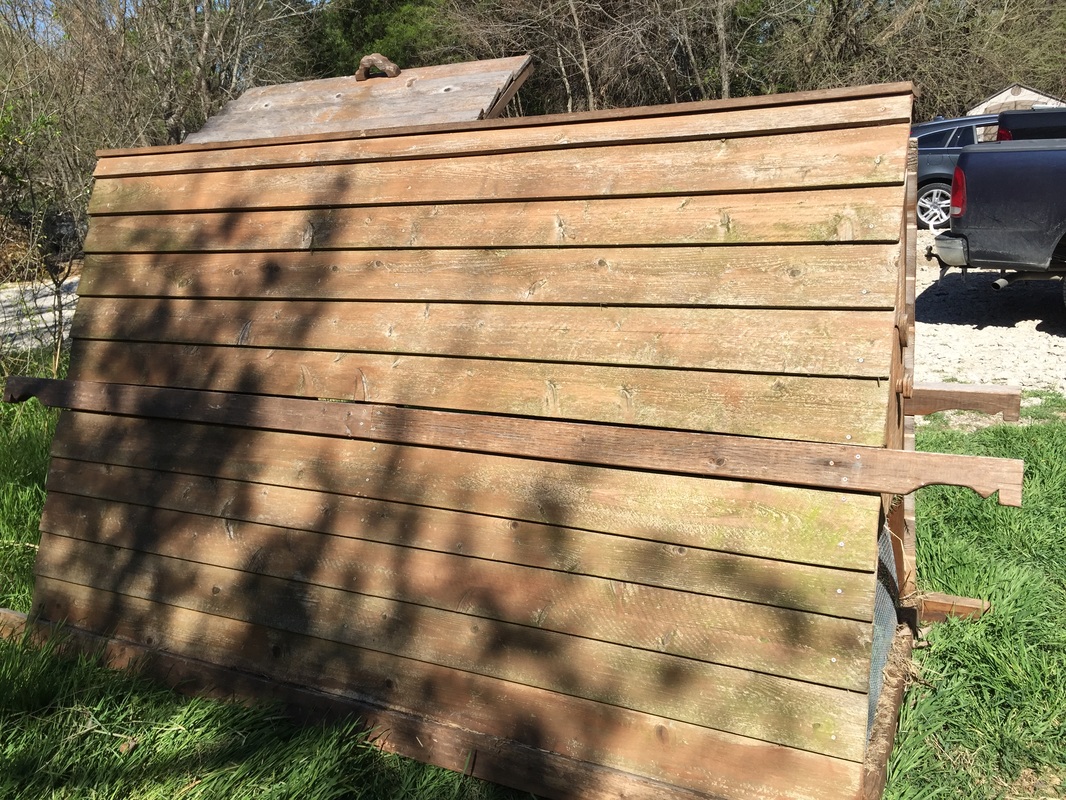 So I spent the weekend sanding the coop down, staining it with some walnut colored brown stain we had left over from past projects, and sealed it with two layers of sealant (waiting a day between each coat).. 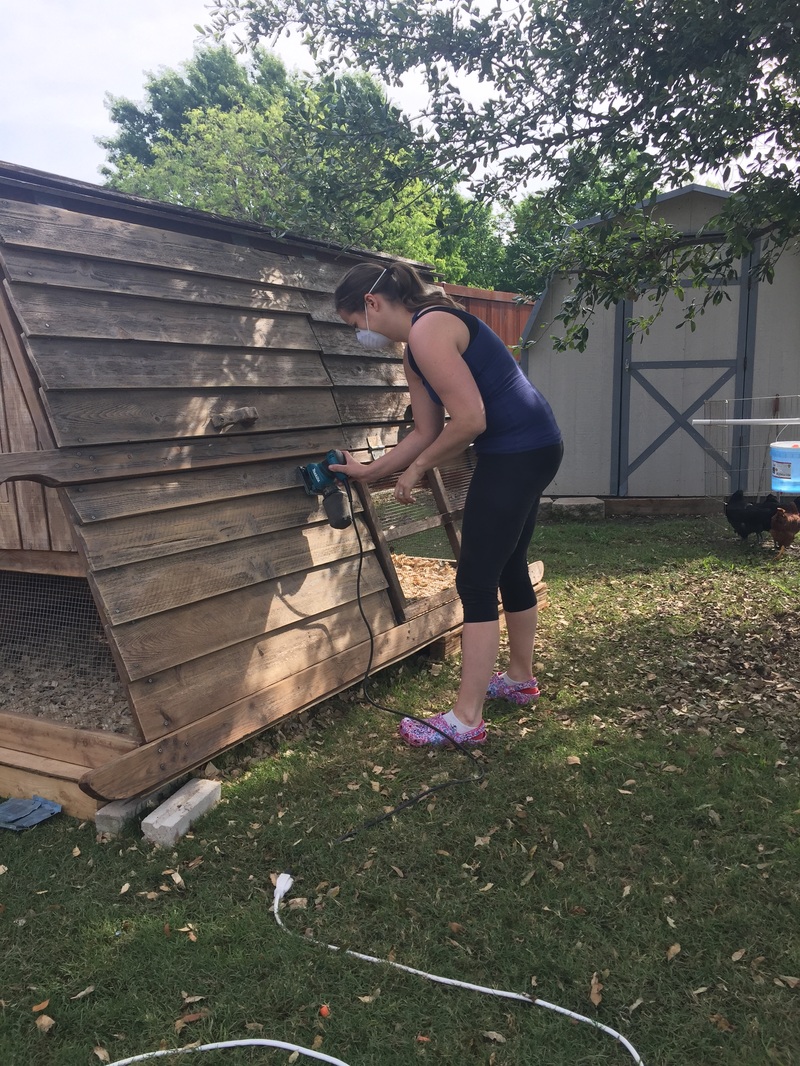 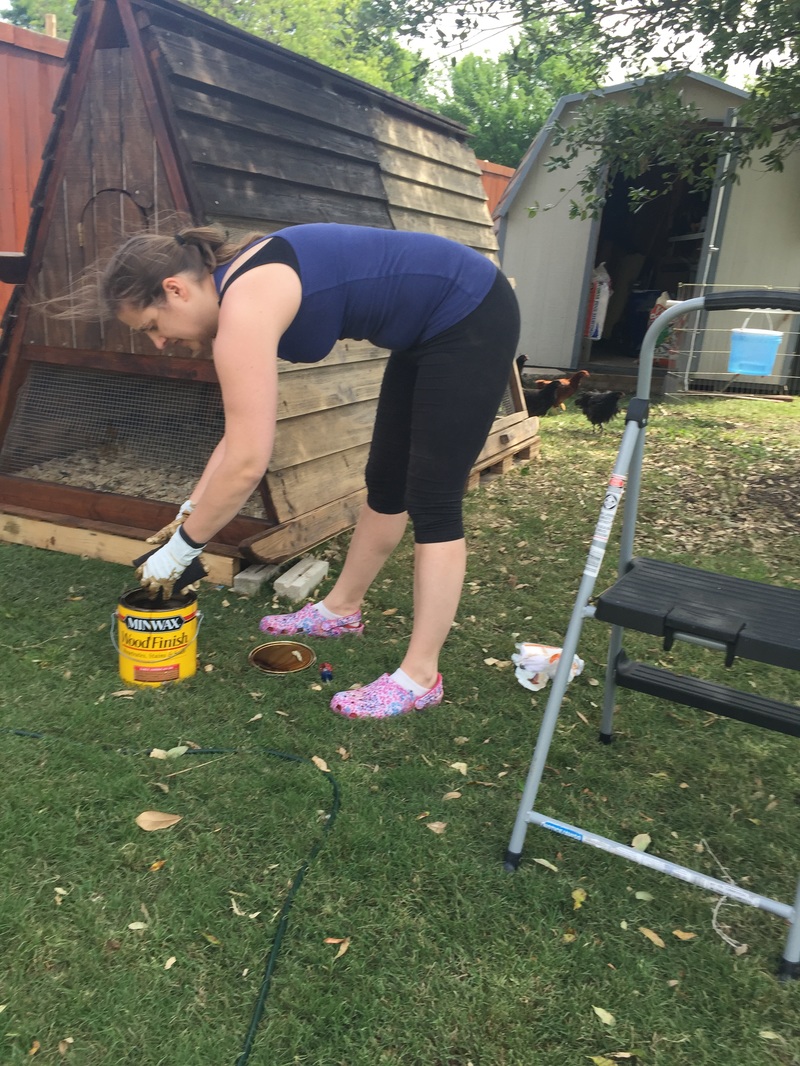 After one weekend's worth of work we had a $800 chicken coop to house our new chickens in (for the more palatable price of $200!): 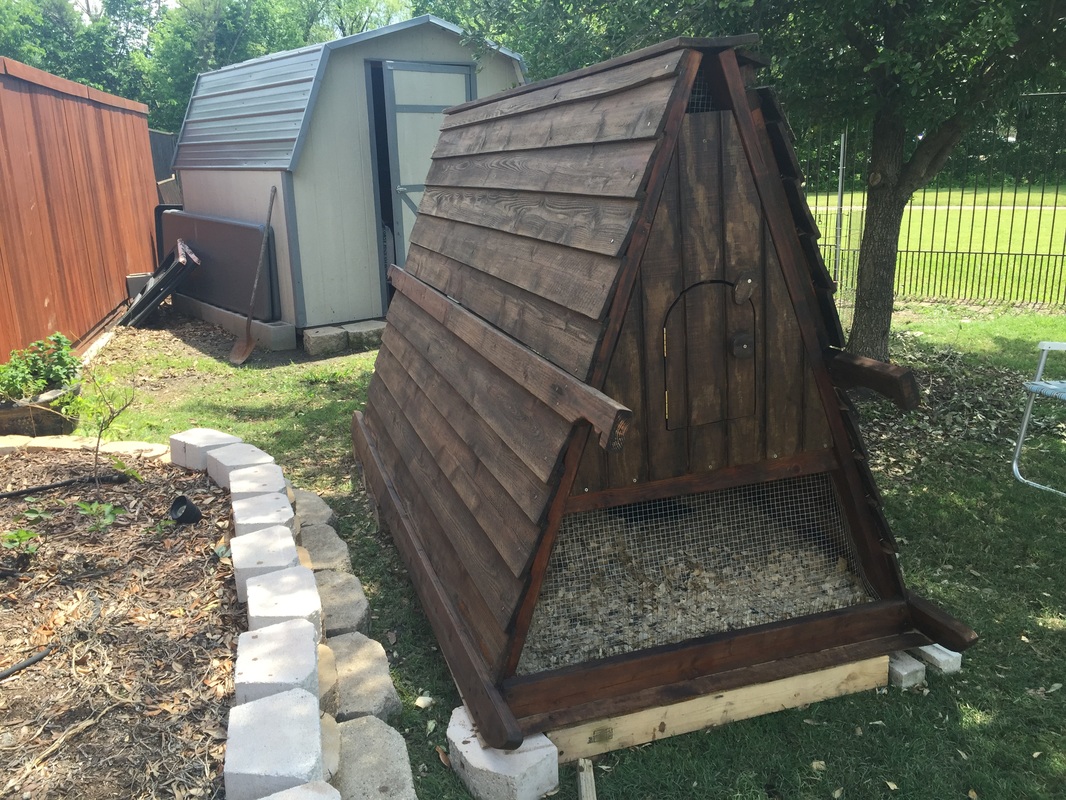 Our last touch was to build the chicken run. Luckily we already had an old metal dog pen that we unscrewed and straightened to run from the coop to the shed. We bought a roll of reeds from Home Depot to put across the top to keep the chickens from flying out and to help with shade. We used some fencing materials to block of the right side of the coop so the chickens have plenty of room to hang out along our fence line and behind the shed. We usually let them out every day for a couple of hours so they can free range. Our tree is good coverage to keep them safe from hawks (I saw one swoop down one day, thinking about grabbing one of chickens for lunch - it was crazy!! Luckily they hid under the tree and were fine). 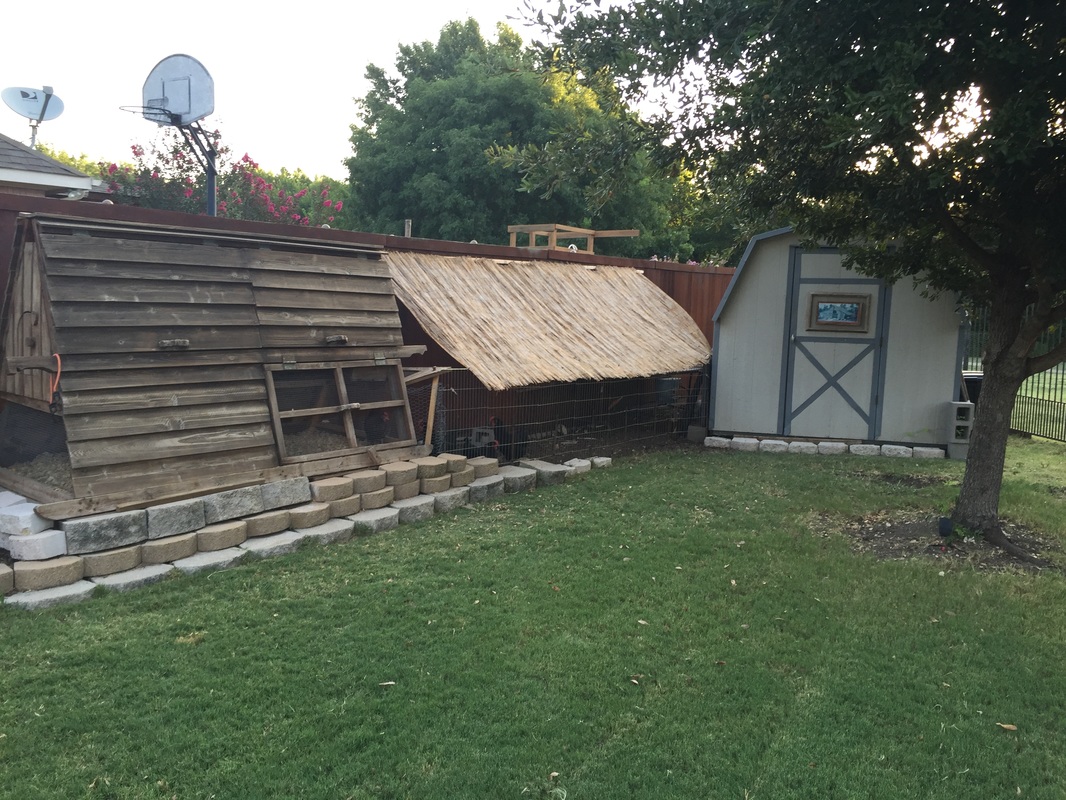 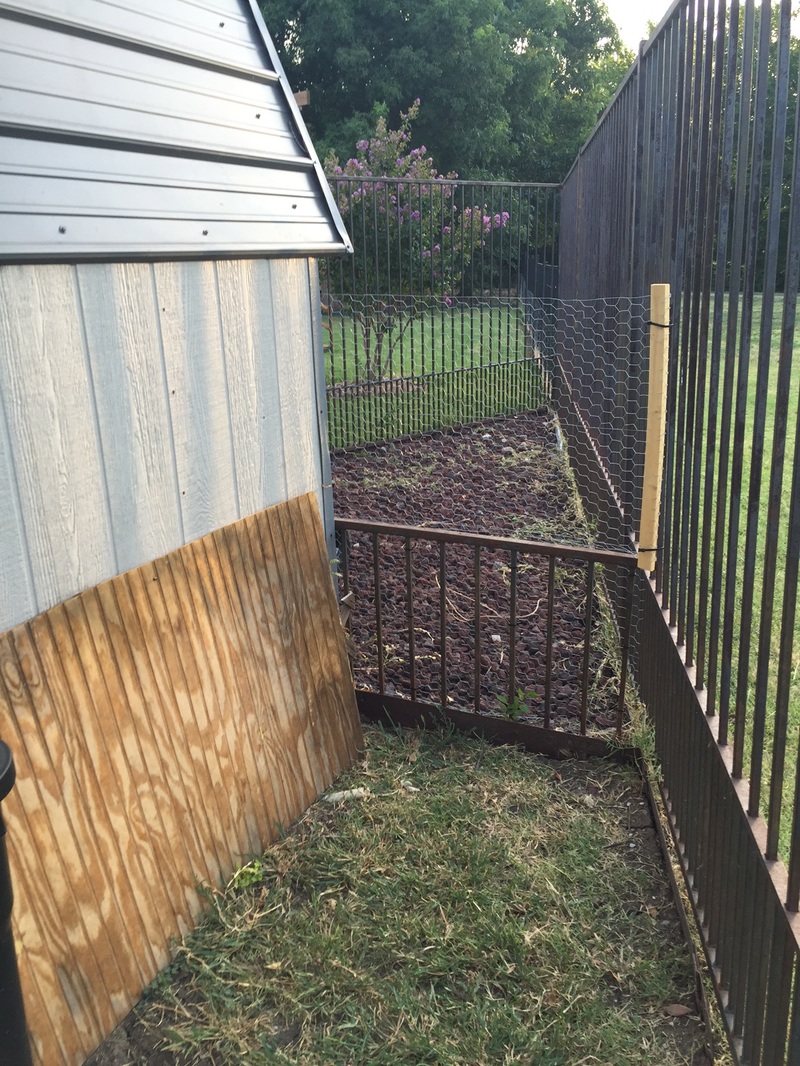 My husband and I bought our first washer and dryer set back in 2005. We were moving into our first house, I was in college, and we could afford only the cheapest bottom-of-the-line set available. We kept that W&D set for 11 years, through 1,000’s of washes and 2 babies (which = 10X the laundry). Finally last year, we couldn’t ignore the growing amount of rust inside the washer or that clothes were coming out with more holes and stains than when they went in. We patiently waited a few weeks for Black Friday and finally bought ourselves a fancy new GE front loading washer and dryer set. I didn't think I was an adult when I served in the Navy, not really when I got married, maybe when I had two kids... But the day we brought home those gleaming new W&D... Finally it was certain, I was officially an adult- Because I was so bloody excited over a W&D!! However, there was a catch to the excitement. Having these gorgeous new appliances shined a light on how neglected and truly ugly our laundry room was. We decided that “nobody puts baby in the corner” – those fancy new gadgets could not live in the hovel we were calling a laundry room! I mean... look at this! Awful. 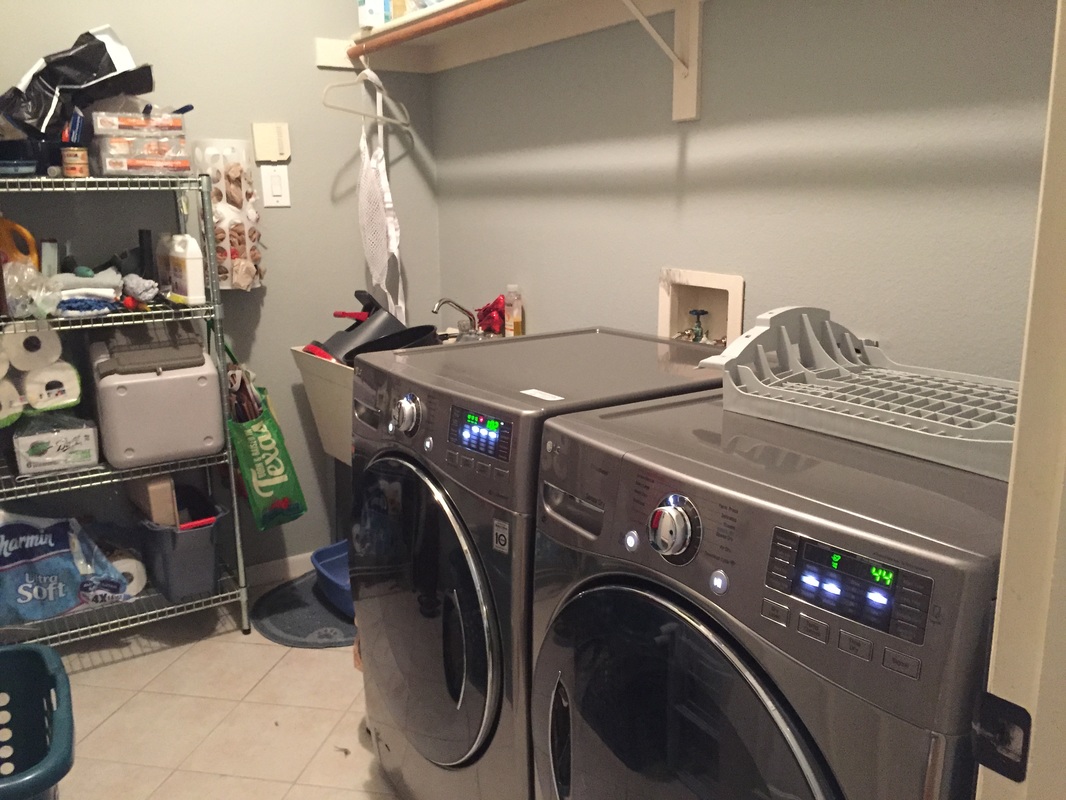 So we decided to fix 'er up! First we cleaned the laundry room out and pulled out the extremely abused faculty cleaning closet utility sink we’d inherited from the previous home owner. I painted the laundry room walls the same gray/blue as the rest of the house, which immediately made a drastic difference. I decided to give it a-go with my first stenciling project. I searched and searched through Etsy and found my now favorite stencil shop Cutting Edge Stencils with countless patterns, helpful tutorial videos, and materials you need to get started. I bought the Taj Mahal Allover stencil and the Stencils Essentials Kit and watched their video tutorial a few times over. I spent half a Saturday painting the stencil on the main wall in the laundry room. A clip on stencil level kept it straight the whole way through. It’s a methodical slow business, overlapping each top layer of the stencil from the top of the wall to the bottom. I won’t even try to explain it as well as their video does, so I’ll just share that! I did my laundry room wall in a silver paint. I probably used a bit too much paint on my roller because I had a good amount of bleeding. By the time I was done the stencil was pretty wrecked. But I didn’t plan on using it anywhere else in the house and trashed it. I gave the paint a day to dry and I spent the better part of Sunday going over the stencil by hand with the gray wall paint, touching up the messy blotches. I got pretty meticulous with it – but I’m really glad I did. Because if there was one blotch somewhere on that wall, I’d look at it every time I went into the laundry room for the rest of my life! 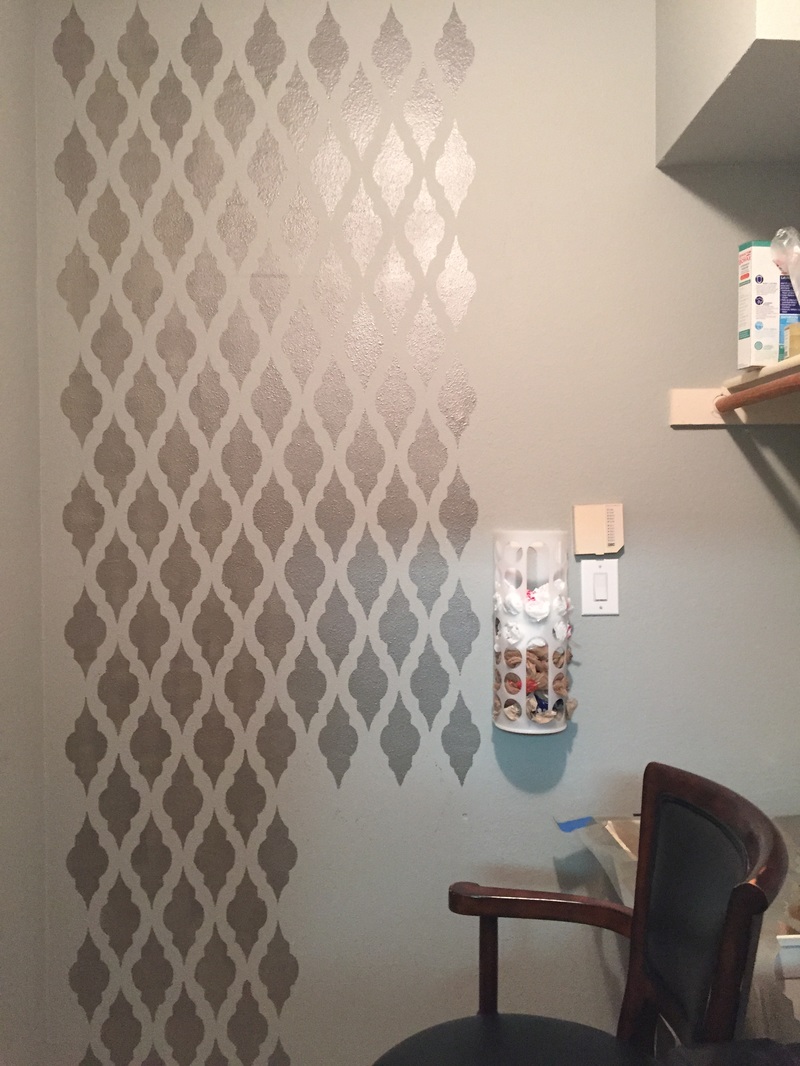 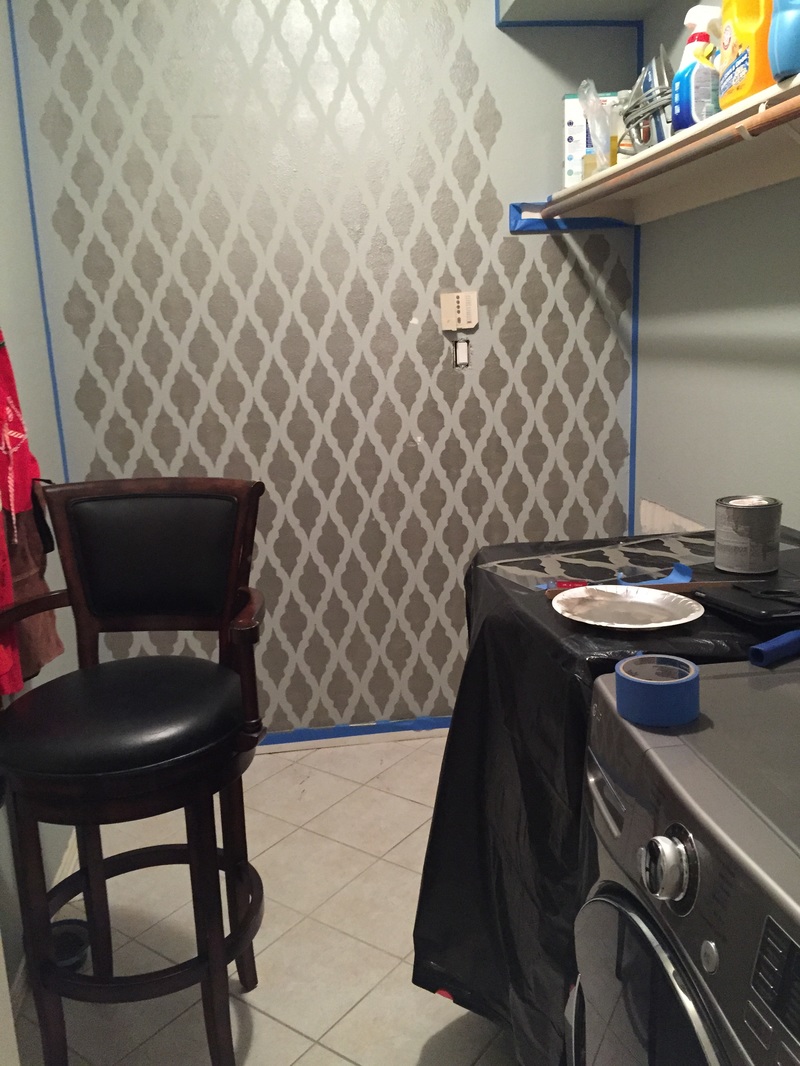 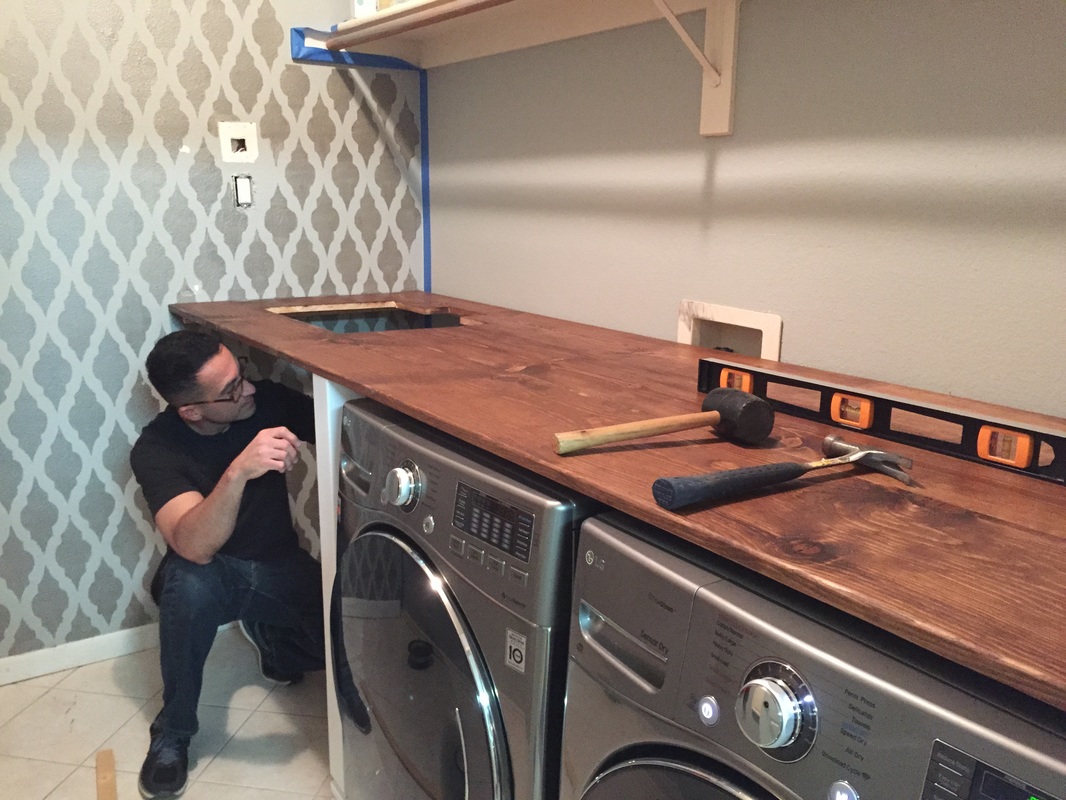 I don’t have to worry about the boards separating and I know that the joints are secure and hidden. I used the Kreg on the support legs that I bought at Home Depot as well and everything came out perfect. Most of the time when I decide to tackle a project like this it takes double the time as an ordinary human because problems always seem to arise that were totally unexpected. Not this time, everything went smoothly and the end result was beautiful! After some sanding, staining, and sealing, we ended up with a counter top that we couldn’t purchase anywhere, for half the price of something smaller. Winning! Back to Amber: I’d found a big utility-sized sink on craigslist for a STEAL of $25! (This thing goes for hundreds $$ in the stores). Challie cut a hole in the counter top and set it in using a silicone sealant. Connected the water pipes and drain and it worked on the first shot.
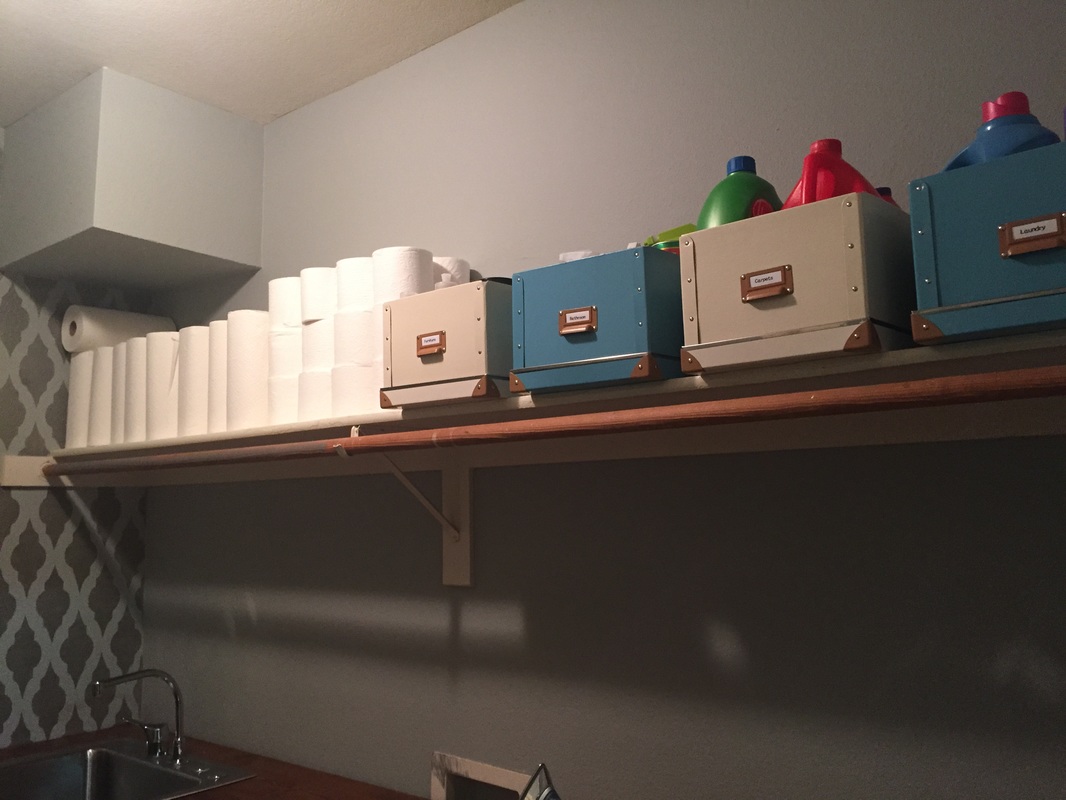
All I had left to do with some organization of the junk that had accumulated in the laundry room (storage) closet. So I hit up Ikea and bought some of their adorable and inexpensive FJÄLLA boxes and magazine files in blue. I busted out my Epson Label Maker and got down with some ridiculous organization labeling. I can get pretty into the details and I never regret it. I scavenged my kitchen for some empty glass containers to hold laundry detergent and dryer sheets. Everything now has its place and every time I open the laundry room door I appreciate the beautiful view. We added our metal bakers rack that we’ve had for 15+ years. It’s served as kitchen storage, garage storage rack, and now laundry room storage rack. I sewed two curtains with a silver/blue sateen fabric from Joann Fabric. I loosely followed this blog tutorial on the Wicker House Blog. The curtain to the left of the washer and dryer hides the cats litter box. Not only does it keep it out of site, but it had the unintended happy consequence of cutting down on kitty litter that falls on the floor and keeping the occasional unpleasant odor contained. 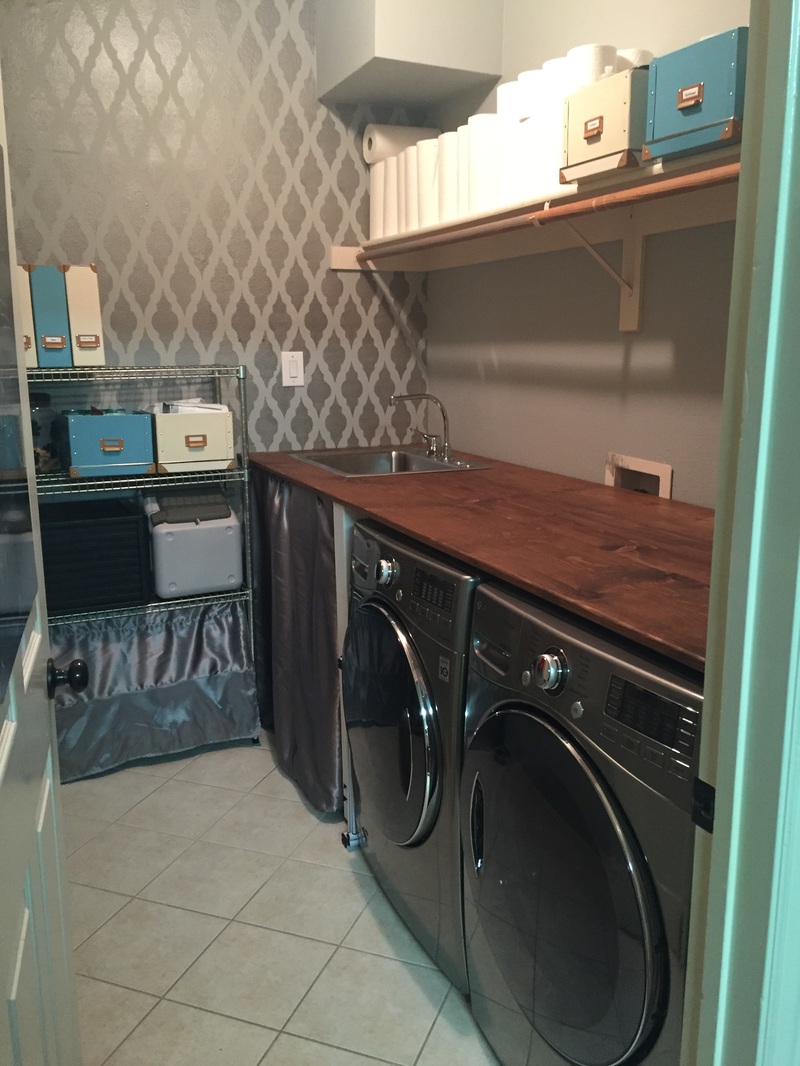 Our finishing touch was to add a cat door to the laundry room so the dogs would stop stalking our cat’s (Handsome Rob) private space and eating his food (or worse his p@@p- UGH sooo gross). Not only that, but the bristles on the cat door brushes his coat every time he goes through it and keeps dander allergens down. It was a pretty big project that took quite a few weeks from start to finish (we’ve got kids and full-time jobs, so nothing is done in one weekend anymore). But it’s definitely one of my top favorite result of all time that I force guests to oooh and ahhh over whenever they stop by for the first time (what, I’m proud!). It’s just so pretty- that room is now my happy place. I seriously love doing laundry now. I’ll shut the door, put Netflix on my iPad, and take my sweet time folding every piece of clothing our family owns. Peace and Joy can be bought for just a few hundred dollars in materials after all! Total Cost of Project: $225
Products mentioned in this blog:
July 2016 I won the petition to the City of Allen, Texas to overturn their anti-chicken ordinances and to allow backyard chickens! Here's how I got there. My husband Challie and I have always talked about buying land in the country. Having goats, horses, cows, pigs, acres of fruit trees and vegetables. But in reality we work in the city, have a suburban-sized back yard, and no experience in livestock of any kind. Well after years of toying with the idea, we decided to get serious and do a mini-version of the farm idea. We wanted to have some backyard chickens. It’s the perfect family project! The kids can start developing a work ethic with the “chore” of collecting eggs every day. They can see first-hand the farm-to-plate chain and understand that their eggs don’t actually come from a shelf at Kroger. Plus they're so much healthier (and better tasting)! In contrast to factory farm eggs, eggs from backyard chickens have 25 percent more vitamin E, a third more vitamin A, and 75 percent more beta carotene. Not to mention more omega-3 fatty acids than factory farmed eggs. Grocery store eggs can be there for days and even weeks. Air seeps into the porous eggshell and affects the nutrients, taste, and consistency of the eggs. Fresh eggs have firmer whites and super bright orange yolks. To get started on our exciting new family project, we went to our cities’ website to make sure we were allowed to have backyard chickens. Sure enough, it was forbidden... or basically forbidden. You could have a chicken coop, but it had to be 150’ away from any neighboring property line. That’s the distance of a football field, 360 degrees around. In Allen, a suburb north of Dallas, that allows 0% of residents to actually have chickens. So I did some research. Okay… a lot of research. (I’ve listed a ton of resources at the bottom of this blog, enjoy!) Once I knew my stuff, I decided to take action and get the ordinance changed! I started a petition to "Change the city ordinance banning backyard chickens and turn Allen into a pro-chicken community" on Change.org. I then built a Facebook Page in which to promote my cause. I carefully laid out all the pro-chicken points while addressing the more common anti-chicken concerns in a thoughtful, clear, and concise essay. I set a budget of $100 and did some targeted display advertising to residents of Allen ages 30+ and boosted some of my posts. During this time, I started interviewing for a new job. It was for a Director of Marketing role and I interviewed with both the company’s CEO and the President. Midway through the interview the President of the company says “So, what are your interests?” I give a pretty generic answer “Oh my family, cooking, church…” and he gives me a look and says “What about chickens?” Well I burst out laughing. It never even occurred to me to Google my own name and see what comes up (which is a total rookie mistake, but I was lucky enough to be old enough that I wasn’t doing anything embarrassing anymore by the time social media became a thing). After a little laugh, I talked about how, yes, I actually was advocating my city to allow us to have backyard chickens. I think it would be a lot of fun and beneficial for my family, yada yada. I was clearly a little embarrassed to be talking about something so non-important-business-womanish in this level of an interview but then the President said… “I really liked your petition. It was very well researched, articulated, and organized. I found it very compelling and impressive.” Honestly – I think that’s at least partially responsible for why I got his vote for the job! Anyway, the petition was fairly new still, I think it had maybe 300 signatures when I started my new job and became pretty busy and distracted. I was side tracked for a few months while I got up-to-speed on the new gig. In January, 2016 I was ready to put some attention back into my advocacy. I notified all the petition signers and Facebook followers to show up and support my speaking to the City Council meeting January 26th. I asked them all to email the City Council expressing their support for updating the ordinance. KEY NOTE: I included the email addresses for the Mayor and all the City Council Members (no one is going to make the effort to look it up themselves) and a draft email they could easily copy/paste. Anything to make it easier is most effective. I brought little chicken buttons (just paper & tape) for supporters to wear at the meeting as a visual show of support. I contacted the media and received two responses from reporters who covered the story.: 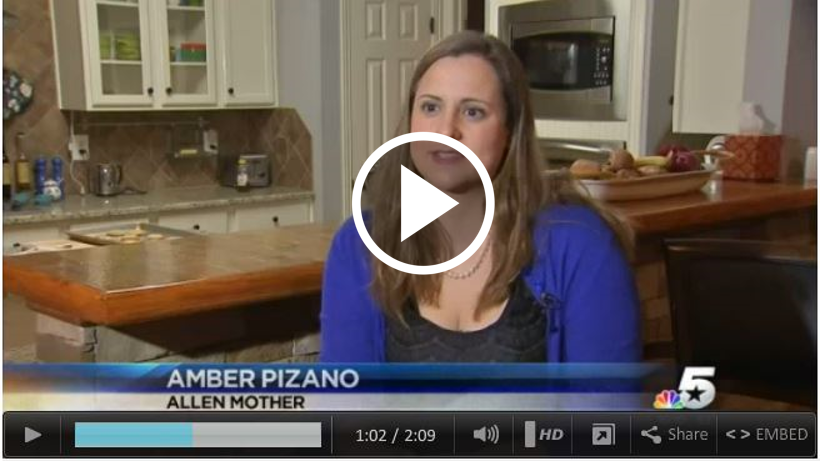  Now with the public support behind me and some decent media coverage I spoke at the City Council meeting January 26th, 2016. February 9th I heard back from the city that they were taking our petition seriously and were putting together a committee to review the issue and present a proposal sometime in March. It wasn't until mid-April that I finally heard from the city that they'd presented the proposal to the City Council in a private meeting and they'd ask that the residents have a chance to review it and give feedback before it was put to a vote. During every lull and waiting period I'd post updates or link to relevant articles to keep my advocate community engaged and involved. If you visit the Change.org page or the Facebook page you can see the regular stream of updates and information shared. So it was April 14th, 2016 and I, along with the owner of a local feed store that I'd reached out to, his work colleague a Purina food rep, and one other passionate Allen resident met with this subcommittee. We reviewed the proposed new ordinance and gave a few suggested changes (see more details on the first draft HERE). It was another two months before we heard from the City Council again. They were doing a small workshop on June 28th to discuss the proposal. I couldn't make this one (which killed me) but I was out of town on business travel. Following the workshop the consensus was that it was likely the ordinance would pass in the next City Council meeting July 26th. I encouraged all the petition signers and Facebook followers to email the Mayor and City Council with their support one last time (for probably the 10th time. I wanted to be persistent, but not obnoxious). Again, I included email addresses and an email template they could copy/paste and customize as they saw fit. I reached out to the media again the day before the vote to let them know the big day was finally there. I gave an interview with the local Allen American newsletter again. The time came - I nervously waited until the meeting got to the Chicken Ordinance vote (about 30 minutes in). Our City Manager did a fantastic job pitching the updated proposal. The City Council was a little more ambivalent about it than I expected - there was a 50/50 divide between them and I began to get nervous it wouldn't pass! The hardest part was that it was not a public discussion and I couldn't chime in when the nay-sayers had misinformed or illogical arguments.  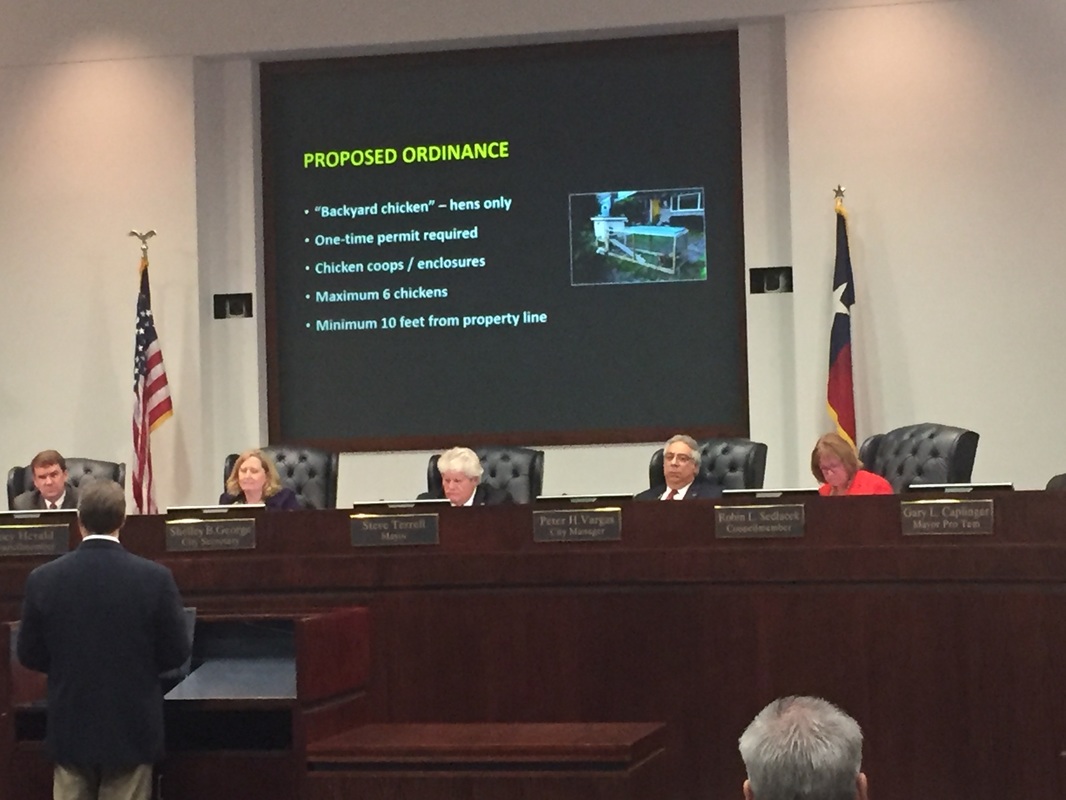 At 8:30pm July 26th I was able to post the following update: "I am happy to announce the new pro-chicken ordinance was approved and passed by the City Council tonight! It was a good 30 minutes of rigorous debate and a few concessions were made in order to get it approved. They did decrease the # of chickens allowed to 4 female hens. No roosters of course. The chicken coop enclosure must be 20' from a neighbor's property line. Allen citizens must apply for a one-time permit. The permit will not be granted if the home resides in an HOA that restricts the home from keeping chickens or if there are any deed restrictions against chickens. All-in-all I'd call it a success and am very proud of all of Allen's Citizens who united to affect change! Thank you all so much for helping make this happen!!! CONGRATULATIONS!!!!" The following article was in the next day's Allen Star newspaper (that's my son Greyson collecting eggs from our coop): 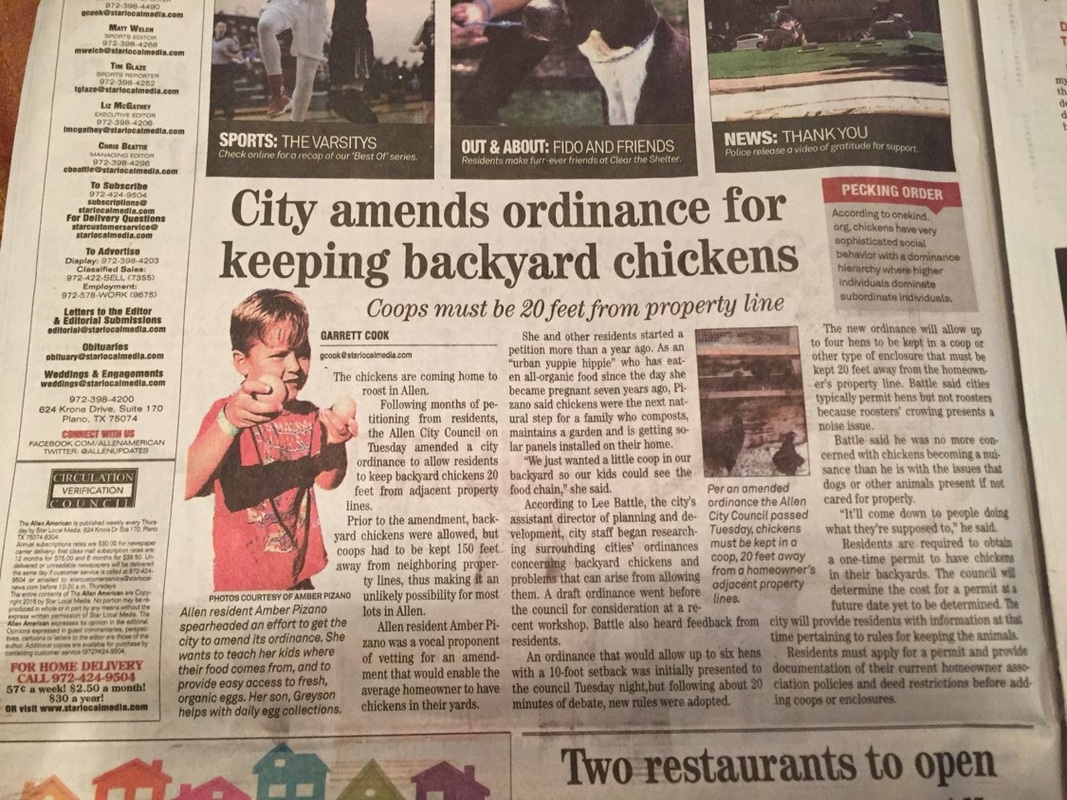 I can't thank the Mayor of Allen, the City Council, the City Manager, and all the residents of Allen who worked together to implement positive change for our city! Now... a good percentage of Allen lives in Home Owners Associations (HOAs) and it’s likely they have rules against chickens. I’m happy to not be in an HOA. Our last house was in a strict HOA and it was not something we enjoyed or will live in again. I can only encourage chicken-keeper-wannabees to start the petition process to overturn their outdated HOA rules against chickens and continue the good fight! We have four chickens we call “the Black Ones and Red” (we started with six. You can read about it in another blog "And Then There Were Four"). They are low maintenance, friendly, and so much fun! We eat fresh eggs every day. The kids love going into the backyard and checking for eggs (seriously every 1-2 hours they’re out there looking). It was absolutely worth the time and effort it took to bring about change to our city ordinance. I am so happy and proud that I was able to bring this fun experience and life lesson into my kid’s childhood – but also the lives of my neighbors and residents of Allen, TX. There were some nay-sayers along the way. But as time goes on and their concerns do not bear fruit, I expect them to forget the law ever even changed and to move on with no ill-affect or change to their lives. If you’re in a community that doesn’t allow chicken keeping please check out some of the below resources that were a great help to me. If you have any questions or need advice on bringing about change in your city or town I’m happy to help. Just comment below and I’ll respond promptly! RESOURCES: Hi, my name is Amber, and I'm a Craigslist junkie. I spend many nights sifting through pages and pages of ugly fake chipboard veneered furniture. But every so often I find a gem that I love to snatch up. Back in 2006 I found the Pottery Barn Apothecary Coffee Table on Craigslist for $50. I don't know what they'd done to it, but the paint was peeling off 75% of the surface area. It looked ready for the junk yard. But I knew I could restore it! I'd loved that coffee table since it was featured in the Friends episode in 2000. First things first, I applied chemical paint stripper to the coffee table in a thick coat with a paint brush. I wore heavy-duty rubber gloves. I let it sit for ~10 minutes until all the paint was raising up and bubbling. I used a plastic scraper to peel the melting paint off. It only took me about an hour or so to do a thorough job of it. I was in the garage with the door open. Make sure if you're doing something like this you have a well ventilated space because those chemicals are toxic! Once the paint was removed I sanded it down so it was plain wood. I also cleaned up all the hardware using a wire brush attachment. I gave it a day to dry and then I set to priming and painting! I picked black paint and crystal knobs off of Amazon. And here's my... $65 coffee table (after cost of materials). This coffee table was like $800 new (if anyone knows the cost of what the Apothecary Coffee Table went for please post in the comments- that's my best guess). :This table still goes for ~$500 on Craigslist today if you can find it. The paint job has held, here it is 10 years later in my living room just a few months ago. I got a new coffee table off Craigslist just last month so it's been moved upstairs in the movie room. I will never get rid of this beauty, even if Pheobe walks in and is horrified! 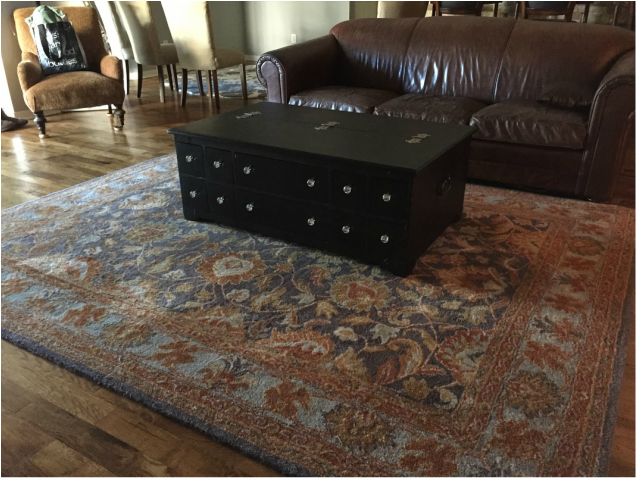 I want to start my first blog post on my exciting new website (that I've been toying with starting for... at least five years now) with our first DIY project. It was a really big one to attempt on our first go. But we were in our early 20's- nothing daunted us! I was in college and my husband (fiance at the time) Challie was (and still is) a Fire Fighter- which means we both had a good amount of time on our hands. We had just bought our first house. Built in the 1950's, it was 1,500 sq ft, and a perfect first home. It came with the obligatory 50's dated pink bathroom and pea green kitchen. So we rolled up our sleeves and got to work! We gave ourselves a budget of $2,000. This is the before: The first thing we did was to pull up the dated linoleum tile floor and lay down nice clean tile (the best we could afford). 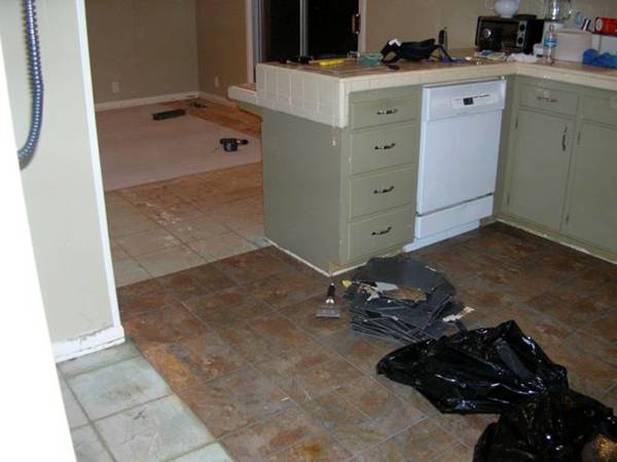 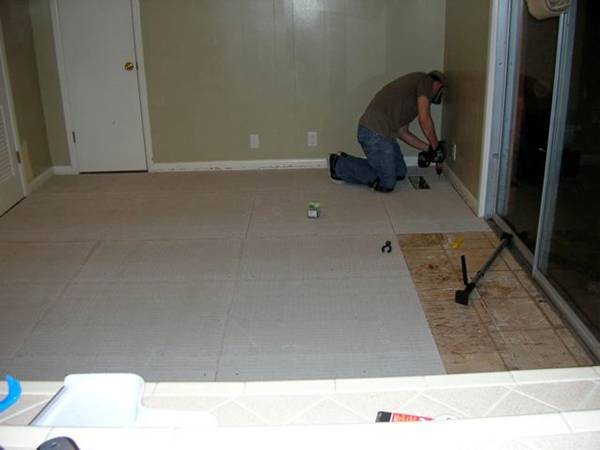  That's our dog Zoe! Awww she was so young there! Note the muddy feet - she loved digging in that big backyard. Next we demo'd the kitchen. Actually this is the one part that we paid some construction workers to do and were grateful we did. It looked hard! They tore out all the old tile. We went to Seconds and Surplus in Dallas and bought some gorgeous granite tile (much cheaper than a large slap of granite and close-to-the-beautiful effect). 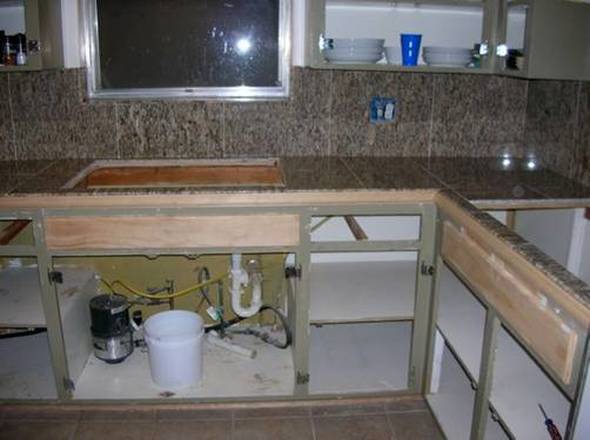 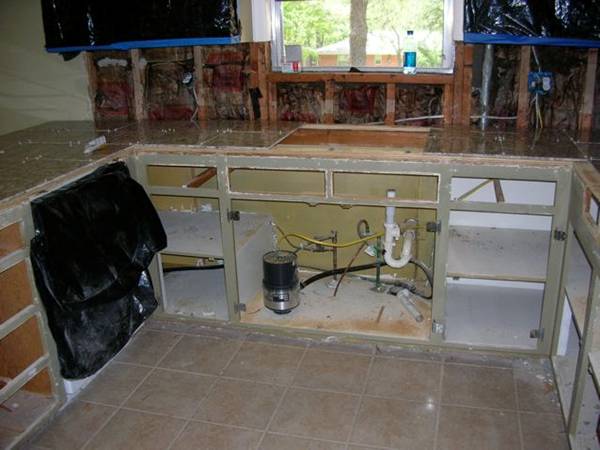 While Challie worked on the counters and backsplash, I was in the garage refinishing the cabinet fronts. I'm particularly proud of this part (and keep in mind this is pre-Pinterest!). I used a jig saw to cut pieces of beadboard about 2" smaller all the way around and glued it on with wood glue. Then I took small wood trim and cut it like a picture frame and glued that on too. I kept the drawers plain/flat. I filled any gaps with wood filler. Sanded, primed and painted them a glossy white and added new pulls and knobs. We painted the walls a gorgeous blue paint from Restoration Hardware (my favorite line of paint)- courtesy of our friend Jeff Bahrenburg who started his own painting company in the DFW area "Signature Painting." The last steps was to go shopping at Ikea: we purchased and installed a deep farm house kitchen sink, faucet, pendant light, chandelier and... VOILA! 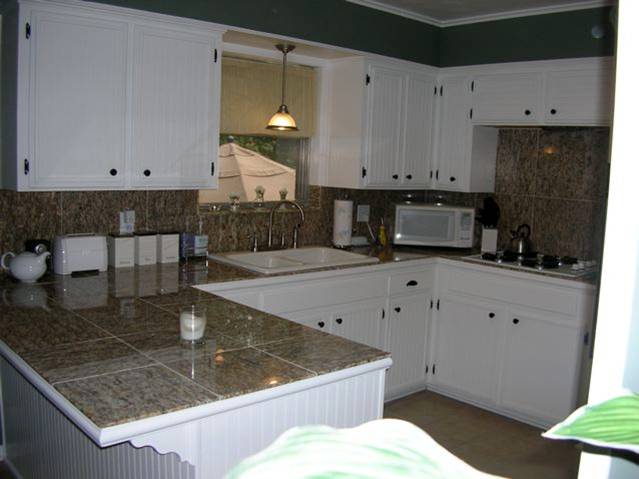 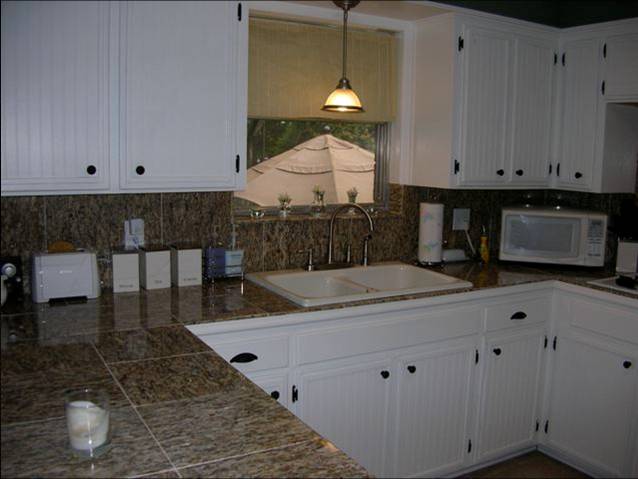 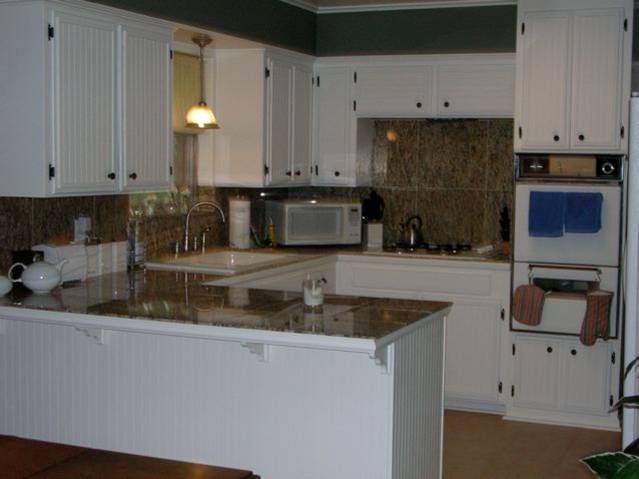 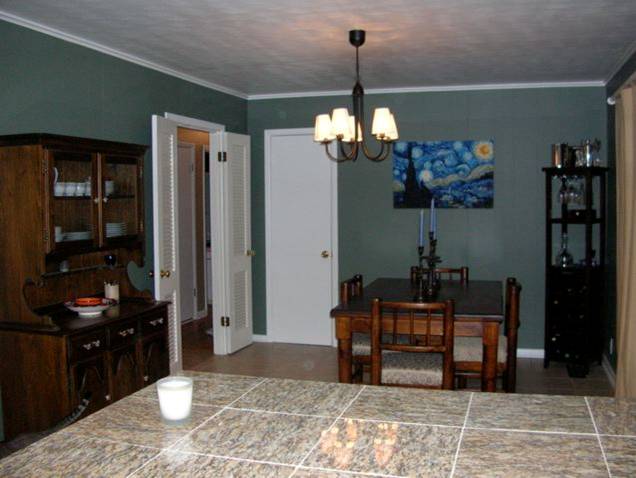 We ended up selling our house almost immediately after we finished this project and turned a tidy profit, in large part due to our renovations I'm sure!
|